This task is divided into the following stages:
- Creating the Revision Block on a New Drawing
- Defining the CATIA Formula Property for Each Attribute from the Database
- Creating the Text Attributes in the Revision Block
The properties used for these tasks have already been mapped by the administrator between CATIA and SmarTeam (see Defining Property Mapping for the Revision Block).
Creating the Revision Block on a New Drawing
-
Create a new CATDrawing document.
-
In the New Drawing dialog box that appears, make sure the default values (ISO in the Standard field and A0ISO in the Format field) are specified and click OK.
-
Design your revision block as shown below:
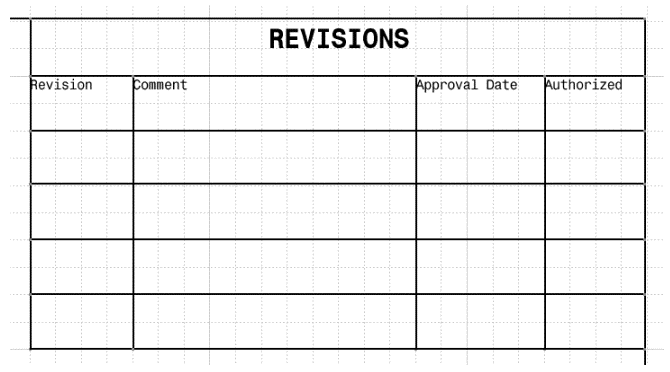
For more information about the revision block, see the CATIA - Generative Drafting User's Guide.
![]()
Defining the CATIA Formula Property for Each Attribute from the Database
-
In the CATIA session, click on the Formula
 icon.
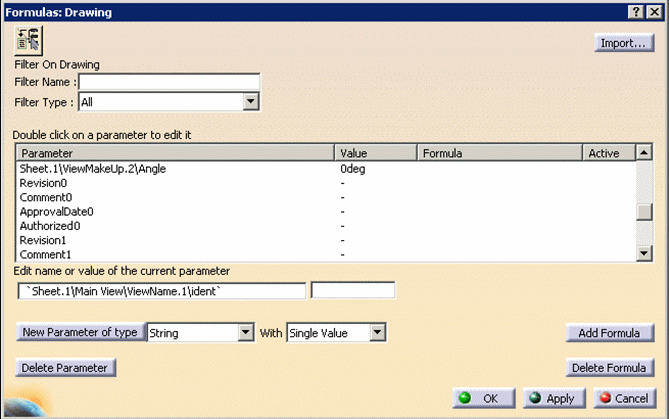
icon.The Formulas: Drawing dialog box appears.
-
Select String in the New Parameter of type list.
-
Select the New parameter of type button.
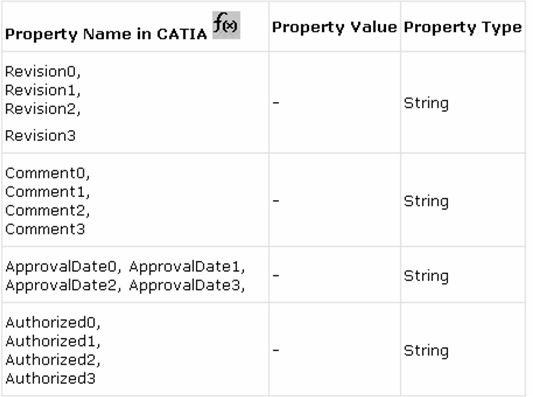
You must now use the names defined in the mapping property (Revision, ApprovalDate, Comment & Authorized).
-
For example, change the name to Revision0 in the field on the bottom left specifying the name of the current parameter. The numbers used must reflect the order in which the revisions were made e.g.: Revision0 = e, Revision1 = d, Revision1 = c, and so on.
Information are ordered, the index 0 will always contain the last revision information.
-
In the field on the right specifying the value of the current parameter, enter the "-" symbol.

-
Click on the Apply button.
-
Repeat steps 2 through 6 as often as required for all mapped properties.
Here is a list of the properties defined in the revision block and that are still to be mapped:
-
Click OK.
![]()
Creating the Text Attributes in the Revision Block
-
Select Insert>Annotations>Texts>Text.
-
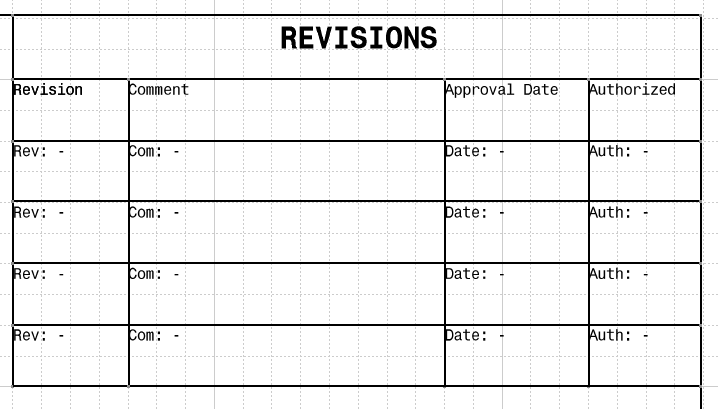
Click inside the drawing to indicate where you want to display the drawing type. (If necessary, refer to the revision block design.)
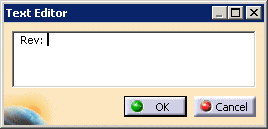
A text editor window appears. -
Enter Rev: in this window:
-
Right-click on the appropriate location in the revision block and select Attribute Links in the contextual menu.
-
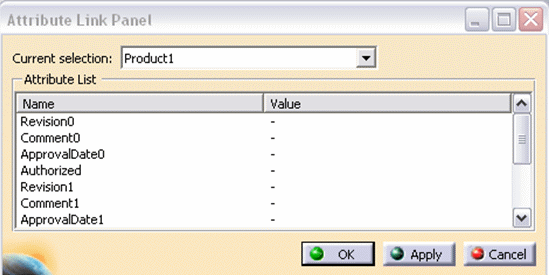
In the specification tree of the drawing, click on the Drawing.
The Attribute Link dialog box appears. -
Select Revision0 in the attribute list:
-
Click OK.
The value of the property i.e. the "-" symbol is now displayed in the Text Editor dialog box: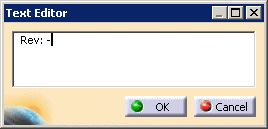
-
Click OK.
-
Repeat steps 1 through 8 for all the cells.