- A contact prevents assembly components from clashing from a fastening element: spot welding, riveting, bolting, spot gluing.
- A contact can be created between:
- two assembly components.
- two adjacent parts to the same assembly component.
- A contact can be assigned directly to any activity. In this case all the contact points under the activity are activated.
See also Setting Parameters as Default to instantiate a contact.
-
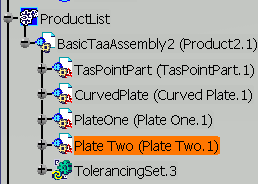
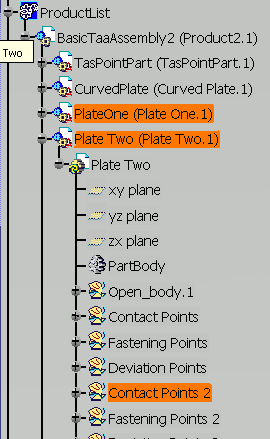
Select the Plate Two assembly component as first element that will be used to create the contact.
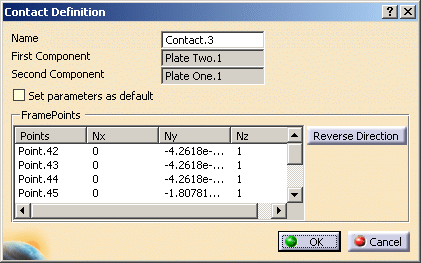
The Contact Definition dialog box appears. 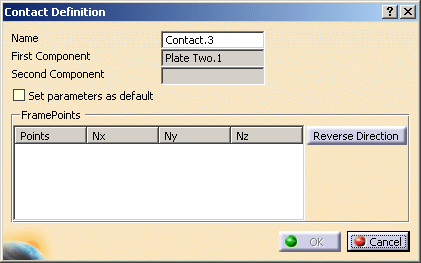
-
Select the Plate One assembly component as the second element that will be used to create the contact.
-
Select the Contact Points open body on Plate Two where contacts will be created.
-
Click OK.
Contact.3 is created. 
-
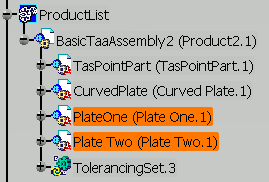
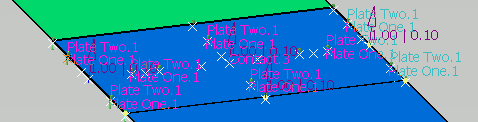
Place your cursor either on Contact.3 in the specification tree or on one of the contacts created. This highlights the name of the contact and the names of its two components.
-
Let's have a closer look at one contact point:
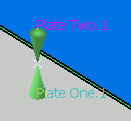
A contact needs to be appropriately oriented from the First Component to the Second Component in order to distinguish interference from clearance and traction forces from compression forces. You need to indicate the orientation because ambiguous cases might arise. 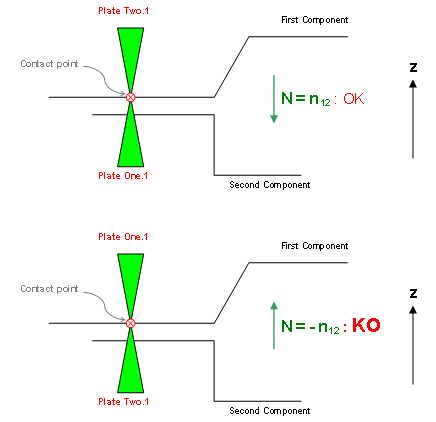
The highlight of contacts displays the name of the components on top of each cone according to the contact orientation. The correct orientation displays the name of the components above the proper component.
-
If this is not the case, double-click the contact to edit it:
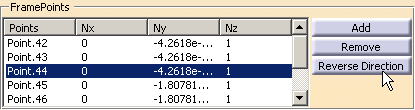
- Select the line of the contact point you want to edit,
- Push the Reverse Direction button.
- Click OK. The highlights are updated.