![]()
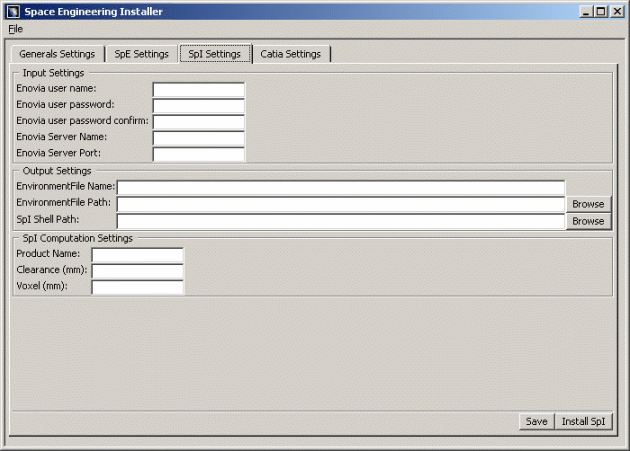
This task shows you how to customize SpI settings.
![]()
|
|
Input Settings
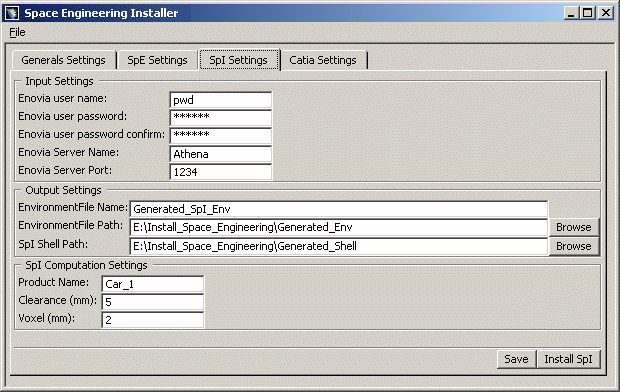
In the Input Settings area, customize the various paths and files as follows:
-
In the In the Enovia User Name field, enter the administrator user ID
In our example: pwd. -
In the Enovia User Password field, enter the Enovia administrator password (pwdpwd).
-
In the Enovia user Password Confirm field, type the Enovia administrator password and confirm this password (pwdpwd).
-
In the Enovia Server Name field, specify the Enovia server name (i.e. Athena)
-
In the Enovia Server Port field, specify the Enovia server port (i.e. 1234) of the Enovia server (Athena)
Output Settings
In the Output Settings area, customize the various paths and files as follows:
-
In the Environment File Name field, enter a name of your choice. This environment file will be created during SpI server installation (i.e. Generated_SpI_Env).
-
In the Environment File Path field, specify the path to the directory in which the environment file will be created. In our example: E:\Install_Space_Engineering\Generated_Env
For this, click Browse and select the path accordingly in the Path Browser-Choose SpI Environment Directory dialog box displayed. Click Ok when done.

Notes:
-
The Generated_SpI_Env file will be created in E:\Install_Space_Engineering\Generated_Env
-
When the installation is finished, the environment file cannot be moved without modifying the parameters of the associated executable program.
-
In the SpI Shell Path, specify the path to the
directory in which the runSpaceIndexserver.bat executable
program will be created. E:\Install_Space_Engineering\Generated_Shell
For this, click Browse and select the path accordingly in the Path Browser- Choose SpI Shell Directory dialog box displayed. Click Ok when done.
|
|
Note: You can move this shell in any directory, provided that you do not rename it. |
SpI Computation Settings
In the SpI Computation Settings area, customize the following parameters:
-
In the Product Name field, enter the PRC name to which a spatial index will be associated, as it is or will be declared in Enovia (Car_1)
-
In the Clearance (mm) field, specify a clearance value. 5mm for instance.

Reminder: the clearance value is used for proximity detection. This value has to be set as higher to the maximum clearance distance of all clash rules specified in the CATProduct document and used in the Space Engineering Assistant.
-
In the Voxel (mm) field, specify the voxel size to be used (i.e. 2mm)

The size of the voxels is calculated in millimeters. The voxel size is a critical factor impacting spatial index performance at creation time and at query time.
-
The smaller it is, the sharper the index is.
-
The smaller it is, the higher the memory consumption is for the spatial index. The spatial query computation is also longer.
-
-
Check your result, you should obtain something like this:

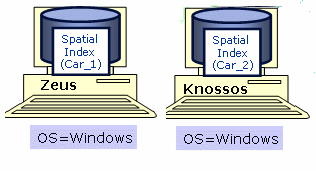
Now, let's have a look at our architecture example:


-
Click Save when satisfied.
-
Click Install SpI. This operation creates the environment file and associated executable program (
runSpaceIndexserver.bat)E:\Install_Space_Engineering\Generated_Env
E:\Install_Space_Engineering\Generated_Shell
Important: Check the environment file of SpI contains the following variables:
VaultClient_PropertiesFileName=VaultClient.properties
VaultClient_PropertiesFilePath=/u/lego/vpm16int/solaris_a/reffiles/I

NT/DB2/solaris_a -
To install SpI server on Knossos, copy the two generated files (
runSpaceIndexserver.bat) and the generated environment file (Generated_SpI_Env.txt) in the appropriate directories. -
Now, customize the SpI Car_2. For this, open the
runSpaceIndexserver.batlocated on Knossos and modify the variables as shown below:@echo on
rem --------------------------------------------------------------------
rem Space Index & CATIA Variables
rem --------------------------------------------------------------------
set CV5_EV5_NoDelete=yes
rem --------------------------------------------------------------------
rem LAUNCH Spatial Index
rem --------------------------------------------------------------------
set PRC_TO_INDEX=Car_2
set MAX_CLEARANCE=10
set VOXEL_SIZE=3
C:\Program Files\Dassault Systemes\B17\intel_a\code\bin\CATSTART - run CATBackboneSpaceIndex.exe -object "%PRC_TO_INDEX% %MAX_CLEARANCE% %VOXEL_SIZE%" -env Generated_SpI_Env -direnv "E:\Install_Space_Engineering\Generated_Env"
rem --------------------------------------------------------------------To summarize:
Car_2 configuration includes:-
3mm for the voxel size,
-
10mm as clearance value on the SpI server hosted by Knossos.
-
![]()

