Click Sweep
Roughing
![]() ,
then select the
geometry to be machined
,
then select the
geometry to be machined ![]() ,
,
A number of strategy
parameters
![]() are available:
are available:
- the Roughing type,
- In the Machining tab:
- the Tool path style,
- the Machining tolerance,
- In the Radial tab.
- the Max. distance between pass.
- the Stepover side,
- In the Axial tab:
- the Maximum cut depth,
Specify the
tool to be used ![]() (only end
mill tools
(only end
mill tools ![]() are
available for this operation)
are
available for this operation)
and feedrates and spindle speeds ![]() .
.
You can also define transition paths in your machining operations by
means of NC macros
![]() as needed.
as needed.
Only the geometry is obligatory, all of the other requirements have a
default value.
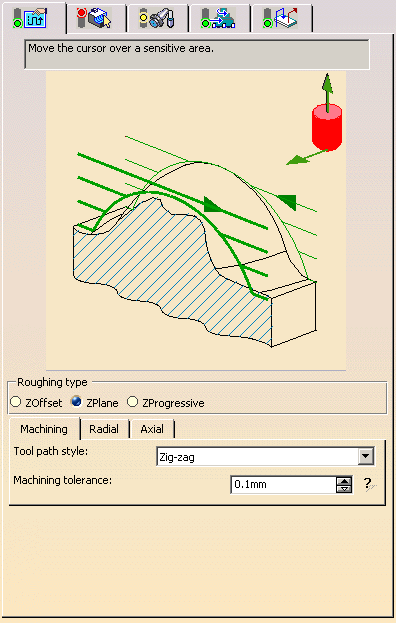
Sweep Roughing: Machining Strategy tab
The sweep roughing machining parameters are distributed into 3tabs.

Roughing type

- ZOffset; the tool path is offset from the part.
- ZPlane; the part is machined plane by plane. The planes are perpendicular to the tool axis.
- ZProgressive; the part is machined by interpolating the
tool path between the part and
the top of a theoretical rough stock.
Sweep Roughing: Machining parameters

Tool path style
- Zig-zag; the tool path alternates directions during successive passes,
- One-way next; the tool path always follows the same
direction during successive passes
and goes diagonally from the end of one tool path to the beginning of the next. - One-way same; the tool path always has the same direction
during successive passes
and returns to the first point in each pass before moving on to the first point in the next pass.
Machining tolerance
Maximum allowed distance between the theoretical and computed tool path.
Consider the value to be the acceptable chord error.
Sweep roughing: Radial parameters

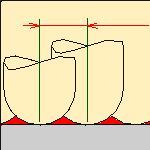
Max. distance between pass
Width of the overlap between two successive passes

Stepover side
It can be either to the left or the right of the tool path and is defined
with respect to the machining direction.
Sweep Roughing: Axial parameters

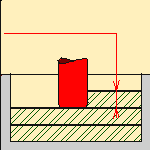
Maximum cut depth
Specifies the maximum cut depth

Sweep Roughing: Geometry
You can specify the following geometry:
- Part with possible Offset on Part.
- Check elements with possible Offset on Check.
The check is often a clamp that holds the part and therefore is not an area to be machined. - Area to avoid if you do not wish to machine it (the small light brown corner near the part selection area).
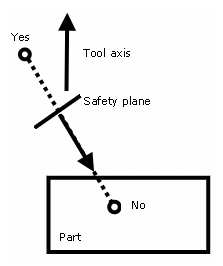
- Safety plane. The safety plane is the plane that the tool
will rise to at the end of the tool path in order
to avoid collisions with the part.
You can also define a new safety plane with the Offset option in the safety plane contextual menu.
The new plane will be offset from the original by the distance that you enter in the dialog box
along the normal to the safety plane.
If the safety plane normal and the tool axis have opposed directions,
the direction of the safety plane normal is inverted to ensure that the safety plane is
not inside the part to machine.

Note that when an Approach/Retract macro is set to None, the safety plane is not reached.
See the Macros Parameters chapter for more information.
- Top plane which defines the highest plane that will be machined on the part,
- Bottom plane which defines the lowest plane that will be machined on the part,
- Limiting contour which defines the outer machining limit on
the part.
You can also activate the Part autolimit option, with the Side to machine, Stop position, Stop mode and Offset parameters.
Please refer to the Basic Task - Selecting Geometric Components to learn how to select the geometry.
![]()
Appears when invalid faces have been detected.
This message disappears when you close the dialog box or when the next
computation is successful.
![]()
Appears when invalid faces have been detected and when you have decided
to ignore them.
This message remains displayed as a warning.
Click the text to switch from one status to the other.