A rough stock that is defined in the part operation before starting the definition of the
Manufacturing Program will be used for all of the successive operations, each working
on the residual material left by the operation before it.
You must have computed at least one machining operation prior to this one
in the
Manufacturing Program.
The rough stock used for a program where you insert a reworking operation
must be
topologically closed, that is, it cannot be formed by a set of faces.
Roughing rework does not function correctly if you have a rough stock in
several parts
because the rework rough stock will be defined as the containment box around
them.
-
Open the Basic.CATProcess file.
-
Select Rough stock in the Product list and hide it using the Hide/Show option in the contextual menu.
-
Fully expand the Manufacturing Program.
You will see that a first roughing operation has already been effected.
Select that operation. -
Click Roughing
 .
.
The dialog box opens at the Geometry tab .
. -
Click the red area in the sensitive icon and select the part in the viewer.
Then double-click anywhere in the viewer to confirm your selection and redisplay the dialog box. -
Go to the Tool tab
 .
.
Click and select the tool
called T2 End Mill D 5 in the dialog box that is displayed.
-
Click Tool Path Replay
 .
.
A progress indicator is displayed.
You can cancel the tool path computation at any moment before 100% completion. -
If you wish, you can modify any of the other parameters:
- geometry
- machining strategy,
- speeds and rates,
- macro data,
- the type or size of tool used.
in the dialog box but this is not obligatory as they all have default values.
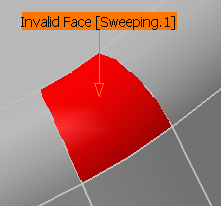
Invalid Face
-
If a tool path cannot be computed because of invalid faces,
an explicit warning message like this one will appear:

Each invalid face is highlighted in red, with an arrow pointing on it.

This visualization is removed when you close the main dialog box or
when you select Remove in the contextual menu.

We recommend that you ignore only faces that will not affect the tool path.
Otherwise this may lead to defective tool paths.
![]()