- parallel
contours where the tool sweeps out an area by following progressively
distant
or closer) parallel offsets of a given guide contour. - between
contours where the tool sweeps between two guide contours along a tool
path
that is obtained by interpolating between the guide contours. The ends of each pass lie on two stop contours. - spine contour where the tool sweeps across a contour in perpendicular planes.
Below we are going to see how to use them.
To create the operation, you define:
- the geometry
of the part to machine
 ,
, - the parameters of the
machining
strategy
 ,
, - the
tool to use
 ; you
have the choice of end mill
; you
have the choice of end mill
 or conical
 tools for this
operation,
tools for this
operation, - the feedrates and spindle speeds
 ,
, - the macros
 .
.
Only the geometry and the guide contour(s) (strategy tab) are obligatory.
All of the other requirements have a default value
Either:
- make the Manufacturing Program current in the specification
tree if you want to define an operation
and the part/area to machine at the same time, - or select a machining feature from the
list if you have already defined the area to machine and
now you want to define the operation to apply to it.
-
Click Contour-driven
 .
.
The Contour-driven dialog box is displayed.
The dialog box opens at the geometry tab page .
. -
Right-click the red area in the sensitive icon and
select this face in the viewer using the Face Selection Toolbar -
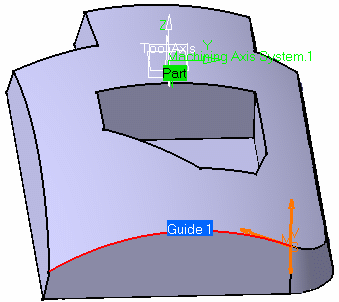
Go to the Strategy tab. Clcik Between contours.
-
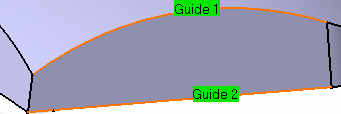
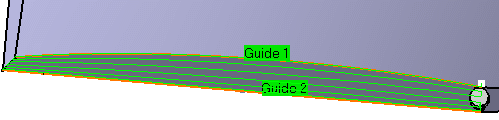
Click the Guide 1 label and select one edge on the part using the Edge Selection Toolbar.
-
Repeat this step for the second guide.
-
Go to the Radial tab and select Constant in the Stepover list.
-
Enter a Max. distance between pass of 5 mm.
-
At the bottom of the dialog box, click Other axis.
Click the oblique arrow of the sensitive icon and select the edge in red.
Make sure its arrow points towards the selected surface.
-
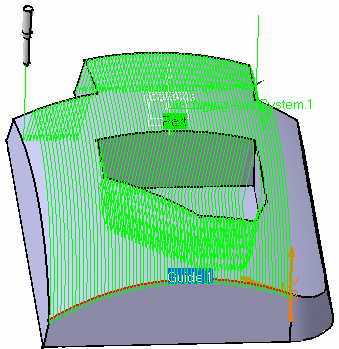
Click Tool Path Replay
 .
.- This will give you this result:
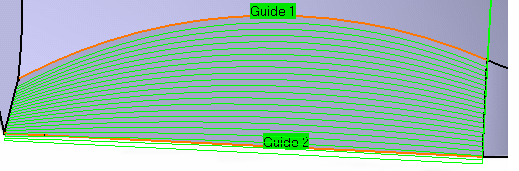
- This is what you get using a Max. distance between pass
of 5, Constant stepover and along the tool axis
 :
:
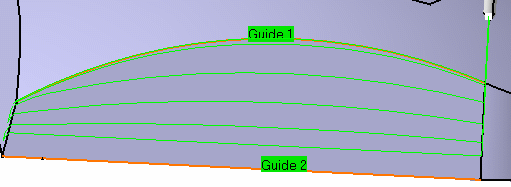
- However if you look along the tool axis you will see how the
same distance is used
or the stepover as in the first operation:
- This will give you this result:
-
Return to the geometry tab page
.
Right-click the green area representing the part and select Remove in the contextual menu. -
Right-click the red area in the sensitive icon and select the surface below in the viewer.
Click OK in the face selection toolbar to confirm your selection and redisplay the dialog box. -
Go to the strategy tab. Click Parallel contours.
-
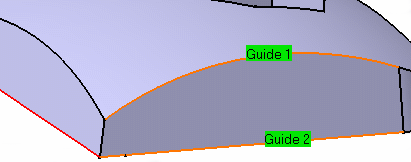
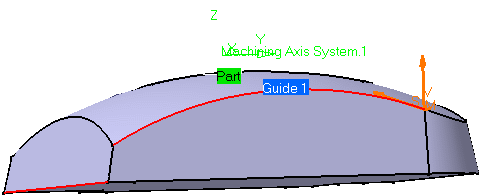
Click the Guide 1 label and select the top edge on the part.
Click OK in the edge selection toolbar to confirm your selection and redisplay the dialog box.
- Taking this surface,
using a Max. distance between pass of 5,
Constant stepover and with the red edge defined as the other axis will give you this result
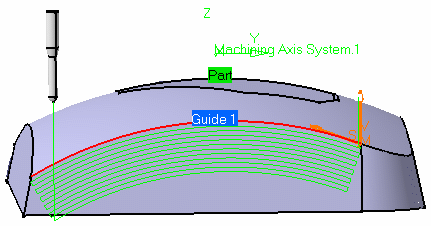 :
:
- This is what you get using a Max. distance between pass
of 5,
Constant stepover and along the tool axis:
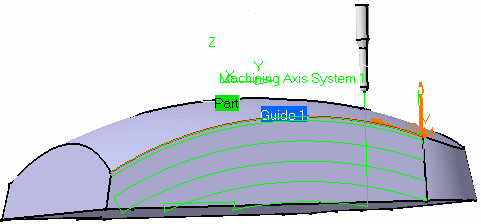
However if you look along the tool axis you will see how the same distance is used f
or the stepover as in the first operation: - Taking this surface,
-
Repeat the steps 9 to 12 with the surface below, using the Spine contour option.
-
Taking this surface, using a Max. distance between pass of 5,
Constant stepover and with this axis (red axis) defined as the other axis:

will give you this result:
- This is what you get using a Max. distance between pass
of 5,
Constant stepover and along the tool axis:

-
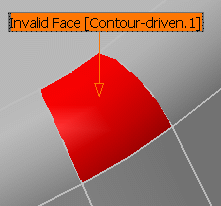
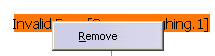
Invalid Face
-
If a tool path cannot be computed because of invalid faces,
an explicit warning message like this one will appear:
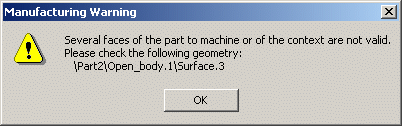
Each invalid face is highlighted in red, with an arrow pointing on it.
This visualization is removed when you close the main dialog box or
when you select Remove in the contextual menu.
-
Click OK in the Warning box to revert to the main dialog box.
In the Geometry tab, a message Ignore invalid faces: No is displayed:
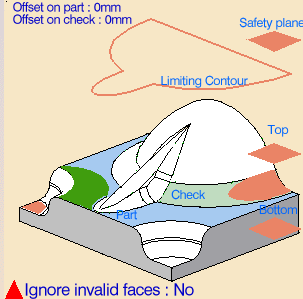
-
You can either:
- close the dialog box.
When you reopen it, the Ignore invalid faces: No will not be displayed. - heal the defective geometry and restart the computation.
If it is successful the message Ignore invalid faces: No will disappear. - ignore the invalid faces. Click the text Ignore invalid
faces: No.
It will turn to Ignore invalid faces: Yes and the computation will continue.
The message remains displayed as a warning.
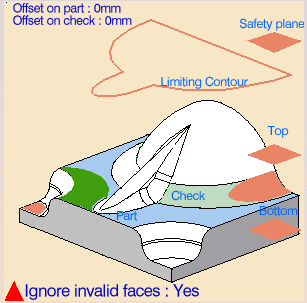
- close the dialog box.
We recommend that you ignore only faces that will not affect the tool path.
Otherwise this may lead to defective tool paths.
![]()