|
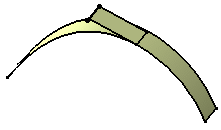
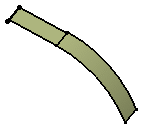
This task shows how to create swept surfaces that
use an implicit linear profile. |
|
The following subtypes are
available:
|
") |
Open the
Sweep1.CATPart document. |
| |
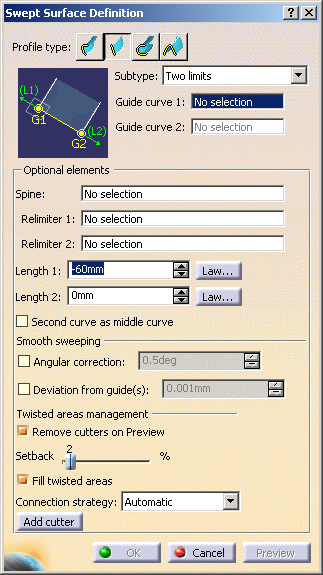
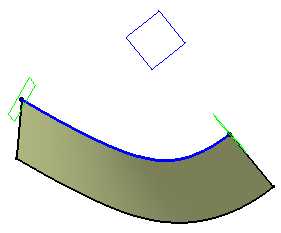
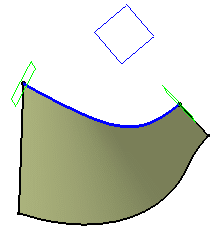
Two limits:
|

|
-
Click Sweep
 . .
| The Swept Surface Definition dialog box appears. |
-
Click the Line profile icon and select
Two Limits from the Subtype drop-down list.
-
Select two guide curves.
-
You can enter one or two length values to define the
width of the swept surface.
-
If needed, select a Spine to specify a spine
different from the first guide curve.
If no spine is selected, the guide curve is implicitly used as the spine.
If a plane normal to the spine intersects one of the guiding curves at
more than one points, the application chooses the closest point to the spine
point.
-
Click OK to create the swept surface.
| The surface (identified as Sweep.xxx) is added to the
specification tree. |
|
| |
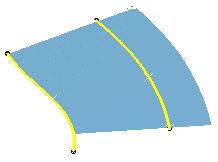
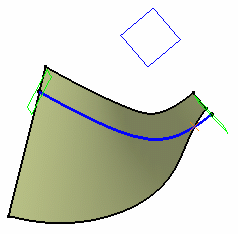
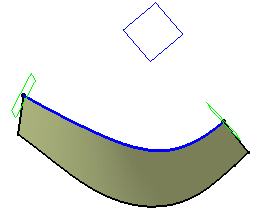
Limit and middle:
|
|
|
-
Click Sweep
.
| The Swept Surface Definition dialog box appears. |
-
Click the Line profile icon and select
Limit and Middle from the Subtype drop-down list.
-
Select two guide curves.
-
Check Second curve as middle curve to use the
second guide curve as the middle curve.
 |
 |
Checking Second curve as middle curve
automatically selects this mode. |
-
If needed, select a Spine to specify a spine
different from the first guide curve.
If no spine is selected, the guide curve is implicitly used as the spine.
If the plane normal to the spine intersects one of the guiding curves at
different points, it is advised to use the closest point to the spine
point for coupling.
-
Click OK to create the swept surface.
| The surface (identified as Sweep.xxx) is added to the
specification tree. |
|
| |
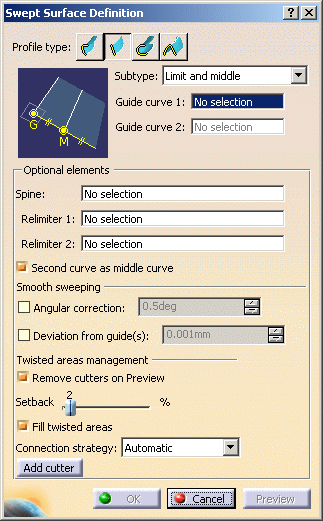
With reference surface:
|
|
|
-
Click Sweep
.
| The Swept Surface Definition dialog box appears. |
-
Click the Line profile icon and select
With reference surface from the Subtype drop-down list.
-
Select a guide curve, a reference surface and key in an
angle value.
| The guiding curve must lie completely on this reference surface,
except if the latter is a plane. |
-
You can enter one or two length values to define the
width of the swept surface.
 |
|
|
The angular definition
defined by the law (if selected) applies to the projection of the
normal to the reference element in the sweeping plane normal to the
spine. |
-
If needed, select a Spine to specify a spine
different from the first guide curve.
If no spine is selected, the guide curve is implicitly used as the spine.
If the plane normal to the spine intersects one of the guiding curves at
different points, it is advised to use the closest point to the spine
point for coupling.
-
Click OK to create the swept surface.
| The surface (identified as Sweep.xxx) is added to the
specification tree. |
|
| |
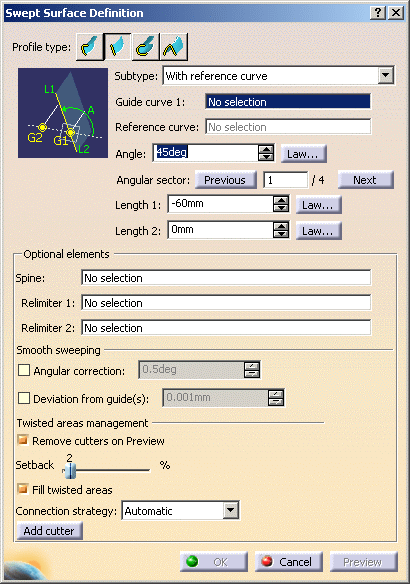
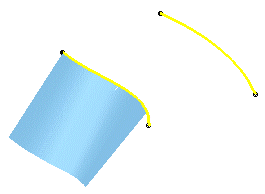
With reference curve:
|
|
|
-
Click Sweep
.
| The Swept Surface Definition dialog box appears. |
-
Click the Line profile icon and select
With reference curve from the Subtype drop-down list.
-
Select a guide curve, a reference curve, and key in an
angle value.
-
You can enter one or two length values to define the
width of the swept surface.
-
If needed, select a Spine to specify a spine
different from the first guide curve.
If no spine is selected, the guide curve is implicitly used as the spine.
If the plane normal to the spine intersects one of the guiding curves at
different points, it is advised to use the closest point to the spine
point for coupling.
-
Click OK to create the swept surface.
| The surface (identified as Sweep.xxx) is added to the
specification tree. |
|
| |
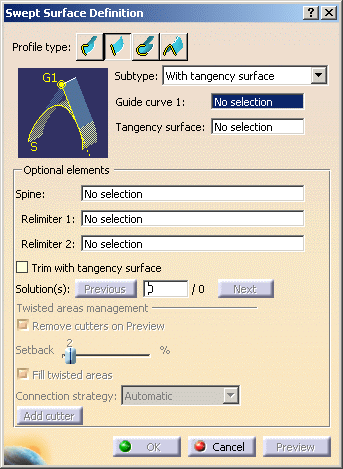
With tangency surface:
|
|
|
-
Click Sweep
.
| The Swept Surface Definition dialog box appears. |
-
Click the Line profile icon and select
With tangency surface from the Subtype drop-down list.
-
Select a guide curve, and a reference surface to which
the sweep is to be tangent.
-
Depending on the geometry, there may be one or two
solutions from which to choose, either by clicking on the solution
displayed in red (inactive), using the Previous or Next
buttons or entering a solution number in the Solution(s)
field.
-
You can check the Trim with
tangency surface to perform a trim between the swept surface and
the tangency surface. The part of the tangency surface that is kept is
chosen so that the final result is tangent.
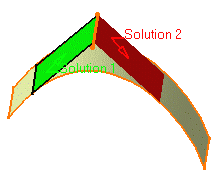 |
| Two solutions |
| |
 |
|
 |
| Choosing solution 2 |
|
Choosing solution 2 with Trim option |
-
If needed, select a Spine to specify a spine
different from the first guide curve.
If no spine is selected, the guide curve is implicitly used as the spine.
If the plane normal to the spine intersects one of the guiding curves at
different points, it is advised to use the closest point to the spine
point for coupling.
-
Click OK to create the swept surface.
| The surface (identified as Sweep.xxx) is added to the
specification tree. |
|
| |
With draft direction:
|
|
|
Open the Sweep6.CATPart document. |
|
|
-
Click Sweep
.
| The Swept Surface Definition dialog box appears. |
-
Click the Line profile icon and select
With draft direction from the Subtype drop-down list.
-
Select a guide curve and a draft direction (a line, a
plane or components).
-
Select the draft computation mode:
-
Square:
equivalent to implicit linear profile swept surface with reference
surface, using a plane normal to the draft direction as reference
surface, and the projection of the guide curve onto this plane as
spine.
-
Cone:
envelop of cones defined along a given curve. In order to have
swept start and end planes similar as the square mode, the guide
curve needs to be extrapolated and the resulting surface split as
explained in the following figure.
|
-
Choose the length types:
- From curve: the swept surface starts from the curve
- Standard: the length is computed in sweeping planes
(defining 0 is similar as choosing From curve)
- From/Up to: the length is computed by intersecting a
plane or a surface; a point can be selected: a plane parallel to
the draft plane would be computed
- From extremum: the lengths are defined along the
draft direction from an extremum plane; L1 corresponds to the
"maximum plane" in the draft direction, L2 corresponds to the
"minimum plane" in the draft direction
- Along surface: the length is used as the distance of
an euclidean parallel curve to relimit the swept surface
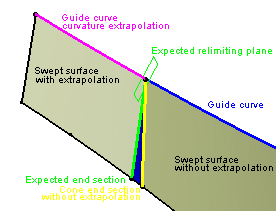
|
| The start (or end) section of the swept surface (in
yellow) does not coincide with the expected relimiting plane (in
green). As a consequence, the blue portion needed is missing. Here
are the steps performed to create the swept surface.
As an information purpose, we put all the elements explaining the
steps above in Geometrical Set.2, so that you understand how the
sweep surface is created.
- The guide curve is extrapolated in curvature (pink curve)
- The result is split by the green plane to obtain the green end
section.
|
-
Click OK to create the swept surface.
| The surface (identified as Sweep.xxx) is added to the
specification tree. |
 |
|
 |
| In the above example, we selected the following values:
Curve.1 as guide curve
Plane.1 as draft direction
Square as computation mode
20deg as Wholly constant angle
Standard Length type
50mm as Length 1 |
|
In the above example, we selected the following
values:
Curve.1 as guide curve
Plane.1 as draft direction
Square as computation mode
35deg as Wholly constant angle
From / Up To
Point 1 as Relimiting element 1
20mm as Length 2 |
 |
|
 |
|
In the following example, we selected the
following values:
Curve.1 as guide curve
Plane.1 as draft direction
Cone as computation mode
20deg as Wholly constant angle
From Extremum type
50mm as Length 1 |
|
In the following example, we selected the
following values:
Curve.1 as guide curve
Plane.1 as draft direction
Square as computation mode
20deg as Wholly constant angle
Along surface type
30mm as Length 1 |
|
| |
 |
Be careful when using a
draft direction and a planar guide that is not continuous in
tangency: it may lead to an invalid topology with surfaces that
are not joined, if the draft angle is not constant or if the
draft direction is not normal to the guide plane. We advise you
to use a relimiting plane in order to cut surfaces and obtain a
valid topology. |
|
| |
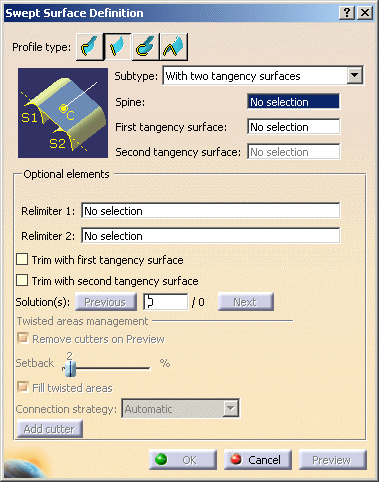
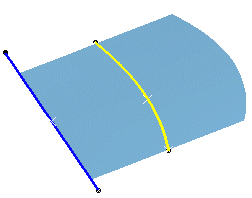
With two tangency surfaces:
|
|
|
Open the Sweep5.CATPart document. |
|
|
-
Click Sweep
.
| The Swept Surface Definition dialog box appears. |
-
Click the Line profile icon and select
With two tangency surfaces from the Subtype drop-down list.
-
Select a spine, and two tangency surfaces.
-
You can check the Trim with tangency surface
to perform a trim between the swept surface and the tangency surface. The
part of the tangency surface that is kept is chosen so that the final
result is tangent.
 |
|
 |
| Swept surface without trim |
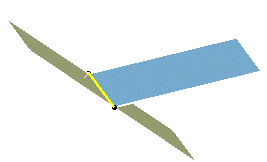
|
Trim with both surfaces |
| |
|
|
 |
|
 |
| Trim with first tangency surface |
|
Trim with second tangency surface |
-
If needed, select a Spine to specify a spine
different from the first guide curve.
If no spine is selected, the guide curve is implicitly used as the spine.
If the plane normal to the spine intersects one of the guiding curves at
different points, it is advised to use the closest point to the spine
point for coupling.
-
Click OK to create the swept surface.
| The surface (identified as Sweep.xxx) is added to the
specification tree. |
|
|
|
Previewing The Angular Value
|
| |
|
|
This option is only available with the
With reference surface, With reference curve
and With draft direction subtypes. |
|
| |
When creating a sweep, you are now able to preview
the four solutions based on the values given for the Angle and
Lengths. The first solution corresponds to Angle, Length1 and
Length2 values, the second solution to -Angle, Length1 and Length2
values, the third solution to Angle, Length2 and Length1 values, and
the fourth solution to -Angle, Length2 and Length1 values. |
| |
Here is an example with the With reference
curve sub-=type, DemoGuide2 as the Guide curve 1,
DemoGuide1 as the Reference curve, 20mm as Length 1,
and 60mm as Length 2. |
| |
|
| |
The orange arrow corresponds to the current
solution. You can click on any arrow then Preview or OK
to recompute the swept surface. You can also use the Previous or
Next buttons or enter a solution number in the Angular
sector field. |
| |
Here is an example with Solution 4: |
| |
|
| |
Optional Elements
|
| |
Refer to Creating Swept
Surfaces. |
 |