|
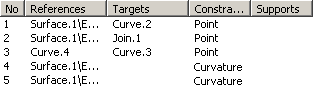
This command is only available with the
Generative Shape Optimizer product. |
 |
This task shows how to deform surfaces
basing the deformation on shape morphing, that is matching each reference
curve or point (reference elements) onto a target curve or point (target
elements)
The deformation is then defined by the transformation of the reference
curves or points into target curves or points.
The elements used for the deformation do not necessarily lie on the
initial surface. |
|
Several cases are presented here, from the simplest one to cases
using various options. Note that whatever information is given in the
first example also applies to the following examples.
|
 |
Open the
ShapeMorphing1.CATPart
document. |
| |
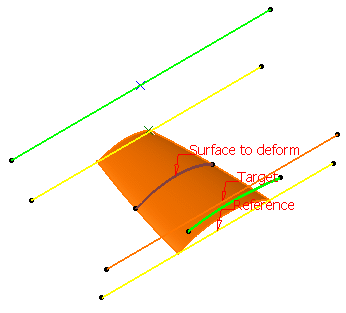
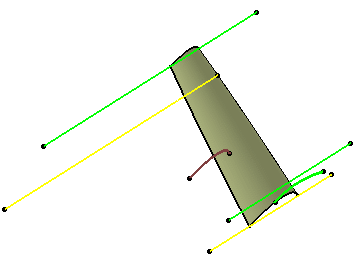
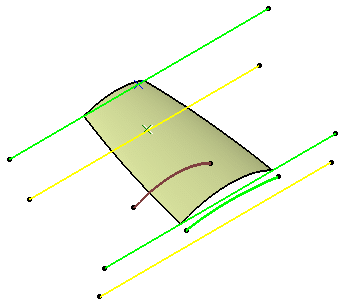
Basic shape morphing deformation
|
 |
-
Click ShapeMorphing
 . .
| The Shape Morphing Deformation Definition dialog box is
displayed. |
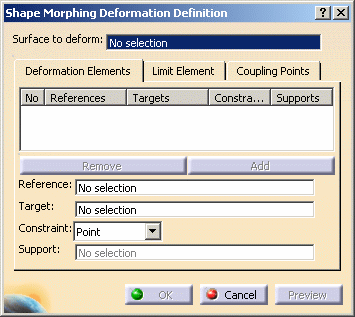 |
-
Select the surface to be deformed.
-
Successively select the first reference element and the
first target element.
-
Repeat this operation by selecting the second reference
element then the second target element.
 |
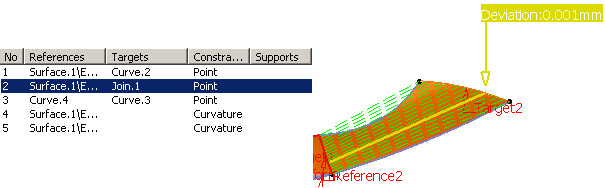
| As you select pairs of reference/target elements, the list in
the Deformation Elements tab is updated accordingly. |
 |
-
Click Preview to visualize the deformation.
The previsualization shows that:
- the deformation is applied to a group of points
- there is a constraints' mapping between the reference and the
target curves.
|
 |
| You can visualize the mapping constraint by
selecting a number in the Constraint dialog box. |
-
Click OK to create the deformed surface.
| The element (identified as Shape Morphing.xxx) is added to the
specification tree. |
 |
You can apply a constraint on the target element with the
associated support surface.
The combo list displays the available continuity types depending on
the reference/target elements you chose. |
-
If you select a reference
and a target element, the Point and the
Tangent continuity are available.
In the case of Point continuity, the
Support
field is grayed.
In the case of
Tangent continuity, select a support surface so that the
continuity is kept.
-
If you select only
reference elements, all continuities
(Point, Tangent, and Curvature)
are available.
In the case of Tangent or Curvature
continuity, you do not need to select a support surface as the
surface to deform is taken into account.
|
|
|
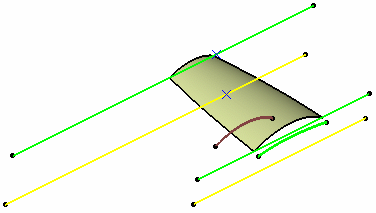
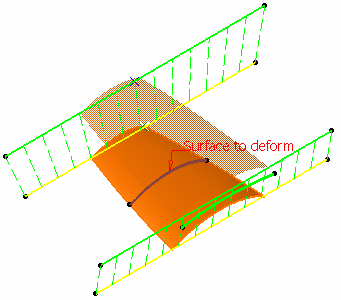
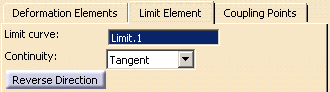
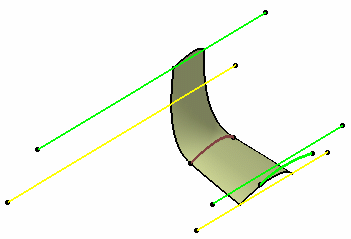
Defining a Limit Element
|
| |
You can define a limit curve to determine the area of the deformation
and enable the other part of the surface to remain frozen.
Here is an example using Limit1. as Limit curve and a Tangent
Continuity.
The Reverse Direction button enables to deform the surface on the
other side of the limit curve. You can also click the arrow in the 3D
geometry. |
| |
|
|
|
| |
 |
|
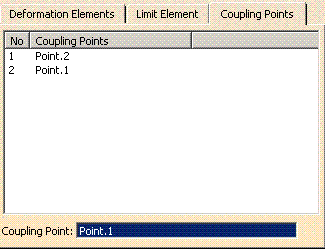
Coupling Points
|
| |
Use this tab to define coupling points in order to map reference
elements with target elements. |
| |
|
|
Points must be located on
reference and target curves. |
|
| |
|
| |
 |
-
You must always
select successively a reference then a target element to define
a pair. You cannot select all reference elements, then all
target elements for example.
-
When several pairs
of curves are selected, they must be ordered, not randomly
selected
|
| |
|
 |
Reference and target curves
can be multi-cells. Joined, blended, or matched curves, for
example, can be used as reference or target curves. |
|
|
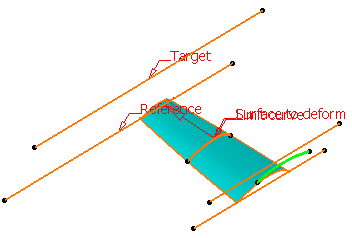
Shape Morphing Deformation with a Fixed
Element
|
|
Sometimes, you need to create a deformed surface in relation to
another element. The shape morphing capability lets you fix an element
that can be used by another one, thus allowing you to retain a connection
between elements while deforming the initial surface. |
|
-
Click ShapeMorphing
.
| The Shape Morphing Deformation Definition dialog box is
displayed. |
-
Select the surface to be deformed.
-
Select the first reference element.
-
Select the target element.
-
Click Add to add another reference element.
-
Successively select the second reference element then
the target element.
-
Click OK to create the deformed surface.
|
| |
Diagnosis
|
| |
This capability lets you visualize the deviations in the 3D geometry
when the result is not fully accurate.
The Warnings dialog box may also be displayed. Refer to the
Managing
Warnings chapter for further information. |
|
|
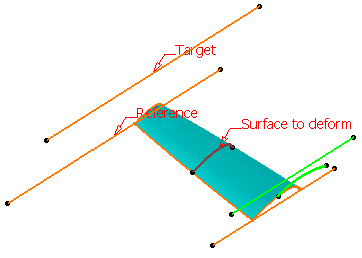
Open the
ShapeMorphing2.CATPart document. |
|
|
-
Click ShapeMorphing
.
| The Shape Morphing Deformation Definition dialog box is
displayed. |
-
Select the surface to be deformed (Surface.1).
-
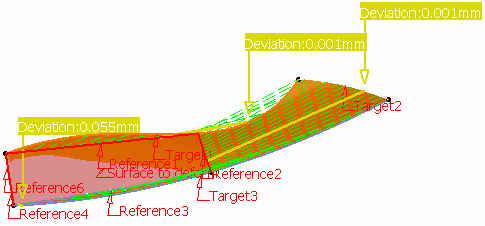
Select the reference and target elements as shown in
the picture below:
-
Click Preview to visualize the deviations:
 |
| The Warnings dialog is also displayed. Refer to
Managing Warnings for further information. |
-
Select a line in the dialog box to display the
corresponding mapping and deviation.
 |
Here are the cases where warnings are displayed.
- When inputs are of bad quality:
|
|
To solve the above
warnings, we advise you to :
-
use the
Curve Smooth command to smooth the
small discontinuities, then
-
use the
coupling point tab to associate the great
tangency or curvature discontinuities between target and
reference.
|
- When reference curves intersect, there may be an
incompatibility between constraints:
- If the targets do not intersect
- If the targets intersect but the mapping between reference
and targets do not associate the reference's
intersection with the targets'
intersection. In this case, we advise you to add coupling
points.
- If the tangency constraint cannot be guaranteed.
|
|
|
 |