As a matter of fact, rendering images may be very time-consuming and using distributed rendering help you to save time since it lets you use up to CPUs simultaneously.
Installing Satellites Automatically
-
Log on as an administrator.
You must belong to the Administrators group, or have the privileges assigned to the Administrators group. Otherwise, you will not be able to start the installation. -
Insert the Version 5 software CD-ROM into the drive.
-
Access the INTEL folder.
-
Run the program:
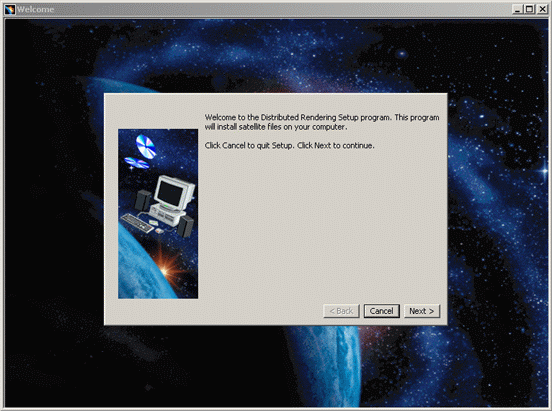
StartSAT.exeThe Welcome dialog box appears:

-
In the Welcome dialog box, click Next.
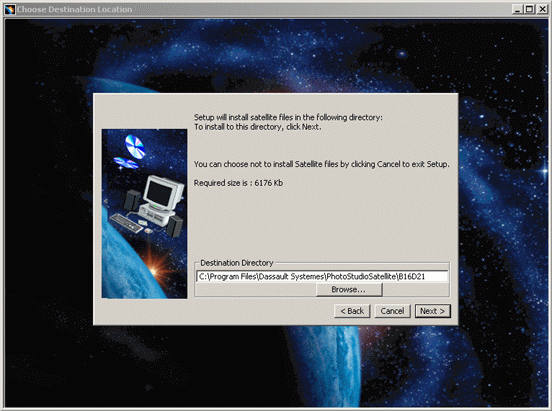
The Choose Destination Location dialog box appears. A default destination folder is already proposed: C:\Program Files\Dassault Systemes\PhotoStudioSatellite\B17D21
-
If the default destination folder is suitable, click Yes in the Confirmation dialog box that opens (to create the directory) then Next to move to the next step.
Otherwise, you can click Browse... and navigate to select another folder then click OK to validate.The folder you choose must be empty. You can also specify a new folder: the folder will be created after confirmation.
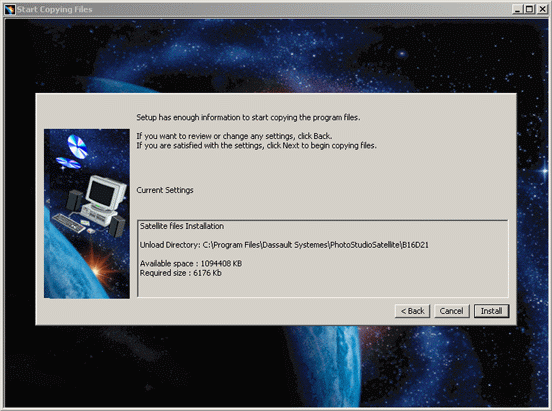
The following dialog box appears to indicate that the copy of the necessary program files is about to start.
The required size as well as the installation directory specified in the previous step are indicated:
-
Click Install to start copying files.
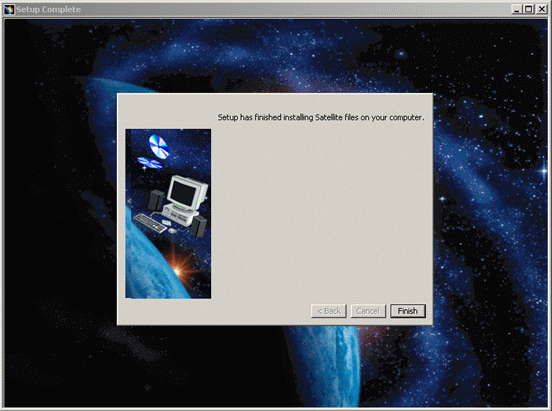
The Setup Complete dialog box appears to inform you that all the necessary files have been installed. 
-
Click Finish to exit the installation phase and close the dialog box.
All the necessary files have been installed on the satellite.
The next step is to activate the distributed rendering.
Installing Satellites Manually
-
You need to copy the necessary files from a Photo Studio 2 and Photo Studio Optimizer installation directory and therefore, only one installation per operating system is required.
Let's suppose the following scenario: Your local host (which runs Version 5) is an AIX computer where you already installed Photo Studio 2 and Photo Studio Optimizer. You want to install 3 satellites: two are AIX computers and one is a Windows computer:
- for the AIX satellites, you will only have to copy the necessary files from the local host to the two AIX computers
- for the Windows satellite, you will have to install on it Photo Studio 2 and Photo Studio Optimizer then, copy the necessary files to the satellite directory.
For detailed information on product installation, refer to Installing Additional Products and in step 9, choose Photo Studio 2 and Photo Studio Optimizer from the list displayed in the Select Software dialog box.
-
On the first satellite, create the directory (for instance, "
c:\satellite") to which you will copy Version 5 files indicated in step 3. -
Copy the following Version 5 files from the installation folder to each satellite directory you created in the previous step.
We assume that the product code has been installed in the default folder proposed which is:
C:\Program
             Files\Dassault
             Systemes\Bn\intel_a\
where "n" is the release number.
In this scenario, we assume that the product code has been installed in the default folder proposed.
This folder will be referred to as "install_root" in this scenario.
The files to be copied are:
install_root\code\command\ray.bat
install_root\code\bin\CATRdgSatellite.exe
install_root\code\bin\CATMathematics.dll
install_root\code\bin\CATRmaShaders.dll
install_root\code\bin\CATSysMultiThreading.dll
install_root\code\bin\JSOGROUP.dll
install_root\code\bin\JSOSPEXT.dll
install_root\code\bin\CATSysAllocator.dll
install_root\code\bin\rayserver.exe -
Access the folder "c:\winnt\system32\drivers\etc\" then open the file "services" and add the line:
mi-ray 7001/tcp # Rendering slaveNote: You can specify a port number other than "7001", if necessary. The port number is arbitrary but must be the same for all the satellites and the local host so that they can communicate. -
Open your Command Prompt window.
-
Change to the satellite directory created in step 2. For instance:
cd c:\satellite -
At the command prompt, enter
rayserver/installto install the server in Windows services. -
Repeat steps 2 to 6 for the other satellites you intend to use.
Your environment is now ready!
Note that once all your satellites have been installed, you can uninstall Photo Studio and Photo Studio Optimizer.
The next step is to activate the distributed rendering.
- Use standard characters and avoid using spaces for the satellite installation path. For instance, use a simple path like c:\satellite on Windows operating systems.
- The satellite directory and the files it contains should allow all access for every one.
- The port numbers must be the same for the master and all the satellites.
Uninstalling Satellites
-
Change to the folder "c:\winnt\system32\drivers\etc\" then open the file "services" and remove the line:
mi-ray 7001/tcp # Rendering slaveor
mi-ray port_number/tcp # Rendering
             slave
(if you have specified a port number other than "7001")
-
Open your Command Prompt window.
-
Change to the satellite directory (created in step 2 in "Installing Satellites"). For instance:
cd c:\satellite -
At the command prompt, enter
rayserver/removethen remove the files from the installation directory. -
Repeat steps 1 to 4 for the other satellites you want to uninstall.