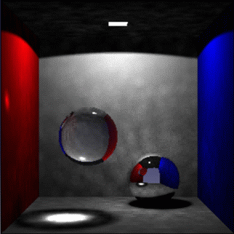
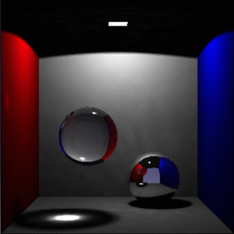
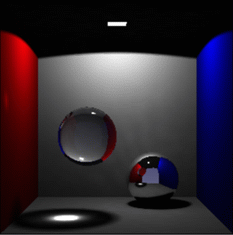
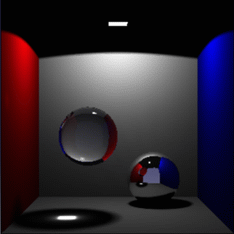
Caustics and global illumination are to be set independently from each other since they are used in different ways and thus, require different parameters.
-
Access the light properties (by right-clicking the light item in the specification tree then selecting Properties) then access the Indirect Illumination tab:
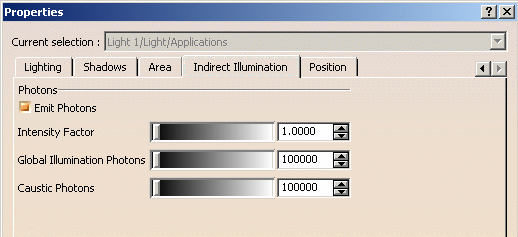
Emit Photons is already selected for the current sample document but note that it is deactivated by default. What are caustics?
Caustics can be defined as small localized lighting effects created by specular light interactions (reflection or refraction) onto a diffuse surface.
A typical example of caustics would be the light pattern cast on the bottom of a swimming pool by the wave pattern on the (refractive) water surface.The two pictures below show examples of caustics:


Although caustics are a kind of global illumination, they are treated separately to allow finer control and improve performance. How does it work?
Caustics and global illumination have identical photon map methods but different parameters. Refer to Using Global Illumination for detailed information.
-
In the Intensity Factor box, indicate the multiplication factor of the light intensity associated to each photon, using either the slider or by entering a value directly in the box.
By default, direct and indirect lighting have the same multiplication factor which is equal to 1. -
In the Caustic Photons box, indicate the number of photons to be stored in the photon map. This value controls the rendering quality of caustics.
Note that too small values tend to create blurry caustics. On the contrary, high values provide a better result but increase the duration of the rendering phase.

Caustics generally require a lower number of photons than global illumination. -
Click OK to validate your lighting parameters then click Create Shooting
 to define the shooting parameters in the Indirect Illumination
tab:
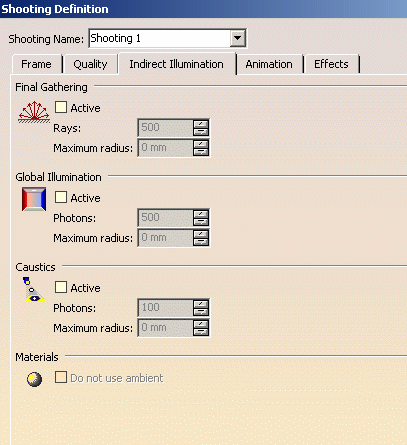
This tab lets you define caustics parameters for rendering purpose. -
In the Caustics area, click Active to activate caustics and activate the other two boxes.
-
In the Photons box, indicate for each pixel the number of photons to be searched in a specified area (defined in the Maximum radius box) in order to compute the local intensity of caustic brightness.
The default value is 100, the highest value is 1000.
Note that increasing the number of photons makes caustics look less noisy. However the higher the value, the blurrier the result and the longer the rendering phase.
As for lighting properties, a number of photons lower than the one required for global illumination is needed. -
Enter the Maximum radius (in millimeters) to set the limits of the area in which the photons are searched to compute the local intensity of caustics` brightness.
A null value means that the radius is computed from the scene extent. -
Click Do not use ambient in the Material area if you do not want the material ambient coefficient to be taken into account for indirect illumination.
The ambient coefficient corresponds to the light intensity diffused in any direction by the object, even if not lit by any light source. This parameter affects the whole object, including the shadowed area. -
Click OK to validate your parameters then render the shooting using Render Shooting
 (you can also right-click the Shooting item in the specification tree
then select Render Single Frame) to check the result.
When setting your parameters, it is recommended to start with low values since the less photons, the quicker the rendering phase (but the lower the quality). You can then increase the values progressively to tune the result.
The following are samples illustrating the various results you can obtain for caustics according to the values you defined (we have kept a null maximum radius and a realistic falloff for each of the four examples):
Intensity Factor = 10
Caustic Photons = 60 000
Photons = 100Intensity Factor = 3
Caustic Photons = 60 000
Photons = 100Intensity Factor = 3
Caustic Photons = 200 000
Photons = 500Intensity Factor = 1
Caustic Photons = 200 000
Photons = 500
