
Mass
-
Click the Mass tab to display technical information.
Displaying the mass properties of the part means that these properties are computed and stored in the part: this may change the status of the part document to "modified" as can be seen usingFile > Save Management.
You cannot edit the density of the whole part. However,when a material is applied to the part, you can edit the density and the volume of the Part Body. If no material is applied to the part but if a material is applied to the PartBody, this material will be taken into account for the density calculation. If both the part and the PartBody have a material applied, the part material will have priority.
When clicking on the Mass tab and if the part is not yet modified, a message is issued to warn you that the part will be modified by the calculation of mass properties.To know how to apply materials to parts, refer to Real Time Rendering User's Guide Version 5.
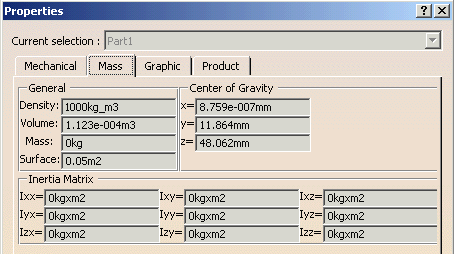
- The mass of the part is null if its part body contains no geometry.
- The mass is calculated only for volume objects (1D or 2D, like spatial curves or surfaces objects are not taken into account).
- Deactivating features does not affect the mass of the part.
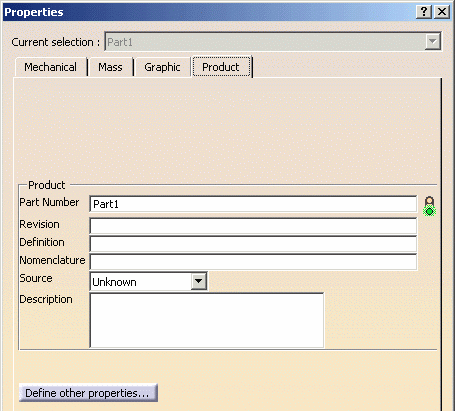
Product
-
Click the Product tab.
-
Enter a new name for the part, for example Stiffener in the Part Number field.
The new name appears in the specification tree. -
The other fields allow you to freely describe the part. Enter the information describing your part in the context of your company.
-
Set the Source option. You can choose between:
- Unknown
- Made
- Bought
-
Use the Description frame to enter additional information.
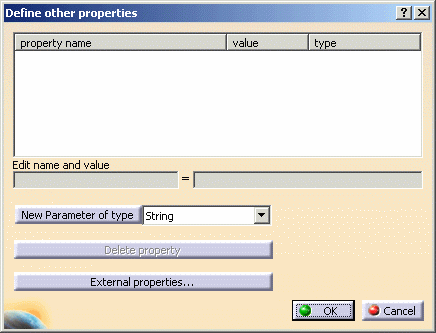
Define Other Properties
-
Click the Define other properties... button to access options enabling you to define parameters and assign values to them.
-
The New Parameter of type button lets you create a user parameter. This parameter can be assigned a single value. To create a parameter, just choose the one you need from the list. Then, click the button.
-
The Edit name and value field becomes available. You can edit the parameter's name and assign a value to it.
The Delete Parameter button operates only for user parameters.
The External properties... button allows you to import parameters and parameter values from a text file or from an Excel file (Windows). -
Click OK to confirm the operation and close the Define other properties dialog box.
You can then note that the parameter you defined is displayed in the Product tab as illustrated here: