Keep in mind that applying materials onto elements affects the physical and mechanical properties, such as the density, of these elements.
- a part body, surface, body or geometrical set (in a .CATPart document). You can apply different materials to different instances of a same CATPart.
- a product (in a .CATProduct document)
- instances of a .model, .cgr, .CATPart (in a .CATProduct document).
- CATParts, CATProducts and cgr can be saved in ENOVIAVPM. For detailed information on ENOVIAVPM, refer to the ENOVIAVPM User's Guide on the ENOVIAVPM Documentation CD-ROM.
- CATProducts can be saved in 3D
XML format. You can now import materials contained in 3D XML files.
Important: Only image-type materials can be imported and/or exported in 3D XML format. 3D materials such as chessboard, stone and external shaders are not taken into account.
Saving operation:

Opening operation:
Below is an example of a 3D XML file containing a material open in a CATIA V5 session. Click the thumbnail to see the full-size picture:
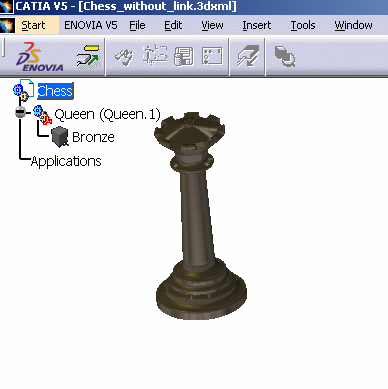 |
| Note that in this case, the material saved in the 3D XML file is non-linked (the Link to file check box was not selected during material application). |
When the document is saved in 3D XML with the Link to
file option selected, the material is saved as a mapped linked
object. Therefore, two documents are retrieved (you can see them via
the File > Desk... or File > Save Management):
- .CATProduct Document
- .CATMaterial Document
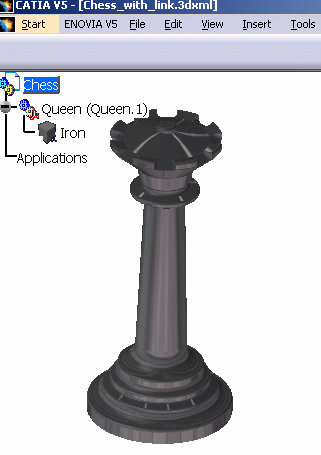
Below another example of a 3D XML file containing a material open in a CATIA V5 session (Link to file option selected). Click the thumbnail to see the full-size picture:
 |
Refer to "Saving Documents in Other Formats" in the Version 5 - Infrastructure User's Guide for more information.
| Within a CATProduct, you should not apply different materials to different instances of a same part because a material is part of the specific physical characteristics of a part. Therefore, this could lead to inconsistencies. |
-
Select the element onto which the material is to be applied.
-
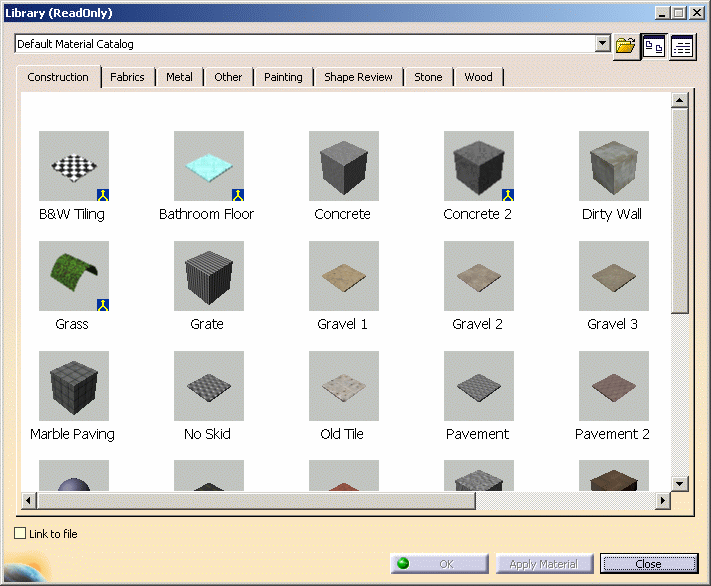
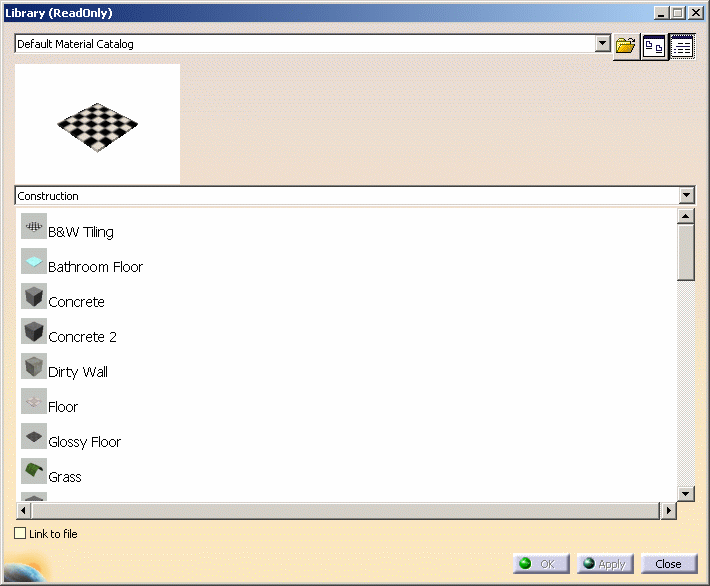
The Library dialog box opens. It contains several pages of sample materials from which to choose.
For a complete description of the families provided with the default material library, refer to Material Sample Library in this guide.Each page is identified either by a material family name on its tab (each material being identified by an icon) if you select the Display icons mode...
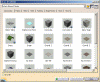

...or by a material family name in a list if you select the Display list mode: 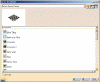
Note that: - the symbol
 identifies materials with a 3D texture. A PSO (Photo Studio
Optimizer) license is required to use these materials
identifies materials with a 3D texture. A PSO (Photo Studio
Optimizer) license is required to use these materials
Clicking the Open a material library  button opens the File Selection dialog box which lets
you navigate through the file tree to your own material libraries.
button opens the File Selection dialog box which lets
you navigate through the file tree to your own material libraries.
You can, of course, use the default library (see What You Should Know Before You Start in this guide) by choosing Default Material Catalog.The previously opened material libraries are listed where you see "Default material catalog" now. When you reopen the Library dialog box, the last chosen material library is placed on top of the list and used by default unless you select another one.
Depending on the document environments (i.e. the method to be used to access your documents) you allowed in Tools > Options ... > General > Document tab an additional window such as the one displayed below might appear simultaneously to the File Selection dialog box to let you access your documents using an alternate method: 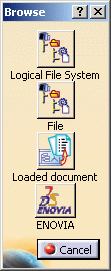
In our example, four document environments have been allowed among which the DLName environment. If you want to access your texture files using DLNames, for instance, click the Logical File System button: this opens a specific dialog box dedicated to the DLName environment.
For detailed information on this dialog box, refer to Opening Existing Documents Using the Browse Window. - the symbol
-
Select a material from any family, by a simple click.
Once a material is selected, you can drag and drop or copy/paste it onto the desired element directly from the material library. 
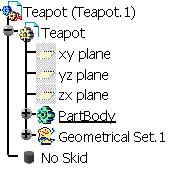
Unless you select in the specification tree the desired location onto which the material should be mapped, dragging and dropping a material applies it onto the lowest hierarchical level (for instance, dragging and dropping onto a part in the geometry area will apply the material onto the body and not onto the part itself).
However, note that a material applied onto a body has no impact on the calculation of the part physical properties (mass, density, etc.) since only the physical properties of the part, and not those of the body, are taken into account.
-
Select the Link to file check box if you want to map the selected material as a linked object and have it automatically updated to reflect any changes to the original material in the library.
-
Click Apply Material to map the material onto the element.
-
Click OK in the Library dialog box.
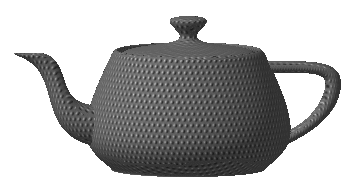
The object looks like this:
-
Right-click the material just mapped in the specification tree and select Properties.
The Properties dialog box is displayed: 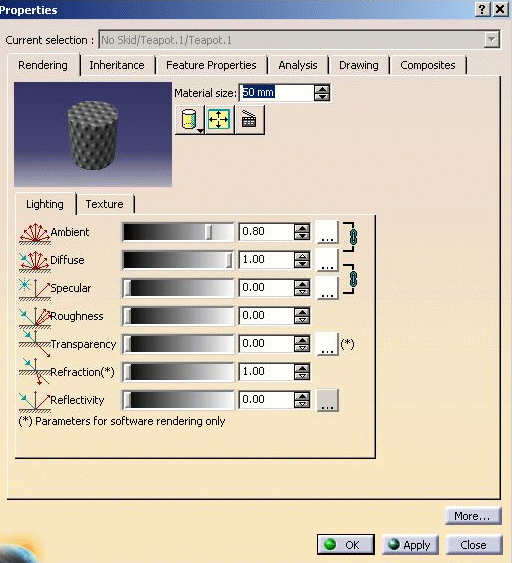
-
Click the Rendering tab to edit the rendering properties you applied to the element.
-
If necessary, change the material size to adjust the scale of the material relative to the element.
-
Click OK in the Properties dialog box, when you are satisfied with the material mapping on the element.
Do not forget that appropriate licenses are required to use the Analysis and Drafting tabs. -
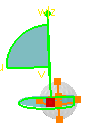
Use the 3D compass to interactively position the material:
Note that material positioning with the 3D compass is only possible in the Real Time Rendering, Product Structure, Part Design and DMU Navigator workbenches. - Select the material in the specification tree:
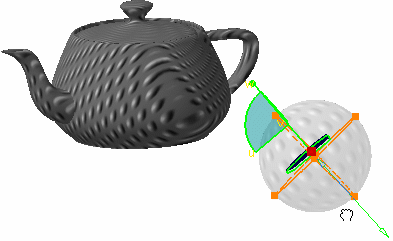
The compass is automatically snapped and the mapping support (in this case, a cylinder) appears, showing the texture in transparency.
If necessary, zoom in and out to visualize the mapping support which reflects the material size.- Pan and rotate the material until satisfied with the result.
You can:
- Pan along the direction of any axis (x, y or z) of the compass (drag any compass axis)
- Rotate in a plane (drag an arc on the compass)
- Pan in a plane (drag a plane on the compass)
- Rotate freely about a point on the compass (drag the free rotation handle at the top of the compass):
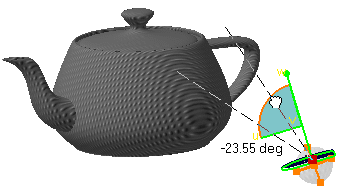
- Use the mapping support handles to stretch the material texture along u- and v- axes (as you can do it with the slider in the Scale U, V boxes displayed in the Texture tab):
For more information on manipulating objects using the 3D compass, refer to the Version 5 - Infrastructure User's Guide.
More about materials
- The application of a material cannot be recorded in a macro file
- You can run searches to find a specific material in a large assembly (for more information, see Finding Materials in this guide) or use the copy/paste or drag/drop capabilities.
- If you are working in Shading with Material visualization
mode (i.e. Materials is selected in the Custom View Modes
dialog box) with no material applied to your object, this object is
visualized using default parameters that only take into account the color
defined in the object graphic properties.
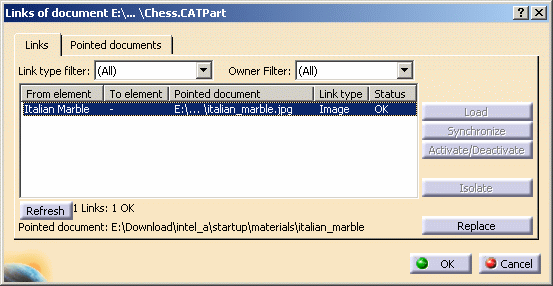
As a consequence, an object with no mapped material appears as if made of matte plastic, non-transparent and without any relief. - Contrary to materials with no texture (such as Gold),
materials with a texture (such as Teak) are applied with an
external link to their texture image. Therefore, this link is displayed
when selecting File > Desk, Edit > Links or
File > Send To.
In the example below, Italian Marble has been applied onto Chess.CATPart and the link to the corresponding .jpg image appears when displaying the Links dialog box:
![]()