|
|
This task shows how to insert a
Prismatic Roughing operation in the
program. This type of operation allows you to quickly rough machine a
part in a single operation. This is particularly useful for parts that
include drafted pockets or multiple bottom pockets. To create the operation you must define:
|
|
|
|
Open the
Multi_Pockets.CATPart
document, then select Machining > Prismatic Machining from
the Start menu. Make the Manufacturing Program current in the
specification tree. |
|
|
|
1. |
Select Prismatic Roughing
|
|
|
The Part and Rough stock areas of the icon are colored red indicating that this geometry is required. All other geometry is optional. | |
| 2. | Click the red Part area then select PartBody either in the specification tree or in the 3D window. | |
| 3. | Click the red Rough stock area in the icon then select Rough Stock.1 either in the specification tree or in the 3D window. | |
| 4. | Set a 1.0mm offset on part. | |
|
|
The Part and Rough stock areas are now colored green indicating that this geometry is now defined. | |
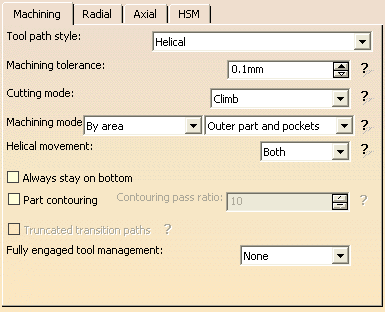
| 5. | Select the Strategy tab page
|
|
|
|
In the strategy tab page, you can modify the proposed
tool axis direction by clicking on the arrow in the sensitive icon. This
displays a dialog box for specifying the tool axis. For a Back and forth tool path, you can modify the proposed machining direction by clicking on the arrow in the sensitive icon. This displays a dialog box for specifying the direction of paths. |
|
| 6. | A tool is proposed by default when you create a machining
operation. If the proposed tool is not suitable, just select the
Tool tab page
|
|
|
|
Only end mills can be used in Prismatic Roughing operations. | |
| 7. | Select the Feeds and Speeds tab page
|
|
| 8. | Select the
Macros tab page |
|
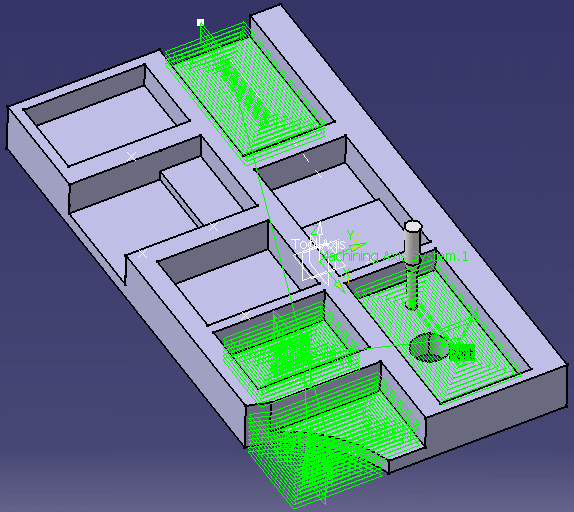
| 9. | Before accepting the operation, check its validity by
replaying the tool path.
|
|
| 10. | Click OK to create the operation. | |
|
|
||