|
|
This task shows how to create a prismatic machining area and then use this feature in Pocketing and Profile Contouring operations. | |
|
|
Open
the Rework01.CATPart document,
then select Machining > Prismatic Machining from
the Start menu.The Video simulation capability is used in this task. Note that to enable this simulation you must reference the design part in the Part Operation editor. The Analyze functionality is used in this task. Note that it is available only when the NC Manufacturing Verification product is installed. It is described in more detail in the NC Manufacturing Verification User's Guide. |
|
|
|
1. |
Select Prismatic Machining Area
|
| 2. | Click the red Bottom in the sensitive icon
then select the pocket bottom in the 3D window.
The pocket boundary (Guide.1) is automatically deduced from the pocket bottom. |
|
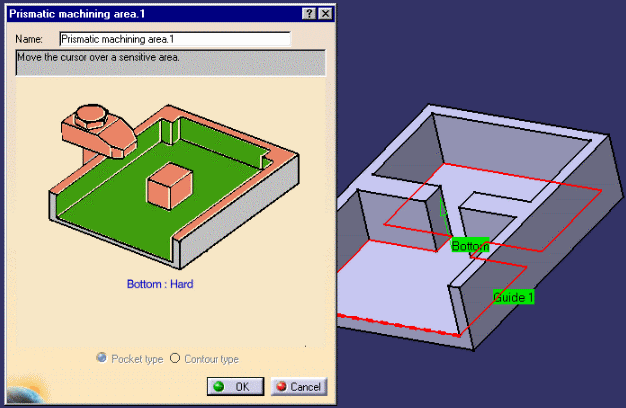 |
||
| Click OK to create the feature called Prismatic machining area.1. This feature references the selected pocket geometry. | ||
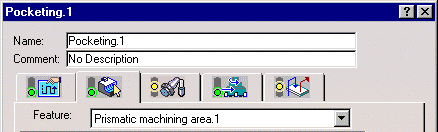
| 3. | Make the Manufacturing Program current in
the specification tree, then select Pocketing
|
|
| 4. | In the Pocketing dialog box, select the
Prismatic machining area.1 feature in the Feature
list.
The operation's geometry shows the elements referenced by the feature |
|
| 5. | Select the Tool
tab You can refer to Edit the Tool of an Operation for more information. |
|
| 6. | Select the Macros
tab You can refer to Define Macros of an Operation for more information. |
|
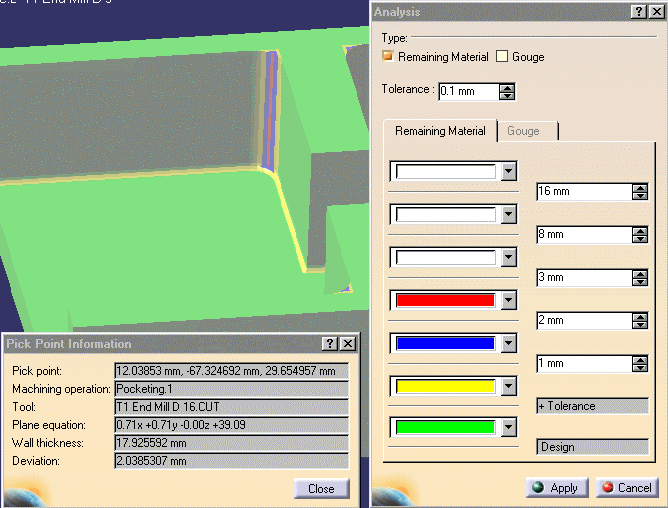
| 7. | Verify the Pocketing operation by simulating the tool
path in
Video simulation mode
Select Analyze
You can see that the pocketing operation leaves some unmachined material in the corners. Close the Analysis and Replay dialog boxes. Click OK to create the Pocketing operation. |
|
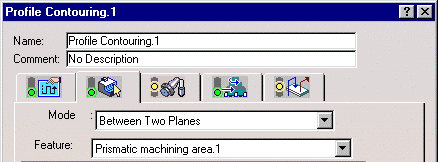
| 8. | Select Profile Contouring
|
|
| 9. | In the Profile Contouring dialog box, select
the Prismatic machining area.1 feature in the
Feature list.
The operation's geometry is initialized with the pocket bottom and guide elements referenced by the feature. |
|
| 10. | Select the Tool
tab You can refer to Edit the Tool of an Operation for more information. |
|
| 11. | Select the Macros
tab You can refer to Define Macros of an Operation for more information. |
|
| 12. | Verify the Profile Contouring operation by
simulating the tool path in
Video simulation mode
Select
Analyze
You can see that the remaining material has now been machined by the Profile Contouring operation. Close the Analysis and Replay dialog boxes. Click OK to create the Profile Contouring operation. |
|
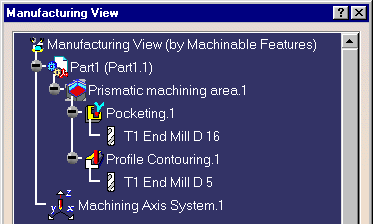
| 13. | Select Manufacturing View
Use the Sort by Machining Features contextual command to see how the Prismatic machining area is referenced by the Pocketing and Profile Contouring operations.
|
|
|
|
In addition to Pocketing and Profile Contouring operations, Prismatic machining areas can also be used on Prismatic Rework Areas. | |
|
|
||