 |
This task shows you how
to add an attribute to the general design rules. |

|
In addition to design
rules that are specific to a standard or
to a specification catalog, this application
has design rules that apply every time you are placing a part. Although
you cannot add a new design rule, you can modify existing ones; and, you
can add attributes for informational purposes to the Design Rules Catalog.
For instance, you can create an attribute called VendorName and link it
to a list of approved vendor names. You can now assign a vendor name to an
object at parts creation time; information that will always be available
to the user.
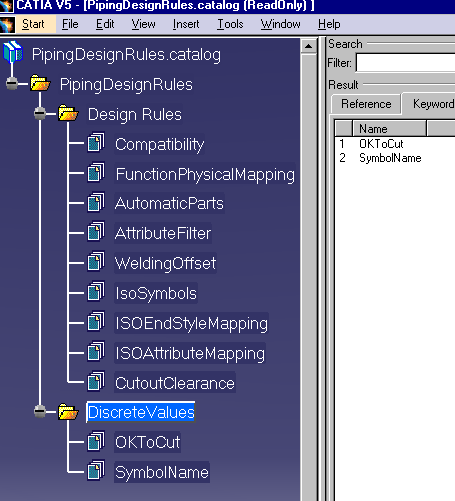
When you want to add an attribute that doesn't change from one
standard to the next you add it here under Discrete Values.
You can only add an attribute that has discrete values.
|
 |
1. |
Create a text file -
with Notepad or another text editor - and enter values for the new
attribute. Refer to one of the existing text files to see the format. Save
the file in the directory where the other files are located. Give the file
the same name as the attribute and follow the naming convention as evident
in the existing files. The default location of the DesignRules catalog is
...intel_a\Startup\EquipmentAndSystems\Piping\DesignRules |
|
2. |
Now you need to add the attribute under the
general design rules and link it to the file you just saved. To do this
open the ...DesignRules catalog in the application. (Use File-Open or drag
it on to the workbench from Windows Explorer.)
|
|
3. |
An attribute can only be added
under the DiscreteValues column. Double click on it to make it
active and click on the Add Family button  .
The Component Family Definition dialog box displays. .
The Component Family Definition dialog box displays.
|
|
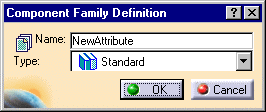
4. |
Enter a name for the
new attribute. Under Type select Standard. Click OK. The new attribute
will display in the list of attributes under DiscreteValues.
|
|
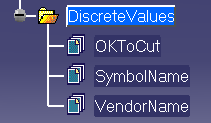
5. |
Double click new attribute, in this case
VendorName, to make it active
and click the Add Component button  .
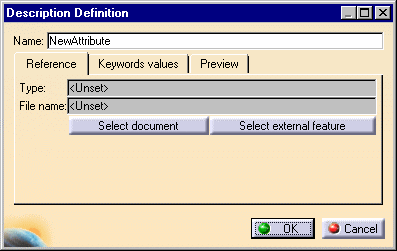
The Description Definition dialog box displays. .
The Description Definition dialog box displays.
|
|
6. |
Click the Select Document button
and, in the File Selection dialog box that displays, navigate to the file
you created in Step 1. Select the file and click Open.
The values in the text file are now linked to the attribute you just
created. Save your changes. |
|

|