This task will show you how to associate images to your environment walls either using the default textures provided in the default material library or custom textures.
Open the RED-CAR.CATProduct document then create an environment.
Using default textures
-
Select any wall of the environment onto which you want to apply a wallpaper.
Note: As far as showroom environments are concerned, you can apply a different texture to each wall of the environment. -
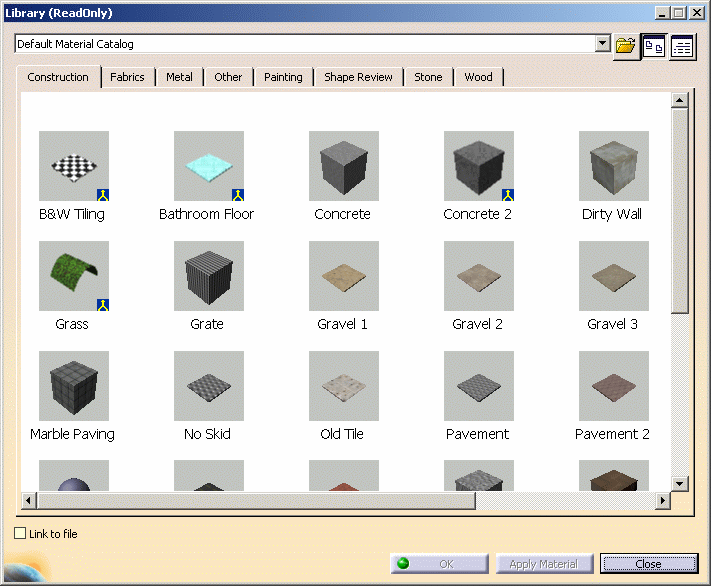
Click Apply Material
 to display the Library dialog box.
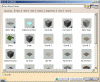
The material to be applied onto the wall must have a texture, otherwise an error message is displayed. -
Click the Construction tab, for example, then select Marble Paving.
-
Click Apply Material to map the image texture of the material onto the selected wall.
-
Repeat these steps for the other walls if you want to.

Instead of clicking Apply Material, you can also use the contextual menu then copy the material before pasting it or drag and drop the material directly onto the wall. -
Click Shading with Material
 in the View toolbar.
The material texture is mapped onto the selected wall. 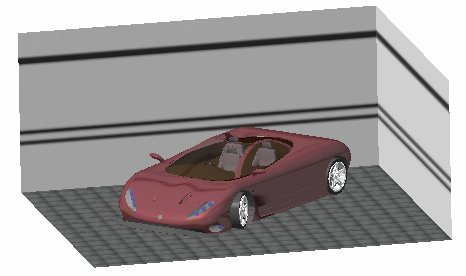
-
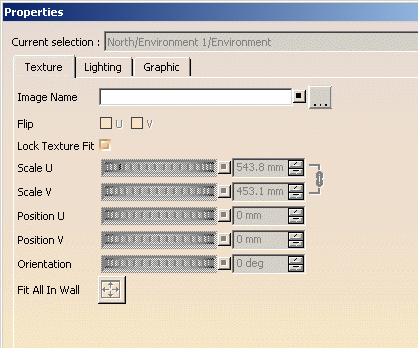
To modify the mapped texture properties, right-click the corresponding environment wall in the specification tree then select Properties or xxx object > Definition.
The Properties dialog box is displayed: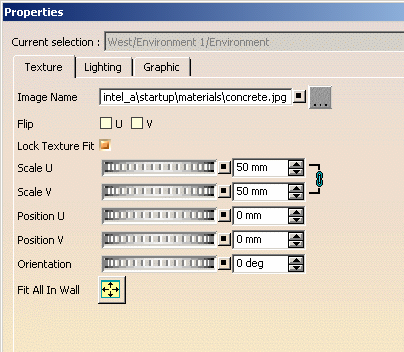
The Texture tab lets you modify the Image Name as well as the material scale, position and orientation. 
The Image Name box lets you modify the mapped texture by choosing either another texture from the default material library or a custom texture. -
The Flip U, V check boxes let you invert the material texture along U and V axes.
-
Define the image repetititon along U and V, as well as its scale, its position and its orientation:
-
Click the Lighting tab and select the On check box to enable shadow casting on the wall.
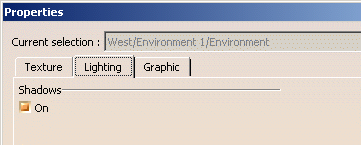
When the option is deactivated, the wall is visible even if not illuminated. Note that this option is used for rendering only. -
Click OK or Apply + OK to validate and close the Properties dialog box.
Using custom textures
-
Select any wall of the environment onto which you want to apply the wallpaper.
-
Right-click then select Properties or xxx object > Definition then access the Texture tab:
-
Enter the name of the texture to be mapped directly in the Image Name field or click the ... button to navigate to the desired file.
Depending on the document environments (i.e. the method to be used to access your documents) you allowed in the Document settings, an additional dialog box might appear simultaneously to the File Selection dialog box to let you access your documents using an alternate method:
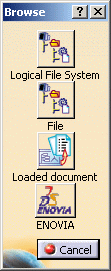
In our example, four document environments have been allowed among which the DLName environment. If you want to access your texture files using DLNames, for instance, click the Logical File System button: this opens a specific dialog box dedicated to the DLName environment.
For detailed information on this dialog box, refer to Opening Existing Documents Using the Browse Window. -
Click OK to validate.
-
Repeat steps 1 to 4 for the other walls.
Once a file name has been entered in the Image Name box, the other boxes are grayed out to let you modify the texture properties. To do so, repeat steps 9 to 12 detailed above in Using default textures.
-
Click OK to validate your modifications.
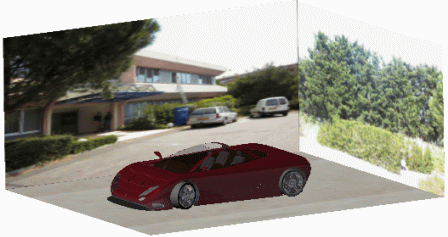
The following example shows an environment onto which custom textures have been applied:
![]()