-
Click New View
 in Layout toolbar.
When no reference plane or surface is selected from 3D, then the view box dimensions are computed from the standards (Tools > Standard > Standard_Name > Layout Views Customization). For more information, refer to Layout Views Customization.
-
Click on the sheet to position the new view.

Note how the view is previewed in the part window. You need to zoom out, as the view box defined in the ISO_3D standard used by the current layout has sides of 1000mm. For more information on the standards, see Administration Tasks.
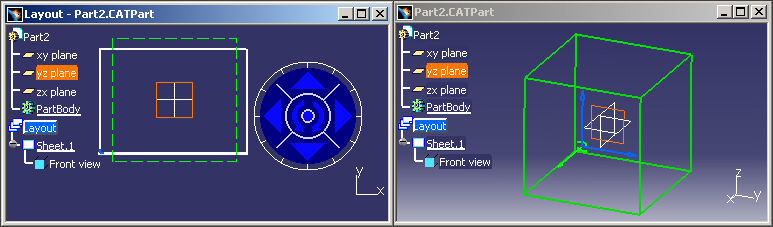
An empty primary view is created, displaying a blue axis in a red frame, as well as the view name and scale. Additionally, the Front View item is added to the specification tree.

In our scenario, the primary view is a front view. The view type for the primary view is defined in the current standard (ISO_3D in our scenario). 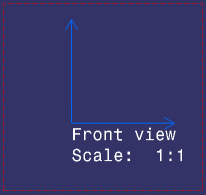
You can now create 2D geometry in your view or continue creating more projection views as detailed below.
-
Click New View
again and click in the layout at the location where you want the
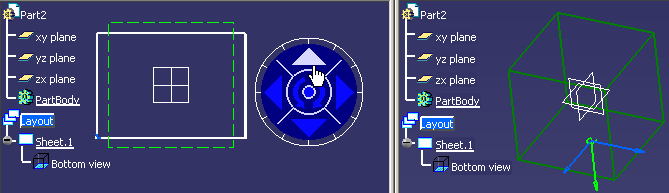
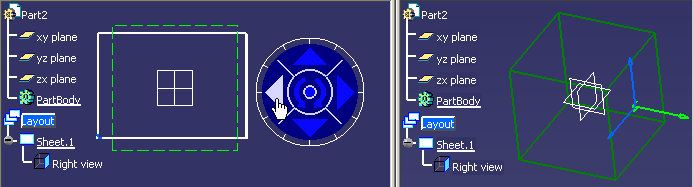
projection view to be positioned: you can create Left, Right, Top, Bottom
and Isometric views. Create a Left view, for example.- Projection views are always created from the active (current) view.
- Positioning the view defines the projection view direction, in
accordance with the projection method and the primary view type (a
front view in our scenario).
The projection method (First angle standard or Third angle standard) is defined by the sheet style, as specified in the standard used by the layout. For more information, refer to Sheet Styles in the Administration Tasks chapter. You can change the projection method by editing the layout sheet properties (through Edit > Properties). - Remember that it is not possible to create several projection views of a same type within a set of views (two Right views, for example).
- Projection views are always created using the sheet scale. The primary view scale, when it is different from the sheet scale, is not propagated to other projection views.
- If you change the sheet scale (defined in the sheet properties), the scale of all existing views (defined in the view properties) is multiplied by that of the sheet (for example, if existing views already have a scale of 1/10, and if you change the sheet scale to 1/10, then existing views will now have a scale of 1/100).
The view is created. The specification tree is updated again to show the newly created view.
-
Double-click the New View icon to create several projection views one after the other: this time, create Right, Top, Bottom and Isometric views. The specification tree is updated again.
-
Press Escape when you have created your views.
-
Activate one of the projection views by double-clicking it. For example, activate the Left view.
-
Click New View
again: this time, you can create Rear or Isometric views from the left
view. Create a rear view, for example. The specification tree is updated
again.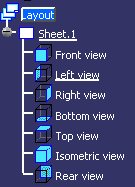
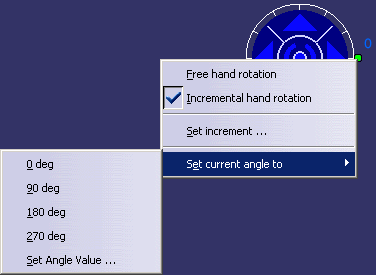
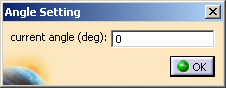
Defining the view orientation during view creation


Reference objects that can be selected Plane Sketch Face FTA view Inverse and Rotate of plane -

-
![]()