-
Click the Lip icon
 .
.
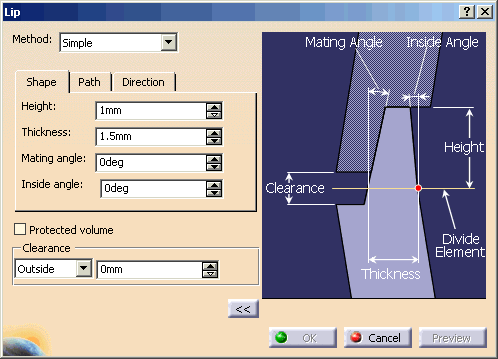
The Lip dialog box is displayed.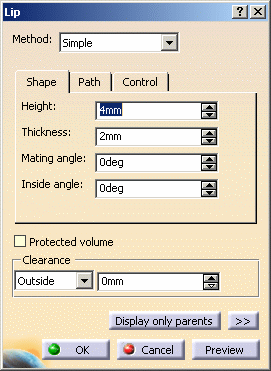
Three lip definition methods are available:
-
Set the Height option: defines the height of the upper lip. The value must be greater than zero.
-
Set the Thickness option: defines the thickness of the lip. The value must be greater than zero.
-
Set the Mating angle option: defines the vertical edge (defined by the height) of the outside of the lip. A negative value implies a snap fit.
-
Set the Inside angle option: defines the vertical edge (defined by the height) of the inside of the lip. A negative value implies a snap fit.
-
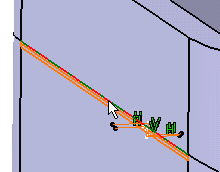
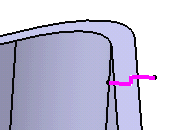
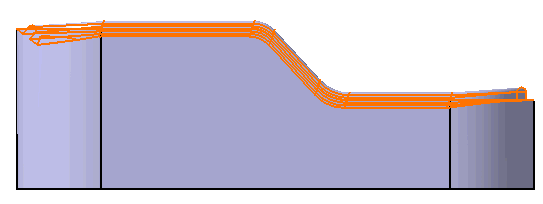
Select an edge or a curve to define the path.
Creating a Lip with Different Upper and Lower Profiles
-
Set the Upper/Lower profile method.
You are going to define one lip for Divide.1 and another lip for Divide.2 (highlighted feature).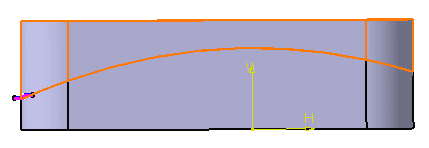
Look more closely at the profiles already sketched:
Note that profiles cannot be self-intersecting.
Shape
-
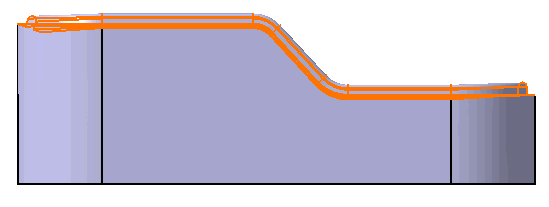
Select Sketch.3 as the upper profile.
-
Select Sketch.4 as the lower profile.
-
Selecting the Protected volume option protects the volume of the lip area by preventing any additional material created by other features to be added to the lip. For the purpose of our scenario, select the option.
Path
-
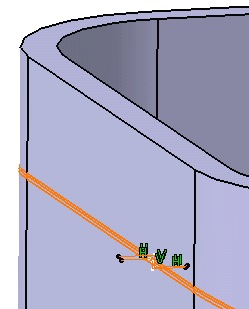
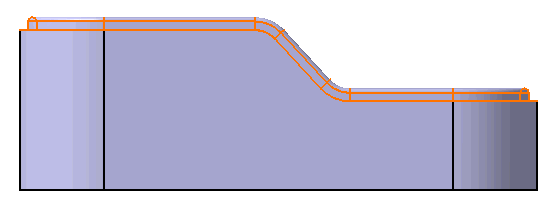
The lip path consists of edges or curve, planar or non-planar. All edges must be connected, and the profile plane must intersect a portion of the path. By default, all split edges constitute the path. For the purpose of our scenario, deselect the option and select the edge as shown to restrict the creation of the lips.
-
Click OK to confirm the operation.
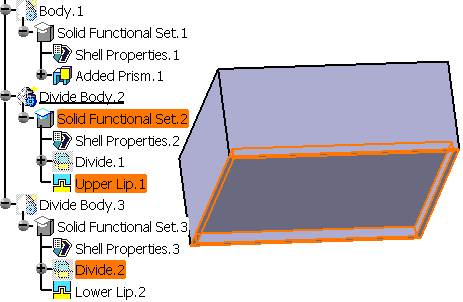
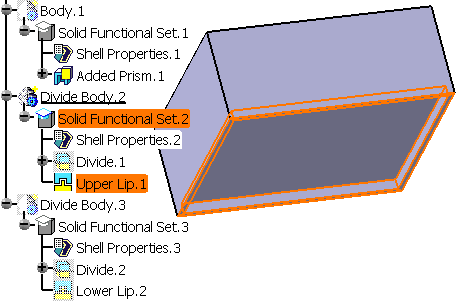
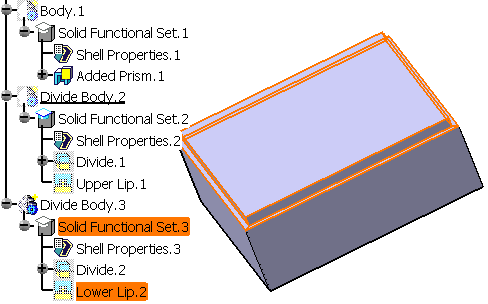
Both lip features Upper Lip.1 and Lower Lip.2 are added to the specification tree. Each of them is located in a distinct Divide body.

-
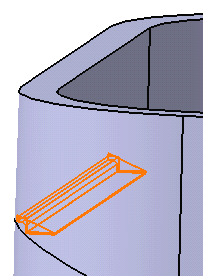
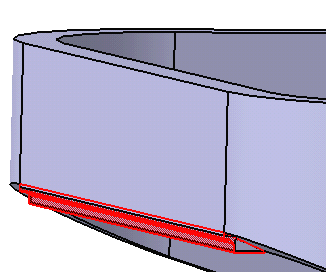
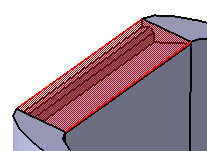
Hide Divide Body.3 to make visualization easier. Lower Lip is created only on the selected edge and the protected area appears in red:
Looking more closely, the shape looks like this:
-
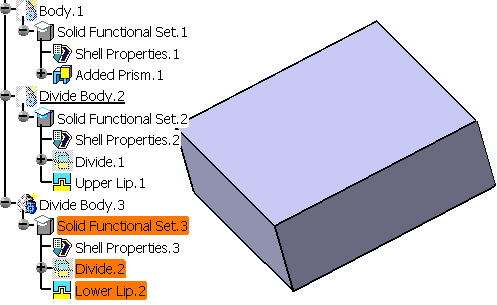
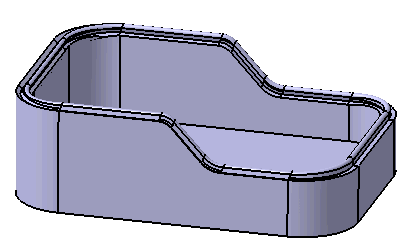
Show Divide Body .2 and hide Divide Body.3 to see the second lip.
Creating a Lip with a Single Profile
-
To perform this scenario, delete Divide Body.3 so as to obtain only one divide feature.
-
Select Divide Body.2 in the specification tree and set it to Define In Work Object.
-
Click the Lip icon
. -
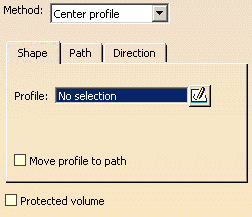
Select the Center profile method.
Shape
-
Select Sketch.4 as the center profile.
-
The lip path consists of edges or curve, planar or non-planar. By default, all split edges constitute the path.
-
Click OK to confirm the operation.

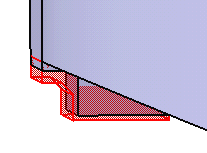
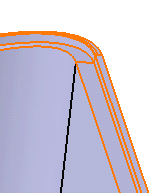
Looking more closely, the shape looks like this:
By default, the Protected volume option is not active. This protects the volume of the lip area by preventing any additional material created by other features to be added to the lip.
Path |
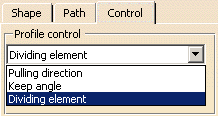
- Pulling direction: the orient profile is as
they are being swept along the lip path. The profile angle is
constant and parallel to the pulling direction as the profile
moves along the path.
- Keep angle: the profile is swept keeping its
angle with the center curve constant.
- Dividing element: the profile orientation is
defined by a reference surface and stays normal to the surface
at each point on the path.
Control |
The Lip feature has three profile control options. It gives the users more flexibility when defining the geometry of the lip feature.
  |
|
|
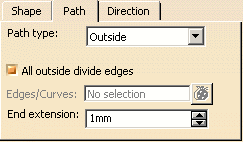
Open Path Extension |
When creating a lip defined with an open path, the user often extends the end curves of the path in order to get the correct geometry. This happens when the path is not planar, or the part geometry is not perpendicular to the end of the path. The Open Path Extension allows the user to simply enter a value, and we would automatically add an extension to the open end of the path.
 |
 |
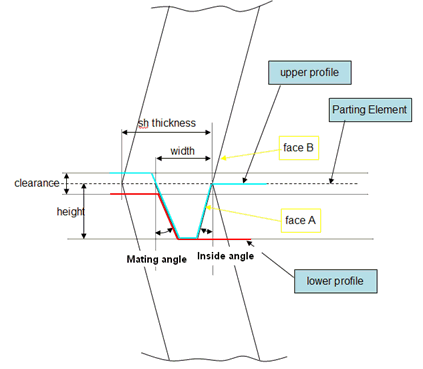
Inside/Outside clearance on Simple Method |
This method requires one additional parameter, Inside Angle or Outside Angle. It sweeps the automatically generated profiles along the internal path, this would guarantee the connectivity between faces A and B (see figure below).
Width would be the thickness of the internal lip at the intersection with the parting element. This is guaranteed to be constant. For non planar parting elements the resulting width of the external lip may have slight variations.
 |
 |
Protected volume option on Added feature |
When you create a lip feature on the
Added feature like below, only the upper side of the lip is
generated and the lower side of the lip does not get
generated. It is because the lip is not a protected feature, and the
lip contribution that forms the cutaway from the lower lip is of type "core".
Since the divide half type is "added", it has higher priority and fills up the
space where the lower lip cutaway is supposed to be.
In order to create a lip
feature on an added volume, you must set the lip type to 'protected' by checking
Protected volume checkbox in the Lip dialog, so the cutaway will have higher priority than the
added volume.
Added feature: Upper Lip without Protected volume |
Added feature: Lower Lip without Protected volume |
|
|
|
Added feature: Upper Lip with Protected volume |
Added feature: Lower Lip with Protected volume |
|
|
|