-
Click the Divide icon
 .
.
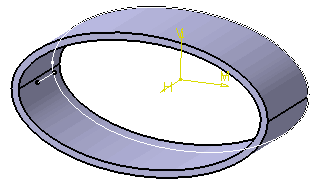
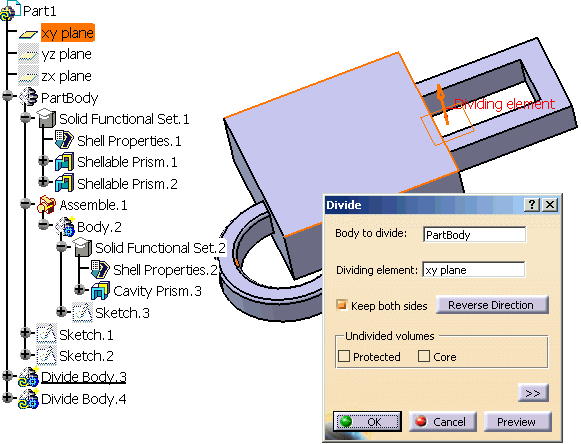
The Divide dialog box is displayed. The in-work body is detected: Body.1 is to be divided.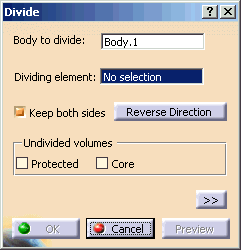
Dividing Element
-
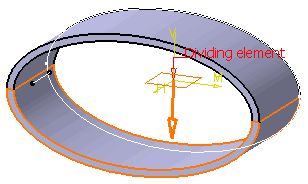
Select xy plane as the dividing element.
Dividing elements can be:
Note that the following contextual commands are available from the field in case you need to create or more easily access the required dividing element:
Create Plane: you can create a plane by using one of the method described in Create Planes.
XY Plane
YZ Plane
YZ Plane
Create Join: joins surfaces or curves. See Joining Surfaces or Curves.
Create Extract: generates separate elements from non-connex sub-elements. See Extracting Geometry.
Keep both sides
By default, the Keep both sides option is on, meaning that both resulting divided bodies are kept. Conversely, when the option is off, only the body lying on the side of the dividing element pointed to by the preview arrow is kept.
The interpretation of the arrow pointing direction is dependent upon the Keep both sides option:
Keep both sides on: The arrow points in the direction (side of the dividing element) of the first body created by the divide operation.
Keep both sides off: The arrow points in the direction (side of the dividing element) of the body to be kept. Clicking Preview gives you an idea of the result:
-
Note that clicking the Reverse Direction button or the arrow reverses the dividing direction.
-
For the purpose of our scenario, keep Keep both sides on and select Reverse Direction button.
-
Click OK to confirm the operation.
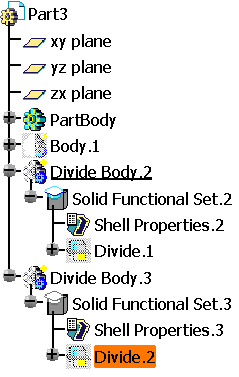
The new functional bodies Solid Functional Set.2 and Solid Functional Set.3 are added to the specification tree. Each functional set contains the following:
-
Shell Properties: Links to the original functional body's shell thickness parameter and face lists. It also contains its own face lists, which means that you can add open faces to a divided body.
-
Divide feature: Contains the result from the divide.
The In work object is changed to Divide Body.2.
-
Undivided Volumes |
The Divide feature splits all the volumes of an undivided body between its divided bodies. The Undivided volumes provides the user with two options:
-
Protected: Do not split the protected volumes but rather to duplicate them within each of the divided bodies.
-
Core: Do not limit the core of either of the divided volumes at the divide surface and allow the internal volumes to be trimmed at the original core extent.
-
Click Internal Feature icon
 .
. Internal Feature dialog is displayed.
Select Sketch.2 for Profile/Surface.
Enter 50mm and select Mirrored extent option.
Click OK.
Select Divide Body.3 in the specification tree and select Hide/Show with RMB.
Double click Divide.1 in the specification tree to edit Divide.1.
Select Core in Undivided volumes option in Divide dialog.
Click OK.
-
Editing a divide feature consists in changing the dividing element or reversing the direction. Note that the Keep both sides option is not available.
-
Both created divide features are siblings, meaning that whenever you edit one of them, the other one reflects the change too.
 |
 |
 |
|
|
 |
Editing a Divide Feature |
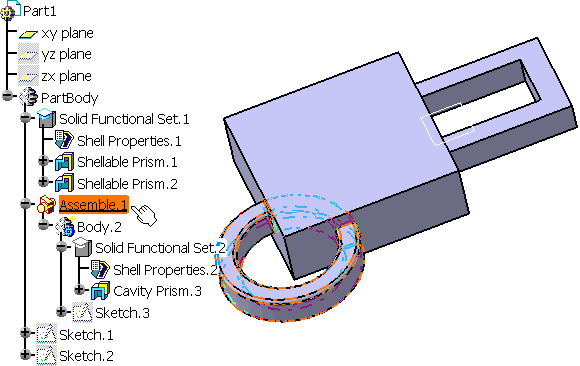
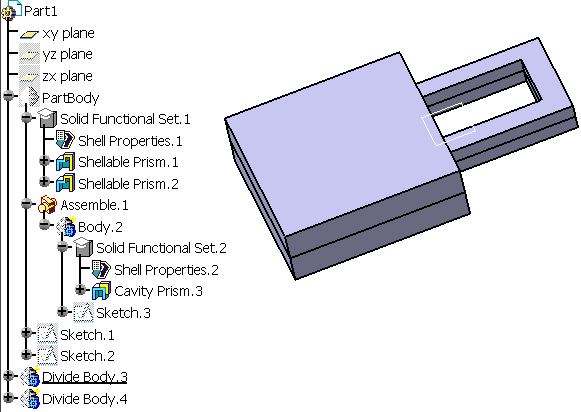
The divide feature only divides the functional solid. If you have an assembling body inserted by the Boolean operation under PartBody in the model, the assembling body will not be divided. Here is a simple example model to show the limitation.
You have a Solid Functional Set and Assemble.1 in the part like below. When you divide PartBody with xy Plane, the assembling body (Assemble.1) is disappeared.
 |
Select PartBody for Body to divide and select xy Plane for Dividing element.
 |
After the Divide, Assemble.1 is still in the Specification tree, but it disappears graphically.
 |