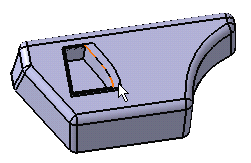
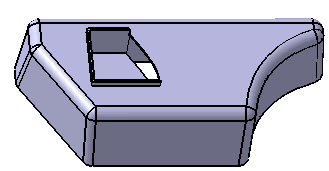
This scenario shows you two different cuts and their impacts on the part.
- First cut: performed on a shellable prism
- Second cut: performed on a pocket
|
-
Click the Cut icon
 .
.
The Cut dialog box is displayed.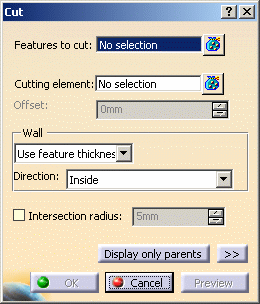
-
Select Shellable Prism.1 as the feature you want to cut.
If you select several features, the field displays the number of selected elements. To act on this selection, just click the
 icon to display the Element
list dialog box that allows you to:
icon to display the Element
list dialog box that allows you to:view the selected elements
remove any element clicking the Remove button
replace any element using the Replace button and selecting a new one in the geometry or the specification tree.
-
Select Extrude.1, Extrude.2 and Plane.1 as the cutting elements.
Here again, if you select several elements, the field displays the number of selected elements. To act on this list, just click the
icon to display the Element list dialog box.
-
Click both arrows on the surfaces to reverse the direction indicating which portion of material is to be kept. The arrows must point toward Shellable Prism.1 as shown here:
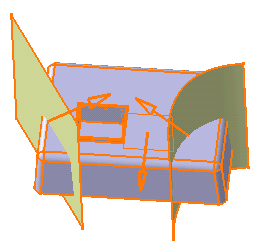
-
The Intersection Fillet option sets the radius of fillets on the edges produced by the cutting surface. For this first cut, check the Intersection radius option and enter 5mm in the dedicated field.
-
The Wall option lets you set if, or how, the Cut command creates walls along the cutting surface. We can leave the default thickness here (body thickness), we will show this option in the Second Cut.
-
Click Preview button to see the result.
-
An offset distance from the selected cutting elements can be entered as an option. Enter 10mm for Offset and click Preview button.
-
In this task, we do not need the offset. Set the offset value back to 0mm.
-
Click OK to confirm.
Intersection Fillet |
The Fillet radius option has changed to Intersection Fillet.
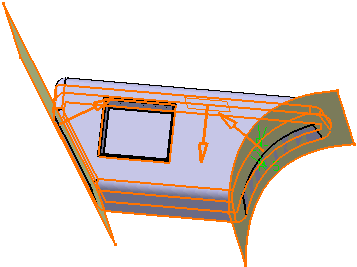 |
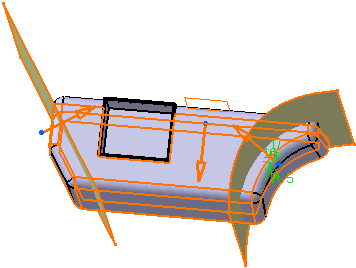 |
The first cut feature is created and the part now looks like this:
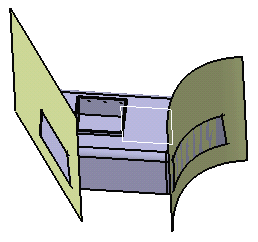
Just hide both cutting surfaces if you wish to see the filleted edges.
Second Cut
-
To create the second cut, click the Cut icon
 again.
 -
Select Pocket.1 as the feature you want to cut.
Note that the Wall options are now available from the dialog box.
-
From the specification tree, select Extrude.3 as the cutting element.
-
Now that Extrude.3 is displayed in the Cutting element field, use the Hide/Show contextual command to show the surface in the geometry area:
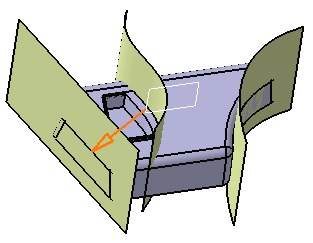
Wall
-
The Wall option lets you set if, or how, the Cut command creates walls along the cutting surface. To define a wall for this second cut, you can set one of the two options available from the drop down list:
-
Use body thickness: the cut wall thickness is that of the active shelled body thickness.
-
Enter thickness: simply enter the value you want. After this option is selected, the value field becomes available. Wall thickness values can only by positive values.
-
Use feature thickness: the cut wall thickness will be the same thickness of the target feature.
-

