-
Select the track created in the previous task (Track.1) either in the geometry area or in the specification tree.

You can also click Path Finder  first and the object afterwards. In this case, the Select
dialog box lets you choose the objects.
first and the object afterwards. In this case, the Select
dialog box lets you choose the objects. -
Click Path Finder
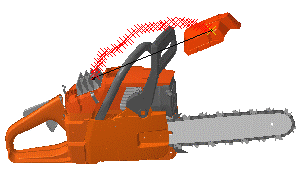
from the DMU Check toolbar.A bounding box appears around the data. 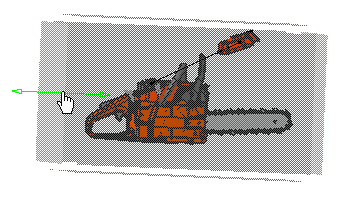
The bounding box can be used to limit the path. You can expand or shrink the bounding box by moving the cursor over the edges until you see an arrow (as shown above) and then pulling the box in the direction you wish to size it. The Path Finder dialog box is displayed. 
(The Basic tab appears by default) You can select options for: On
Result: You can see the object move and its various positions during calculation. You can stop the calculation process at any time.Off
Result: You are not allowed to stop the calculation process and you do not see the progressionStrombo
Result: You can see positions based on a specific parameter (every 20 steps) and you can stop the calculation process.Small (uses the smaller settings to determine the algorithm)
Result: The computation time will take longer.Medium (uses the medium settings to determine the algorithm)
Result: The computation time will take a medium amount of time.Large (uses the larger settings to determine the algorithm)
Result: The computation time takes the least time.Advanced (select only if you want to use path finder's advanced settings, which are determined using the Advanced tab)
-
Keep the default settings:
- Visualization: On
- Steps: Medium
-
Select the Ignore collisions check box to get rid of the irrelevant interferences.
If this box is checked, collisions that already exist for the first shot are ignored. If the last shot is in collision, or near collision, the results of the command may be less than ideal. If an error message appears saying No way out, users should consider altering some of the other path finder settings or moving the object to another position.
-
Click Apply to confirm your operation.
The progress bar is displayed letting you monitor and, if necessary, interrupt (i.e., press the Stop button) the calculation. 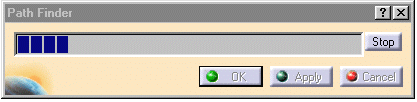
The bounding box disappears as the path is being found; it reappears once the path is completed. -
Click OK.
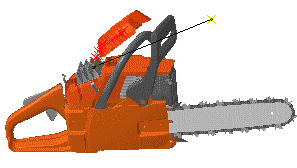
This is what you obtain: 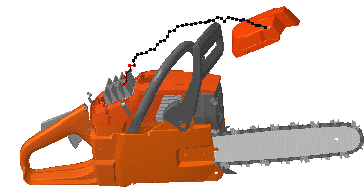
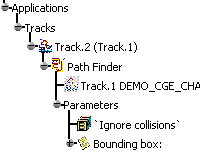
It is identified in the specification tree under a new track (Track.2).
The option Ignore collisions is identified under Parameters (knowledge parameters).