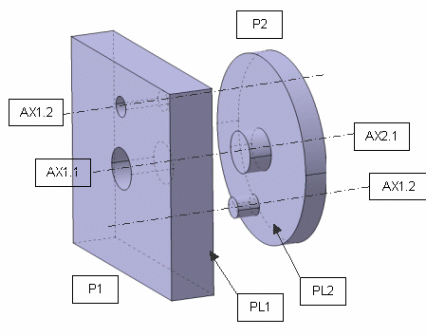
- you want to move P2 in P1, using the smart target, we can create a first coincidence constraint between the two planes referred to as PL2 and PL1
- then, we add a second coincidence constraint between the two axis AX2.1 and AX1.1
- finally we add a third coincidence constraint between the two axis AX2.2 and AX1.2
-
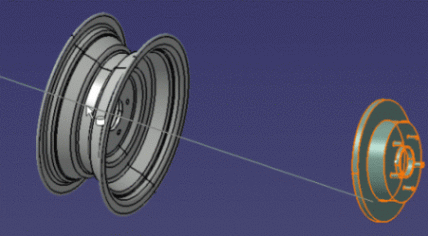
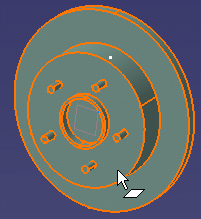
Select Disk.1 either in the specification tree or in the geometry area.
-
Click Track
 from the DMU Simulation toolbar.
You are ready to record your track: select the part to move. In our example, select Disk.1 either in the specification tree or on the geometry. 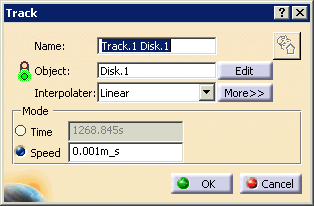
The Player and Manipulation pop-up toolbar appears. -
Click Smart Target
 from the Manipulation toolbar.
The Disk is selected and thus highlighted in the geometry area. The SmartTarget dialog box appears. 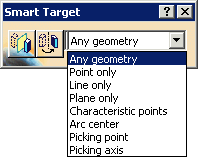
The buttons invert the snap direction as follows:  Invert the snap
direction by symmetry
Invert the snap
direction by symmetry Invert the snap
direction by rotation
Invert the snap
direction by rotation
Inverting the geometry by symmetry is a mirroring operation, and consequently changes the part data getting snapped. (Note that this modification is not reflected in the specification tree.) Also, this option renders the axis system indirect. Inverting the snap direction by rotation does not change the part data and it leaves the axis system direct. -
From the list, select the type of geometry you need (default = Any geometry).
-
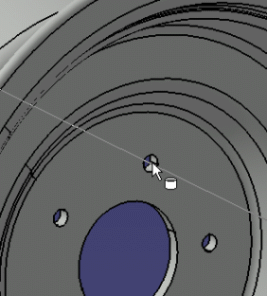
Select a geometric element (a point, line, or plane) on the same to-be-moved component, e.g. a circle of which the center is the center of the entire Disk cylinder in the sample product.
-
Double-click Record (Insert)
 in the Recorder toolbar to activate the automatic insert mode.
For more details on this mode, please refer to Track Editor and Recorder and Recording a Track. -
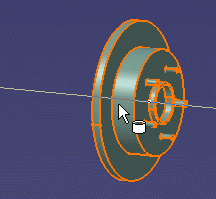
Select the Rim cylinder axis as shown below.
The first coincidence constraint is created. The Disk cylinder is displaced in accordance with the first constraint. You can continue directly to the creation of the second constraint. 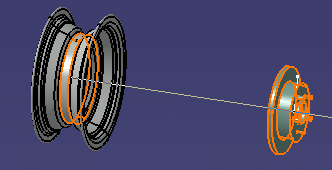
-
Select the Invert the snap direction by rotation
button to position the Disk. The Disk is automatically inverted. 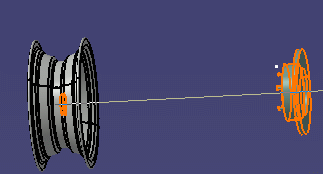
-
Select a geometric element on the to-be-moved component, e.g. the axis passing through one of the nuts of the Disk cylinder.
-
Select a geometric element on the receiving component, e.g. the axe passing through one of the nut holes of the Rim cylinder.
The second constraint is created. The Disk cylinder is displaced in accordance with the second constraint. You can continue directly to the creation of the third constraint. -
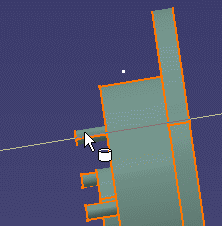
Select the plane of the Disk cylinder containing the nuts.
-
Select the plane of the Rim cylinder containing the nut holes.

The third constraint is created. The two components have been placed together as a function of the three constraints. This is what you obtain. 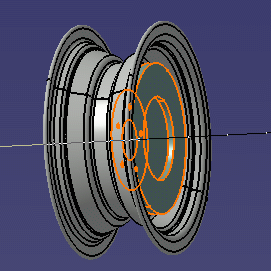
The track is created, you can replay it. 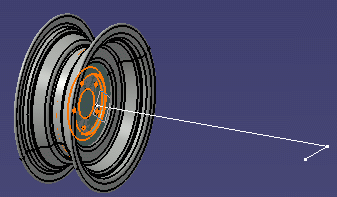
-
Click Smart Target
to exit the command.
| Geometric Features | Design mode | Visualization mode |
| Cylinder axis | Y | Y |
| Surfaces |
Y | Y |
| Edge: Extremities Any point (Ctrl key) |
Y | Y |
| Camera (eye) | Y | Y |
| Construction lines Construction axis |
Y | Y |
| V4 axis system | Y | Y |
| V5 axis system (Only selectable on the specification tree) |
Y | Y |