This task shows you how to add 3D physical properties to a body, on the condition a mesh part was previously created.
A 3D property is a physical property assigned to a 3D part. A solid property references a material assigned to this 3D part. A solid property is associative to the geometry this property points at.
To know more about this property, refer to Solid Property in the Finite Element Reference Guide.
Open the sample41.CATAnalysis document from the samples directory.
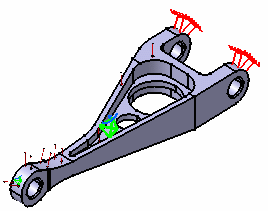

-
Click 3D Property
 in the Model Manager toolbar.
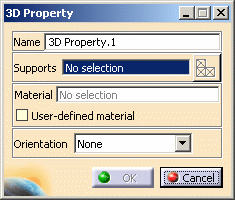
The 3D Property dialog box appears.
-
Name: lets you change the name of the property.
-
Support: lets you select a support.
-
Select Mesh Parts: this button is only available if you have selected a support.
For more details, refer to Selecting Mesh Parts. -
Material: indicates that a material has been applied on the selected support.

If you do not specify a user material, the material taken into account will be the first one found, if any, on the way up from the selected geometry in the specification tree.
-
User-defined material: lets you select an user material on condition that it has been previously created.
For more details, refer Creating an User Material.
The only allowed materials in the 3D property definition are Isotropic, Honey Comb and Orthotropic 3D.
-
Orientation: lets you define an accurate axis system for 3D properties even if the 3D shapes are complex.

This option is only available with the ELFINI Structural Analysis (EST) product. -
None: no axis system will be associated.
-
This option is useful if the associated material is Isotropic.
-
If the material is Orthotropic 3D, the global axis system will be taken as the default axis system.
-
-
By axis: lets you define the axis system you want to associate to the selected user material.
This option is useful if the material is Honey Comb or Orthotropic 3D.
If you select this option, the Component Edition button appears.

To know more about axis system, refer to Axis System Type. -
By surface: lets you select a surface and a direction to orient the 3D property.
This option is useful for complex 3D shapes.
If you select this option, the Component Edition button appears.

Note that the Component Edition button shows an invalid status.
To make it valid, click Component Edition.
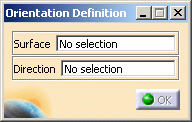
The Orientation Definition dialog box appears:
-
Surface: lets you define the Z-direction by selecting a surface.
-
Direction: lets you define the X and Y-direction by selecting an edge, a line or an axis of a reference axis system.
-
-
-
-
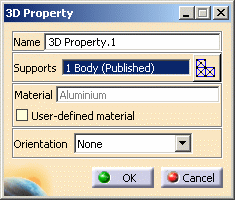
Select the part to be applied a 3D property.
The 3D Property dialog box now appears as shown here:
-
Select By axis as Orientation option.
-
Click the Component edition button.
The Orientation Definition dialog box appears. -
Select Global as axis system Type.
-
Click OK in the Orientation Definition dialog box.
-
Click OK in the 3D Property dialog box.
The 3D property is created.
The specification tree is updated: the 3D Property.1 feature is displayed.
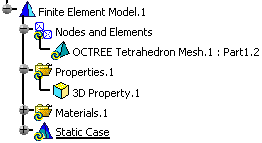
You can manually add or delete 3D properties.
![]()