This task shows you how to distribute masses and inertias on several mesh parts or on a virtual part.
Distributing masses and inertias lets you take into account a spatial distribution of mass on a selection of geometries or on a virtual part.
To simulate a weight on a virtual part, you must couple a mass and an acceleration.
Only available with the ELFINI Structural Analysis (EST) product.
Inertia can be applied to the following types of supports:
|
Geometrical Feature |
Mechanical Feature |
Analysis Feature |
||||
|
Spatial Groups |
Geometrical Groups |
Groups by Neighborhood |
Groups by Boundary |
Others |
||
|
Point/Vertex |
|
|
|
|
|
Virtual Part |
To know more, refer to Authorized Supports.
Distributing Masses and Inertias on Geometrical Selection
Open the sample08.CATAnalysis document from the samples directory.
-
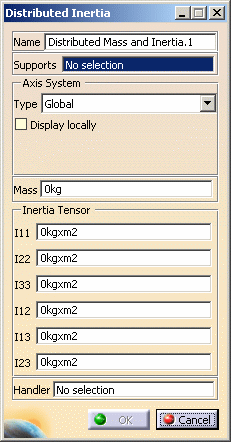
Click Distributed Mass and Inertia
 in the Masses toolbar.
The Distributed Mass and Inertia dialog box appears.
-
Name: lets you change the name of the inertia.
-
Supports: lets you select a support. A support can be a selection of geometries or groups or a single virtual part.

-
Multi selection is available for geometries and groups.
-
Multi selection is not available for virtual part.
-
-
Axis System Type: lets you define the axis system.
To know more about axis system, refer to Axis System Type. -
Mass: lets you specify a mass magnitude value (in kg).
-
Inertia Tensor: lets you specify the components of the inertia matrix ( I11, I22, I33, I12, I13, I23).
-
Handler: lets you select a handler point.
-
If you do not select any handler point, the center of gravity of nodes is selected by default as handler of distribution.
-
If you selected a virtual part as Support, you cannot select a handler point.
-
-
-
Select a support.
In this particular case, select in sequence several geometries and/or groups.
-
Enter a Mass value to define the mass magnitude.
-
Modify the Inertia Tensor components.
-
Click OK.
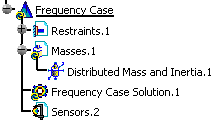
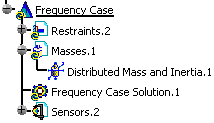
A Distributed Mass and Inertia.1 object appears in the specification tree under the Masses.1 set.
-
Perform a mesh only computation.
To do this:
-
Click Compute
 .
. -
Select Mesh Only.
-
Click OK.
A warning message (Too few nodes or a bad repartition in space of nodes was detected when distributing mass and inertia) may appear after launching the mesh only computation. In this case the spatial distribution algorithm does not respect the selected handler or the inertia tensor components.
This is due to:
- either an insufficient number of nodes belonging to the selected support
- or a bad spatial distribution of the nodes belonging to the selected support (for example: all the nodes lying in a common plan).
-
-
Generate a mass inertia image.
To do this:
-
Right-click Masses.1 in the specification tree and select Generate Image.
-
Select Mass inertia (text).
-
Click OK.
When you select a geometry as support of a distributed mass and inertia, the only available image is Mass inertia (3x3 mass tensor). Point mass image (punctual tensor) and Mass moment of inertia image (3x3 inertia tensor) are not available.
-
Distributing Masses and Inertias on a Virtual Part
Open the sample28_1.CATAnalysis document from the samples directory.
-
Click Distributed Mass and Inertia
in the Masses toolbar.The Distributed Mass and Inertia dialog box appears.
-
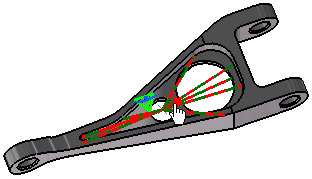
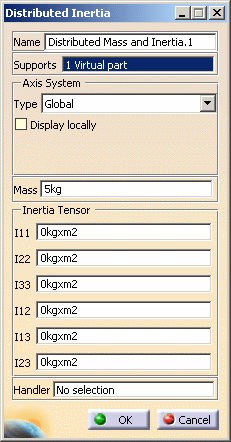
Select a virtual part as Support.
In this particular case, select the Rigid Virtual Part.1 either from the specification tree or directly on the geometry as shown below:
-
You cannot select several virtual parts (multi selection is not available).
-
You cannot select a handler point if you select a virtual part as Support (a virtual part already has a handler point).
-
-
Enter a Mass value to define the mass magnitude.
In this particular example, enter 5kg as Mass value.
-
Modify the mass inertia components.
-
Click OK.
A Distributed Mass and Inertia.1 object appears in the specification tree under the Masses.1 set.
-
Generate a mass moment of inertia image and a point mass image.
To do this:
-
Click Compute
. -
Select Mesh Only.
-
Click OK.
-
Right-click Masses.1 in the specification tree and select Generate Image.
-
Hold down Ctrl and select Mass moment of inertia (text) and Point mass text.
-
Click OK.
When you select a virtual part as support of a distributed mass and inertia, the only available images are Point mass image (punctual tensor) and Mass moment of inertia image (3x3 inertia tensor). Mass inertia (3x3 mass tensor) is not available.
-
![]()