Section views make drawings more readable by replacing the hidden elements of parts, including holes, with filled areas.
-
Double-click the view from which you want to create the section view, to activate it. In this particular case, double-click the left view.
-
In the drawing window, click Offset Section View
") in the Views toolbar (Sections sub-toolbar).
in the Views toolbar (Sections sub-toolbar). -
Select the axis line in the left view.
Note that selecting this axis line makes the view callout associative by default to the corresponding 3D feature.
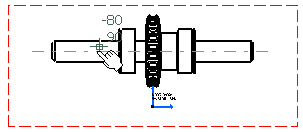
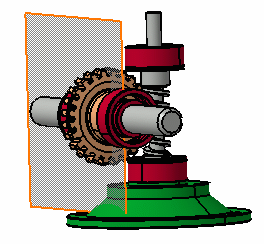
The first point of the cutting profile is automatically created on the view. The section plane appears and moves dynamically on the 3D sub-assembly while you define the profile on the drawing.

-
Double-click the last point of the cutting profile to end its creation.
The section plane automatically disappears, and a preview is displayed.
-
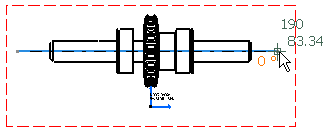
Define the section view position using the cursor.
")
Positioning the view also defines the section view direction, as if it were a left or a right projection view. The direction of the callout blue arrows changes as you change the cursor position. -
Click to generate the view. A progress bar appears while the view is being created.
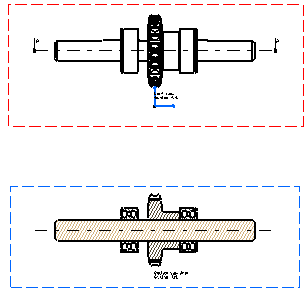
- In our example, the various parts use a material to which a specific pattern is associated. In this case, it is the pattern associated to this material which is used. For more information, refer to View Generation Definition in the Interactive Drafting User's Guide.
- You may modify the pattern (hatching, dotting, coloring or motif). For more information, refer to Modifying a Pattern.