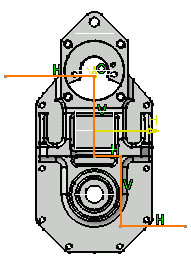
Section views / section cuts are usually created using a cutting profile as the cutting plane; such a profile is typically driven using concentricity or parallelism constraints. Defining a profile in 3D to create a section view / section cut enables you to make the profile associative with the geometry, and therefore to drive this profile using dimensional constraints, for example.
-
In the Part window, click Sketch
 and select the xy plane as the reference plane.
 You are now in the Sketcher workbench.
-
Click Profile
 and sketch the profile you will use as cutting plane. For the purpose of
this scenario, make sure you sketch your profile using orthogonal lines.
-
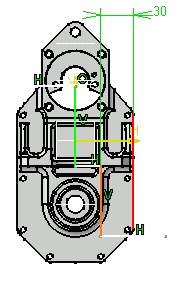
Click Constraint
 to create dimensional constraints between your profile and other
elements.
-
Now, click a vertical line and the edge of the part to create a dimensional constraint between them.
-
Exit the Sketcher workbench.
-
In the Drawing window, click Update
 to update the view.
 -
Click Offset Section View
 in the Views toolbar (Sections sub-toolbar).
Depending on the type of profile you sketched and on the type of section (offset or aligned) you want, you can select another icon in the Sections sub-toolbar. If the 3D profile is not valid for generating the appropriate view, you will not be able to select it. In this case, you will need to select another icon. -
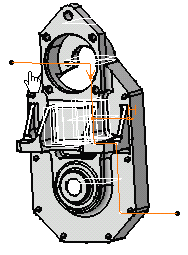
Select the profile on the 3D part.
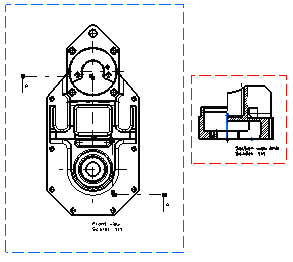
The cutting profile is automatically displayed on the front view as well as a preview of the view to be generated. Positioning the section view amounts to defining the section view or the section cut direction.

-
Click to generate the view.

- You can modify the section view / section cut by editing the 3D profile. After doing so, don't forget to update the drawing.
- When editing a 3D profile, make sure that you modify it in accordance with the type of section (offset or aligned) you created: if an edited profile is invalid when you update a drawing, the associated section view / section cut will not be displayed (an error symbol will appear instead).
- If you delete the 3D profile and then update the drawing, the section view / section cut will not be deleted. The profile will no longer be associated with the geometry. You can subsequently edit the profile directly in the drawing by double-clicking it.
About Patterns
The patterns which are used to represent the section are defined in the standards. For more information, refer to Pattern Definition in the Interactive Drafting User's Guide.
You may modify the pattern (hatching, dotting, coloring or motif) by right-clicking the pattern and selecting Properties from the contextual menu. This will display the Properties dialog box in which you may either select a new pattern or modify some graphical attributes of the existing pattern. For more information, refer to Modifying a Pattern.
About the Cut in section views capability
In an assembly, you can define that given parts will or will not be sectioned when generated into section views. (This capability is not available for section cuts.)
In the Assembly Design workbench, select one part, then the Edit > Properties command from the menu bar from and either activate or de-activate the Cut in section views option. You can also do this when overloading element properties in a view generated from a CATProduct.
If you choose to not cut elements in section views (i.e. if you uncheck the Cut in section views option), note that if the cutting profile intersects an uncut part, then this part will not be cut and will be entirely projected.
About section views or section cuts generated using the Approximate generation mode
You can now generate section views or section cuts using the Approximate generation mode. For more information on the approximate generation mode, refer to Customizing Settings: View.
When generating section views or section cuts using the Approximate generation mode, or when switching a section view/cut from exact mode to approximate mode (i.e. via Edit > Properties), be aware of the following information:
Patterns
In the case of parts which use a material to which a specific pattern is associated, section views/cuts in Approximate mode do not inherit the material properties from the 3D, and therefore do not use the pattern associated to this material.
Pattern properties are not persistent: for instance, after switching an exact view to the approximate mode, and vice versa, the pattern may change.
The Cut in section views capability
If you choose to not cut elements in section views (i.e. if you uncheck the Cut in section views option), note that this capability does not work for section views generated using the Approximate generation mode: selected elements will be cut. Likewise, if you switch an exact view to the approximate mode, the elements for which you unselected the Cut in section views option will be cut in the view.
![]()