- ATOMIZER.cgr
- BODY1_2.cgr
- BODY2_2.cgr
- LOCK.cgr
- NOZZLE_1_1.cgr
- NOZZLE_1_2.cgr
- REGULATOR.cgr
- REGULATION_COMMAND.cgr
- TRIGGER.cgr
- VALVE.cgr
They are to be found in the online documentation file tree in the DMU
Optimizer sample folder dmoug/samples
You can manage the Silhouette result as alternate shape automatically.
For more detailed information, please read Using Simplification Command and More About Simplification
-
Click Silhouette
 in the DMU Optimizer toolbar.
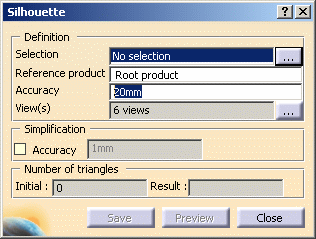
The Silhouette dialog box appears:
-
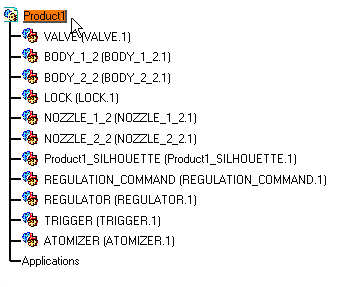
Select Product1 in the specification tree. (The number of triangles representing the tessellated shape of the selected product is displayed in the Number of triangles field.)

-
Enter the desired value in the Accuracy field, for instance 2mm.
-
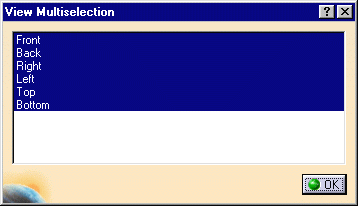
Click the View(s) button
 to
display the View Multiselection dialog box.
 -
Select the desired views. The 6 views for instance.
-
Click OK to confirm your operation.

-
Click Preview to obtain a silhouette preview.

The progress bar is displayed letting you monitor and, if necessary, interrupt (Cancel option) the calculation.
The Preview window is also displayed.
The number of triangles representing the silhouette result is displayed in the Number of triangles field as shown below:

-
Click Save.
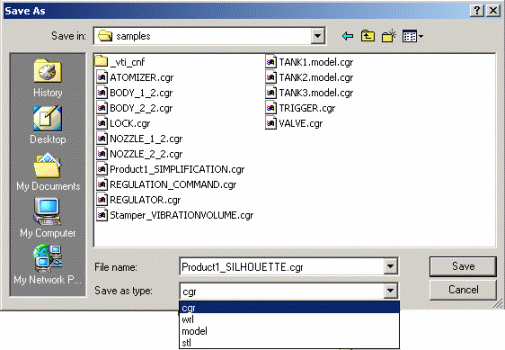
The Save As dialog box is displayed -
Set the Type to .cgr

You can save your result as a .stl file. This format can be reused and imported in other CATIA products for design purposes.
For instance, with Digitized Shape Editor you can recreate exact surfaces from the imported point shell. -
Click Close.
-
Identify the folder in which you want to save the file.
-
Enter a file name.

-
Click Close to exit the silhouette command.
![]()