For more information on the operating mode, please refer to Plunge Milling.
Click Plunge Milling
![]() then the geometric
components
then the geometric
components
![]() to be machined.
to be machined.
Only the geometry is obligatory, all of the other requirements have a
default value.
Regarding the machining strategy:
- Each of the plunge tool path:
- Starts at a given distance from the rough stock and will stop at a given distance from the part taking into account the offsets,
- Takes into account the non cutting diameter of the tool.
- The plunge tool path positions are placed on a grid:
- Rectangular, defined by two step values, a direction, a center point. The order of the plunges is fixed.
- Defined by you, from selected points or from contours, defining the position and the order of machining.
- The tool plunges starting from a position defined by the tool contact with the rough stock plus the Axial safety distance.
- The plunge stops when:
- The bottom plan (plus offset) is reached,
- The tool center touches the material (when the non cutting diameter is not null),
- The tool reaches the part (plus offset).
- A number of strategy parameters are available:
- in the Machining
tab:
- the Machining tolerance,
- the Minimum plunging length,
- in the Axial tab:
- the Axial safety distance,
- the Distance after first cut,
- the Distance before bottom,
- the Lateral retract distance,
- the Raise distance.
- in the Grid tab, according
to the Grid type:
- the Discretization step,
- The Transversal step,
- the Longitudinal step,
- the Groove width,
- the Groove step,
- the Machining style.
- in the Machining
tab:
- Center cutting plunger,
- Side plunging milling cutter.
and speeds and rates
![]() .
.
You can also define transition paths in your machining operations by
means
of NC macros
![]() as needed.
as needed.
Plunge Milling: Machining Strategy tab
Plunge Milling: Machining tab
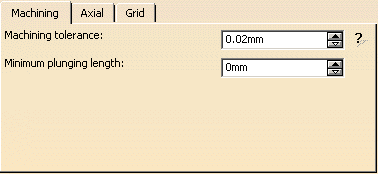
Machining tolerance
Maximum allowed distance between the theoretical and
computed tool path.
Consider the value to be the acceptable chord error.
Minimum plunging length
If the distance to be machined along Z on one of the point is lower than the Minimum plunging length, this point is not machined.
Plunge Milling: Axial tab
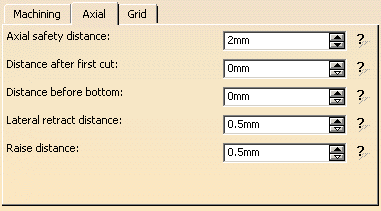
Those parameters are illustrated below:
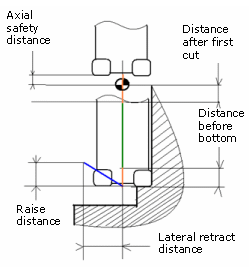
- The retract motion is defined by the Lateral retract distance and the Raise distance.
- Its direction is automatically defined by the position of the tool in the material.
- The motion will be done insuring that the tool cannot be damaged (no machining during this motion): there is a check with the remaining material of the stock
Plunge Milling: Grid tab
Its content varies with the Grid type selected:

Only the sensitive icon below is available.
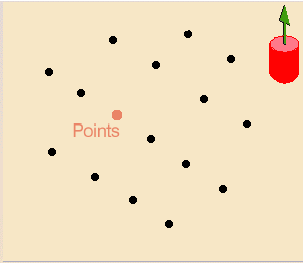
Click Points in the sensitive icon, and select the points in the
3D Viewer.
Double-click anywhere to validate the selection and revert to the dialog
box.
The selection order defines the machining order.
Once the points have been selected, a contextual menu is available in the
sensitive icon
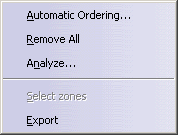
or on the points
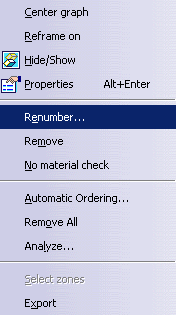
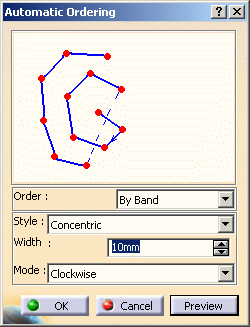
Automatic Ordering enables you to re-order all the points as
shown in the dialog box that is displayed.
while Renumber changes the order of individual points.
No material check disables the material check on individual
points.
A sensitive icon and one parameter are available.
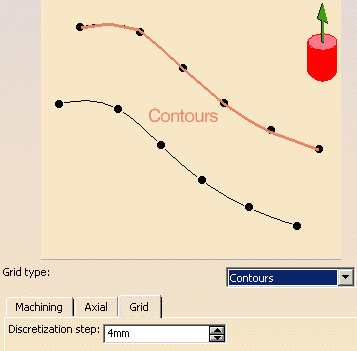
Click Contours in the sensitive icon and select the contours in
the 3D Viewer.
Double-click anywhere to validate the selection and revert to the dialog
box.
- The contours may be ordered or not, closed or not.
- The contact points are computed from those contours, using the Discretization step.
- The initial ordering of the points on a contour follows the orientation of the contour.
- To ensure a correct ordering of the points, you can either re-order the contours, or use the Renumber contextual menu item.
A sensitive icon and several parameters are available.
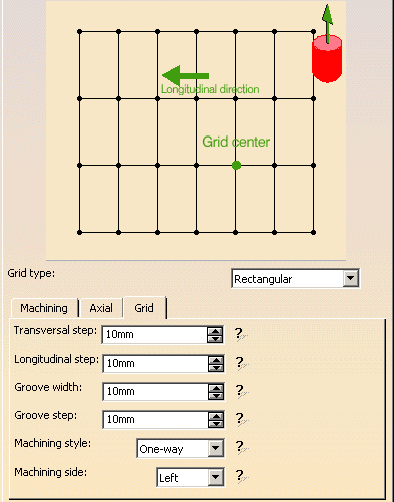
Click Grid center in the sensitive icon and select the corresponding point in the 3D Viewer.
|
|
Input of Grid center is not mandatory. By default, the computation of the grid is based on the default Longitudinal direction. |
Starting from the Grid center, the grid is computed along a
Longitudinal direction.
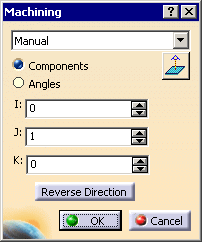
If necessary, click
Longitudinal direction
and enter the required direction in the dialog box that is displayed.
First, the tool machines a groove:
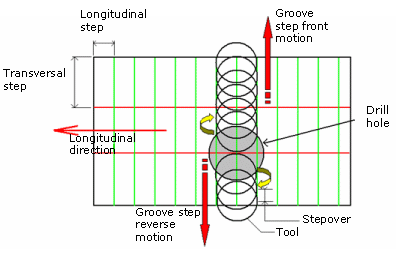
and then reaches each of the points of the grid with a constant fixed order
defined by a Machining
style:

When you select a One-Way Machining style, you can choose the
Machining side
(Left (material is on the left of the tool) or Right
(material is on the right of the tool))
|
|
|
The groove has a specific
Groove step and a specific Groove width.
The default Groove width
is the tool diameter, you can define a larger Groove width but it
cannot exceed twice the tool diameter.
In that case, the groove will be machined in Zig-zag Machining style.
|
|
The Machining style of the groove is independent from the strategy used to machine the rest of grid. |
Plunge Milling: Geometry
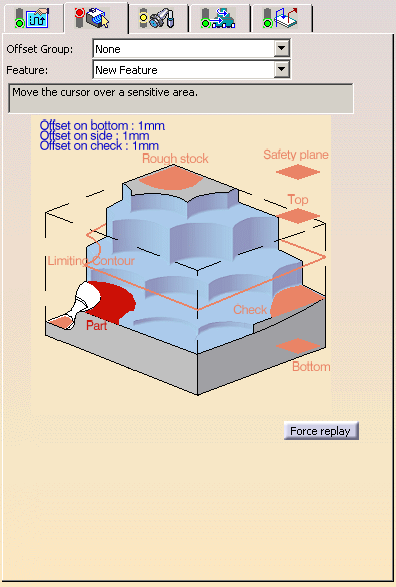
You can specify the following geometry:
- the Part to machine.
- Rough stock (optional).
- If you do not select a rough stock, the rough stock defined at the Part Operation level is taken into account to compute the material remaining after all the operations placed before the Plunge Milling operation.
- In Prismatic Machining, as rework is not possible, you must select a top and a bottom plane if you want to divide the machining into several operations.
- The rough stock can only contain a plane or a planar face: the rough stock taken into account will be the material between this face and the part.
- Offset on bottom: it is the offset on horizontal areas.
- Offset on side: it is the offset on vertical areas
- Check element with possible Offset on check.
The check element is often a clamp that holds the part and therefore is not an area to be machined. - Area to avoid if you do not wish to machine it (the small light brown corner near the part selection area).
-
Safety plane. The safety plane is the plane that the tool will rise to at the end of the tool path in
order to avoid collisions with the part.
You can also define a new safety plane with the Offset option in the safety plane contextual menu.
The new plane will be offset from the original by the distance that you enter in the dialog box
along the normal to the safety plane.
If the safety plane normal and the tool axis have opposed directions, the direction of the safety plane normal
is inverted to ensure that the safety plane is not inside the part to machine.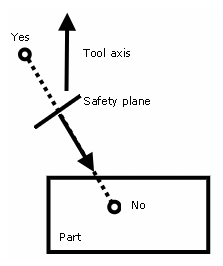
- Top plane which defines the highest plane that will be machined on the part,
- Bottom plane which defines the lowest plane that will be machined on the part,
- Limiting contour which defines the machining limit on the part.
![]()
Appears when
invalid faces have been detected.
This message disappears when you close the dialog box or when the next
computation is successful.
![]()
Appears when invalid faces have been detected and when you have decided
to ignore them.
This message remains displayed as a warning.
Pick the text to switch from one status to the other.
Plunge Milling: Feeds and Speeds
In the Feeds and Speeds tab page, you can specify
feedrates for approach, plunge
retract, machining and finishing as well as a machining spindle speed.
Feedrates and spindle speed can be defined in linear or angular units.
A Spindle output checkbox is available for managing output of the SPINDL
instruction in the generated NC data file.
If the checkbox is selected, the instruction is generated. Otherwise, it is
not generated.
Feeds and speeds of the operation can be updated automatically according
to tooling data and the Rough or
Finish quality of the operation. This is described in
Update of Feeds and Speeds on Machining Operation in the
NC Manufacturing Infrastructure user's guide..
Plunge Milling: Macro data
For more information on how to save or load an existing macro,
please refer to
Build and use a macros catalog in the NC Manufacturing
Infrastructure user's guide.
The possible Approach and Retract macros are (in Build by user mode):
- Add Axial motion
- Add distance along a line motion
- Add Tangent motion
- Add Horizontal motion
The possible Clearance macros are:
- Optimized,
- Along tool axis.