Plunge milling can be carried out with:
- a rectangular grid of points, e.g. to perform a quick roughing operation with a plunger,
- a set of selected ordered points, when you know exactly where the tool must plunge,
- a set of selected contours, e.g. to perform a contouring operation.
To create the operation you define:
- the
geometry of the part to machine
 ,
,- The operation takes into account the geometrical environment and
thus accepts the definition of the part and the definition of the rough stock. - If the rough stock is not defined, the operation uses the rework
technology
in order to take into account the shape of the stock at the beginning of the operation
- The operation takes into account the geometrical environment and
- the
tool to use
 :
:- Center cutting plungers,
- Side plunging milling cutters.
- the parameters of the
machining
strategy
 ,
, - the feedrates and spindle speeds
 ,
, - the macros
 .
.
Only the geometry (part, points and contours) is obligatory, all of the other requirements have a default value.
For more information on the parameters, please refer to Plunge Milling Parameters.
- make the Manufacturing Program current in the specification
tree if you want to define an operation
and the part/area to machine at the same time, - or select a machining feature from the
list if you have already defined the area to machine and
now you want to define the operation to apply to it.
Below we are going to see how to do the first of these and how to define an user grid.
Open file Plunge1.CATProcess from the samples directory.
-
Click Plunge Milling
 in the Roughing Operations sub-toolbar.
A entity and a default tool are added to the program.
The dialog box opens at the geometry tab page .
.
This page includes a sensitive icon to help you specify the geometry to be machined.
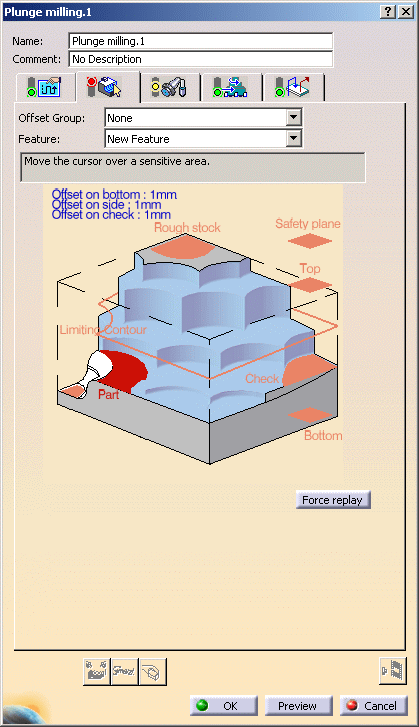
The area that represents the part geometry is colored red indicating that the geometry is required for defining the area to machine. -
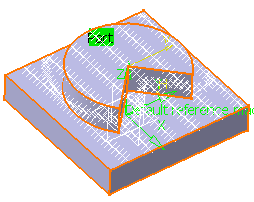
Click the red area representing the part in the sensitive icon and select the part in the viewer.
Then double-click anywhere in the viewer to confirm your selection and redisplay the dialog box.
-
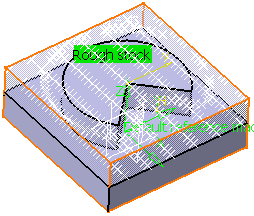
Click the red area representing the rough stock in the sensitive icon and select the rough-stock as shown below.
-
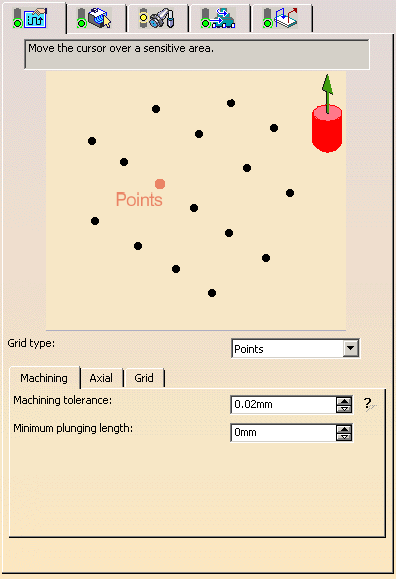
Go to the Machining Strategy tab.
Select Points as the Grid type.
-
Select points in the 3D Viewer.
As you pick them, each point is given a machining order.
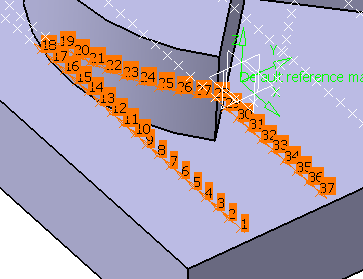
Note that the selection trap is available, and that only "real" points can be selected (no sketch points, no repetition points).
An alternative is to use the Grid tab to define the grid. -
When you have selected the required points, double-click in the 3d viewer to validate your selection and revert to the dialog box.
-
If necessary, you can reorder the points:
-
manually: right-click the point and select Renumber in the contextual menu.
Type the Renumber position in the dialog box that is displayed.
Click OK. -
automatically: right-click the point and select Automatic Ordering in the contextual menu.
-
-
Click Tool Path Replay
 .
.
A progress indicator is displayed. You can cancel the tool path computation at any moment before 100% completion.
The tool path is displayed.
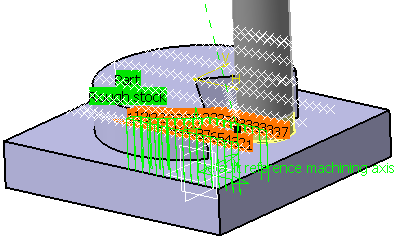
Invalid Face
-
If a tool path cannot be computed because of invalid faces,
an explicit warning message like this one will appear:

Each invalid face is highlighted in red, with an arrow pointing on it.

This visualization is removed when you close the main dialog box or
when you select Remove in the contextual menu.

-
Click OK in the Warning box to revert to the main dialog box.
In the Geometry tab, a message Ignore invalid faces: No is displayed: -
You can either:
- close the dialog box.
When you reopen it, the Ignore invalid faces: No will not be displayed. - heal the defective geometry and restart the computation.
If it is successful the message Ignore invalid faces: No will disappear. - ignore the invalid faces. Click the text Ignore invalid
faces: No.
It will turn to Ignore invalid faces: Yes and the computation will continue.
The message remains displayed as a warning.
- close the dialog box.
We recommend that you ignore only faces that will not affect the tool path.
Otherwise this may lead to defective tool paths.