![]()
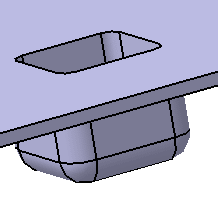
This task shows you how to create a surface stamp by specifying the various geometrical parameters of the punch:
Creating a Surface Stamp
![]()
Open the
NEWStamping4.CATPart document from the samples directory.
If you use the Aerospace SheetMetal Design workbench, open the
Aero_Stamping4.CATPart document.
![]()
-
Click Surface Stamp
") .
.The Surface Stamp Definition dialog box opens, providing default values. 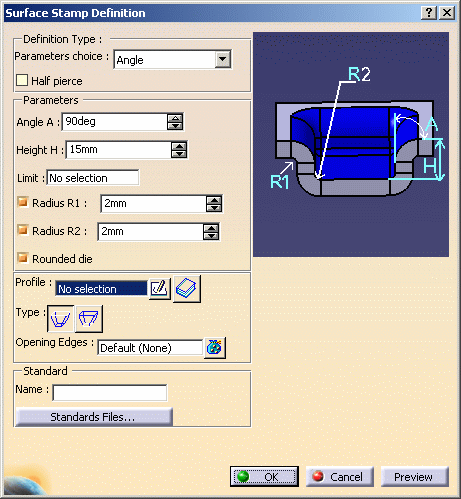
-
In the specification tree, select Sketch-for-Surface-Stamp, the profile previously defined.
-
Change the value in the different fields, if needed.
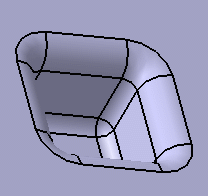
In our example, we chose the following values: -
Angle A: 90deg
-
Height H: 15mm
-
Radius R1: 2mm
-
Radius R2: 2mm
The surface stamp is previewed. 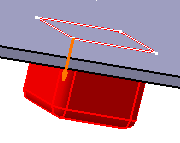
-
-
Click Preview to compute the surface stamp.
-
Click OK to validate.
The surface stamp (identified as Surface Stamp.1) is created and the specification tree is updated accordingly. 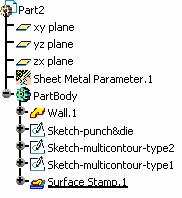
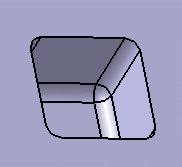
Creating a Surface Stamp without Fillets
This means that all edges of the surface stamp are filleted.
- Rounded Die lets you create a surface stamp which die's edges are all filleted.
If you click to clear the Rounded Die check box, the surface stamp should look as shown below.
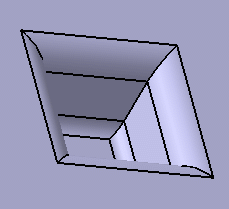
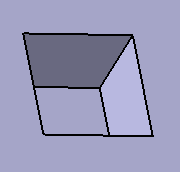
- The Radius R2 lets you create fillets on the surface stamp's bottom.
If you click to clear the Radius R2 check box, the Rounded Die check box is automatically cleared as well and the surface stamp should look as shown below.

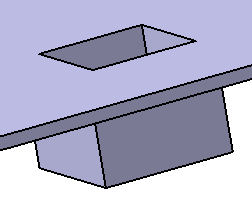
- The Radius R1 lets you create fillets on the surface stamp's top.
If you click to clear the Radius R1 check box but keep Radius R2 and Rounded die selected, the surface stamp should look as shown below.
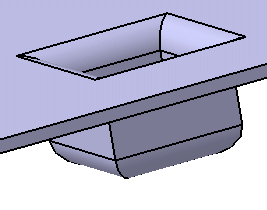
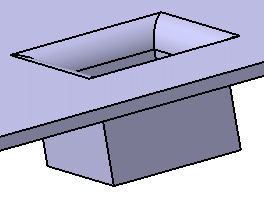
Creating a Surface Stamp with a Limiting Plane
-
Double-click Surface Stamp.1 in the specification tree to edit it.
-
In the Surface Stamp Definition dialog box, right-click in the Limit field.
-
In the contextual menu, select Create Plane.
The Plane Definition dialog box is displayed. -
Select the xy plane in the specification tree as reference.
The offset from the plane and its direction is previewed.
- To be able to use a limiting plane for a stamp, the profile of the stamp must be based on a sketch.
- The limiting plane has to be parallel to the sketch plane. If not, an error message is displayed.
-
Use the up and down arrows to change the offset value.
In our scenario, we selected an offset of 25mm. 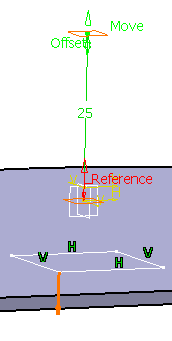
-
If needed, click Reverse Direction to change the offset direction.
-
Click OK to close the Plane Definition dialog box.
The stamp based on the limiting plane is previewed. 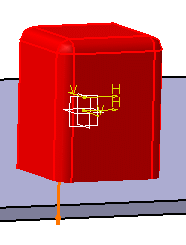

Should you need to delete or edit the plane you previously selected, right-click the Limit field and select the appropriate item in the contextual menu. 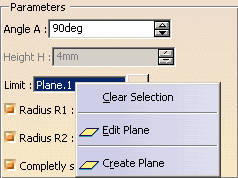
For more information on planes, refer to Creating Planes in Generative Shape Design User's Guide. 
You will note that the Height field is deactivated. This is due to the fact that the height of the stamp is now based on the distance between the stamping point and the plane which is coincident with the external face of the stamp. -
Click Preview to compute the surface stamp.
-
Click OK to close the Surface Stamp Definition dialog box.
The stamp is created. 
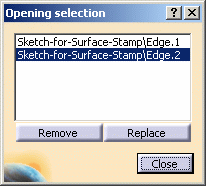
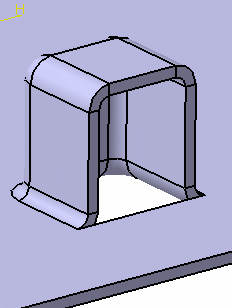
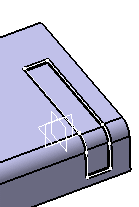
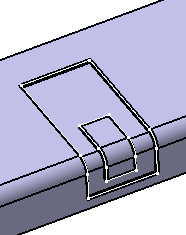
Creating a Surface Stamp with Opening Edges
-
Double-click Surface Stamp.1 in the specification tree to edit it.
-
In the Surface Stamp Definition dialog box, click the Opening Edges field to activate it.
-
On the geometry, select one opening edge as shown below.
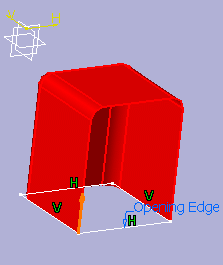
- You can select several opening edges.
- If you want to delete your selection, right-click on the Opening Edges field and select Clear Selection in the contextual menu.
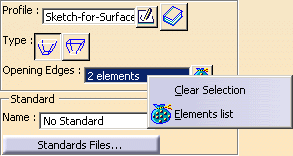
Should you need to modify the opening edges: - right-click on the Opening Edges field and select Elements
list in the contextual menu and use the Remove or
Replace button to change your selection.
or - click the icon at the right of the field, then use the Remove or Replace button to change your selection.
-
Click Preview to compute the surface stamp.
-
Click OK to create the stamp with opening edges.
Inserting a Profile from a Catalog
-
Click Surface Stamp
.
The Surface Stamp Definition dialog box opens, providing default values. -
Change the value in the different fields, if needed.
In our example, we chose the following values: -
Angle A: 90deg
-
Height H: 10mm
-
Radius R1: 1mm
-
Radius R2: 1mm
-
-
Click catalog
 to select a stamp feature
from the catalog.
to select a stamp feature
from the catalog.The Catalog Browser dialog box is displayed. -
If needed, browse to the directory where the stamp catalog is filed.
In our example we selected Aero_Sheetmetal_Cutouts catalog. 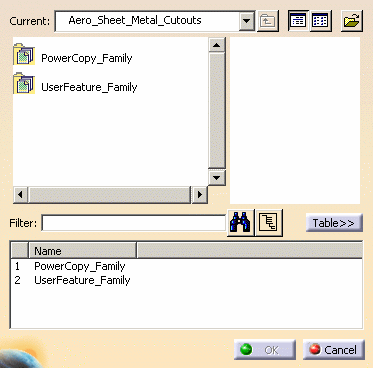
-
Double-click on UserFeature_family.
The features available in the catalog are displayed. 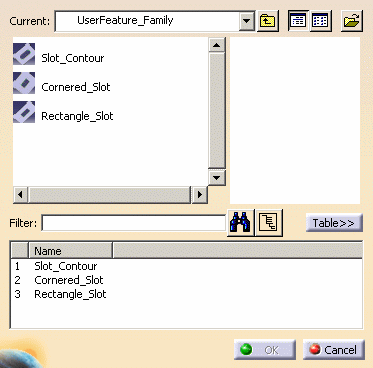
-
Select Slot_Contour and click OK to close the catalog browser.
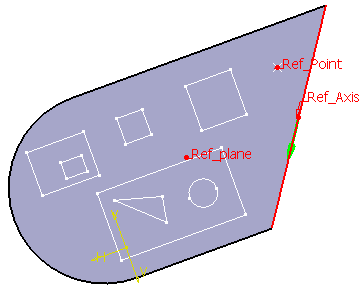
-
On the geometry, select the inputs needed to insert the feature:
-
Use Wall.1 or Web.1 as Reference plane;
-
Use Point.1 as Reference point;
-
Use an edge of Wall.1 or Web.1 as Reference axis.

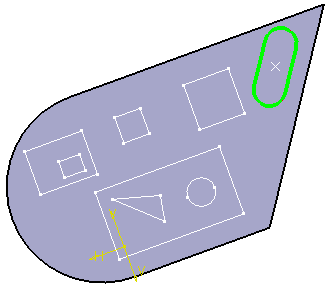
-
-
Click OK to insert the feature.
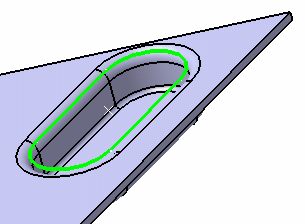
-
Click Preview to compute the surface stamp.
-
Click OK again to create the stamp.
Creating a Stamp Based on a Multi Contour Profile
Applying parameters to the top of the surface stamp
-
Click Surface Stamp
. -
In the specification tree, select Sketch-multicontour-type1
The Surface Stamp Definition dialog box opens. -
Select Angle as Definition type and the first type of stamp
 .
. -
Change the value in the different fields, if needed.
In our example, we chose the following values: -
Angle A: 90deg
-
Height H: 10mm
-
Radius R1: 2mm
-
Radius R2: 2mm
The surface stamp is previewed. 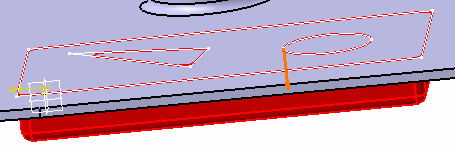
-
-
Click Preview to compute the surface stamp.
-
Click OK to validate.
The surface stamp with several inner contour (identified as Surface Stamp.2) is created and the specification tree is updated accordingly. 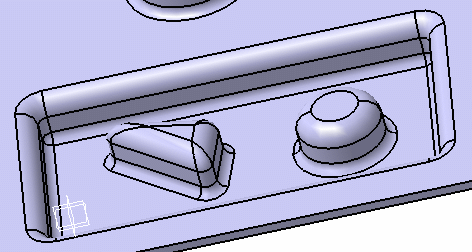
Applying parameters to the bottom of the surface stamp
-
Click Surface Stamp
. -
In the specification tree, select Sketch-multicontour-type2
The Surface Stamp Definition dialog box opens. -
Select Angle as Definition type and the second type of stamp

-
Change the value in the different fields, if needed.
In our example, we chose the following values: -
Angle A: 60deg
-
Height H: 13mm
-
Radius R1: disabled
-
Radius R2: disabled
The surface stamp is previewed. 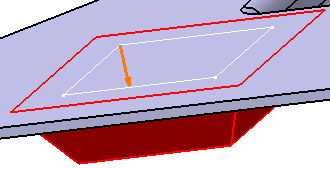
-
-
Click Preview to compute the surface stamp.
-
Click OK to validate.
The surface stamp with several inner contour (identified as Surface Stamp.3) is created and the specification tree is updated accordingly. 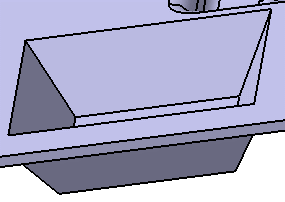
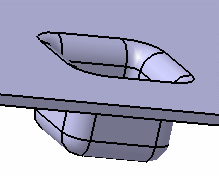
Creating a Stamp Based on a Punch and Die Profile
-
Click Surface Stamp
. -
In the Surface Stamp Definition dialog box, select Punch and Die as Definition type.

-
In the specification tree, select Sketch-punch&die
The Surface Stamp Definition dialog box opens. -
Change the value in the different fields, if needed.
-
In our example, we chose the following values:
-
Height H: 13mm
-
Radius R1: disabled
-
Radius R2: disabled
A light preview is displayed. 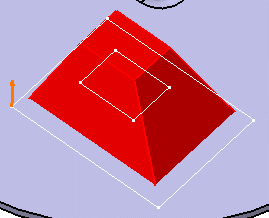
-
-
Click Preview to compute the surface stamp.
-
Click OK to validate.
The surface stamp with two contours (identified as Surface Stamp.4) is created and the specification tree is updated accordingly. 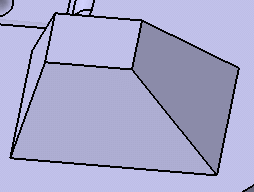
Each punch edge must be parallel to the corresponding die edge. 
Creating a Stamp Based on a 3D Curve
-
Open the NewStamping12.CATPart document. If you use the Aerospace SheetMetal Design workbench, open the Aero_Stamping12.CATPart document.
The part contains a simple 3D curve profile and a 3D multicurve profile. -
Click Surface Stamp
. -
In the specification tree, select Folded curve.2.
The Surface Stamp Definition dialog box opens. -
Select Angle as Definition type and the first type of stamp
. -
Change the value in the different fields, if needed.
In our example, we chose the following values: -
Angle A: 90deg
-
Height H: 6mm
-
Radius R1: 2mm
-
Radius R2: 2mm
-
-
Click Preview to compute the surface stamp, then click OK to validate.
-
Click Surface Stamp
. -
In the specification tree, select Folded curve.1.
The Surface Stamp Definition dialog box opens. -
Select Angle as Definition type and the first type of stamp
. -
Change the value in the different fields, if needed.
In our example, we chose the following values:
-
Angle A: 90deg
-
Height H: 6mm
-
Radius R1: 2mm
-
Radius R2: 2mm
-
-
Click Preview to compute the surface stamp, then click OK to validate.
Creating a Two Profile Stamp
-
Open the NewStamping9.CATPart document.
-
Click Surface Stamp
. -
In the Surface Stamp Definition dialog box, select Two Profiles as Definition type.

-
Check to deactivate Rounded Die.
-
In the specification tree, select Sketch.2 as first profile and Sketch.3 as second profile.
- If you want to define the internal part of the stamp, use the
Inner type
 .
. - If you want to define the external part of the stamp, user
the Outer type
 .
.
- If you want to define the internal part of the stamp, use the
Inner type
-
Click Preview to compute the stamp.
You are warned that the stamp cannot be built. -
Start coupling sketches together selecting points.
You should end up with six couplings. 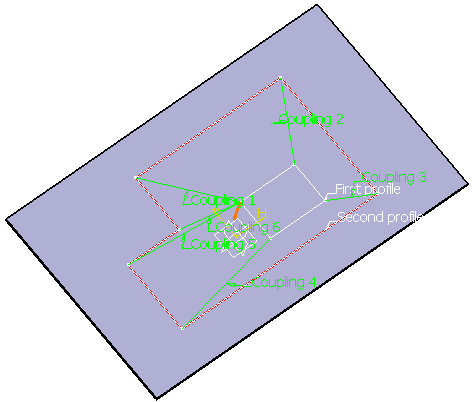
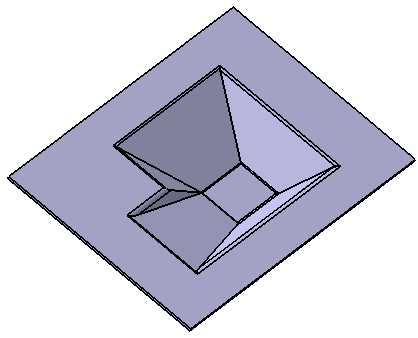
Once the coupling is done, the stamp can be computed and is previewed. 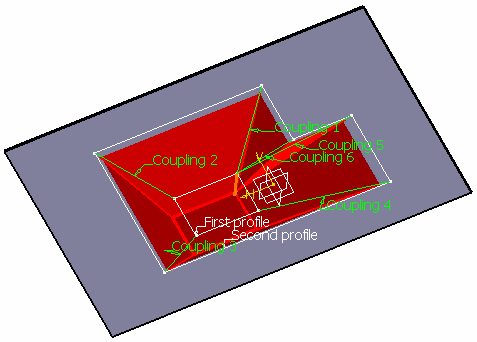
-
Click OK to create the stamp.
Avoid as much as possible a coincidence between the edge of the sketch profile and the edge of the base feature. Instead, let the sketch profile exceed the edge of the wall. - Should you need to create Half pierce stamps, refer to the Creating a Half Pierce Stamp section.
-
Refer to the Customizing Standard Files chapter for more information about defining the Standards Files.
![]()