-
Click Create Camera
 .
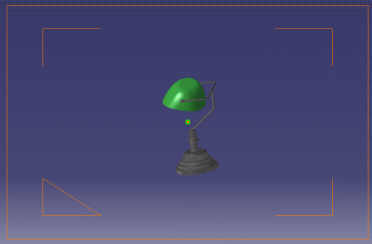
The camera is created at the current viewpoint.
.
The camera is created at the current viewpoint.
-
Click the Camera item in the specification tree and rotate the model to see the camera symbol:

This standard visualization is not affected by any change of scale ("zoom"). In case you wish to hide the camera representation, right-click the camera in the specification tree then select Camera object > Hide/Show Representation. Inversely, this command lets you show a hidden representation.

You can create several cameras at different locations to have different viewpoints.
The camera which is taken into account to render a given image is said to be active. Any other camera is inactive. -
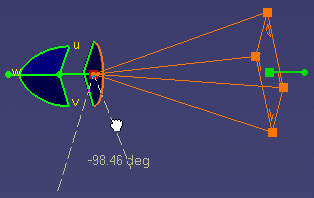
Use the two spheres and the two squares displayed in green on the 3D representation to interactively manipulate and position the camera.
This visualization is affected by changes of view scale (zoom) and is activated when selecting a camera in the scene or in the specification tree. Otherwise, all elements are set to the standard visualization. 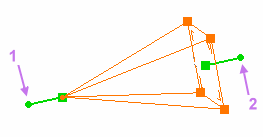
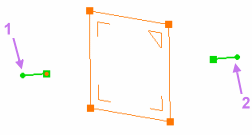
Conical camera
Pyramid height = focal length
and
Pyramid base = film dimensionsCylindrical camera Plane = film dimensions
- the source point (1) rotates the camera around its target point
- the target point (2) rotates the camera around its source point
- the source green square translates and rotates the camera around its target point
- the target green square translates and rotates the camera around its source point.
Cameras are needed to render and view a scene. "An image is worth a thousand words": the better the camera is positioned, the more accurate the saying.
-
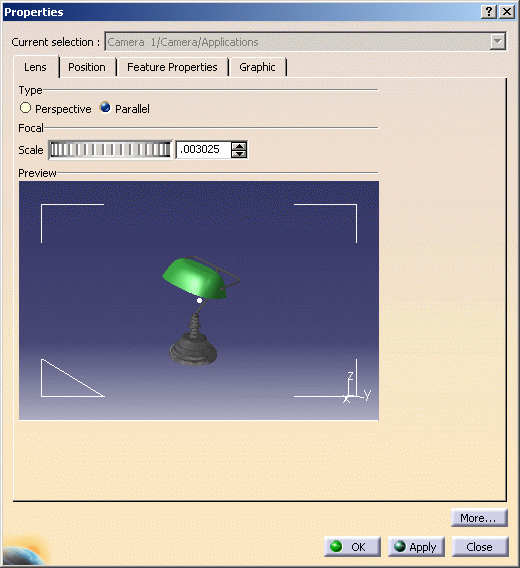
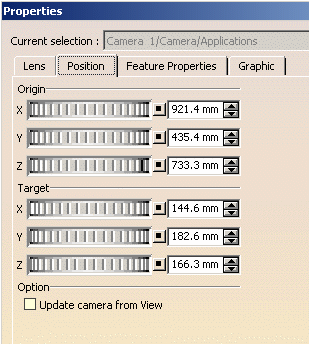
Select the camera in the specification tree then right-click and select Properties (or press Alt+Enter). The Properties dialog box is displayed:
-
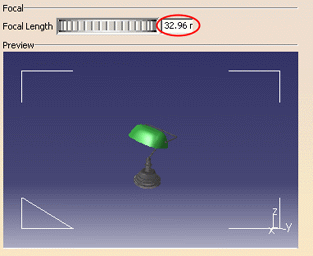
In the Lens tab, select the lens type: Perspective or Parallel, i.e. to obtain a conical or a cylindrical projection. The Preview area shows the result of your selection accordingly.
-
Specify the Focal Length, which determines the field of view, in millimeters.
The focal length is the distance between the camera origin and the viewing plane.In a cylindrical projection, the focal length is replaced by a zoom factor which determines the scale of view (i.e. Scale appears instead of Focal Length in the dialog box). 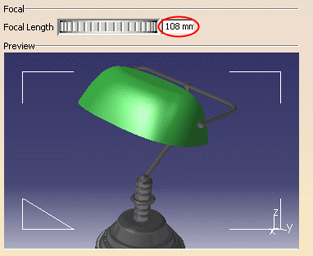
You can also specify the camera view directly inside the preview window by zooming, rotating or panning the view: 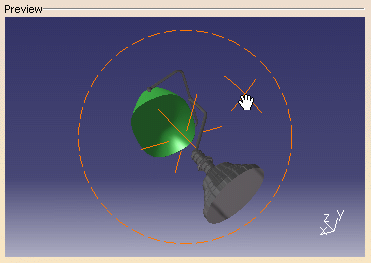
-
Click the Position tab to define the target and origin position.
-
Select the Update camera from View check box to adjust (i.e. center) automatically the camera whenever the viewpoint is modified:
This avoids using the Update from View contextual command each time a viewpoint modification is done. -
Click OK when finished.
-
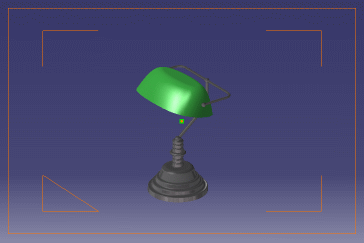
If you want to position yourself behind the camera and observe the captured image, select Window > Camera Window: a new window displaying the camera viewpoint is opened. When you manipulate the handler in this window, the camera is simultaneously positioned in the main window.
You can choose three arrangements for the opened windows, i.e. horizontal, vertical and cascading by selecting the following commands from the menu bar:
- Window > Tile Horizontally
- Window > Tile Vertically
- Window > Cascade
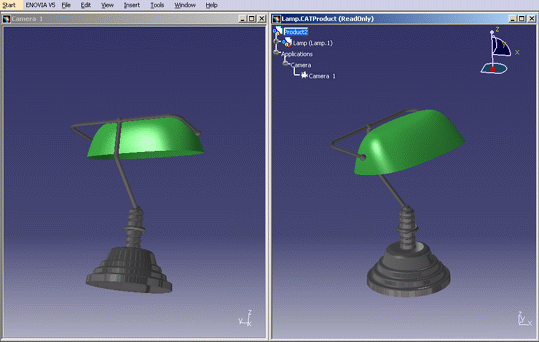
Example of vertical tiling -
To close the camera window, you can either click the cross in the top-right corner of the window or reselect Window > Camera Window > Camera x.
You can double-click the Camera item in the specification tree to position the camera from the current point of view.
You can also right-click the camera in the specification tree then select Update From View to update the camera when the viewpoint is modified.
![]()