![]()
The Userfeature Definition window is accessed by
selecting the Insert>UserFeature>UserFeature Creation... command or
by clicking the Creates a UserFeature icon (![]() ).
).
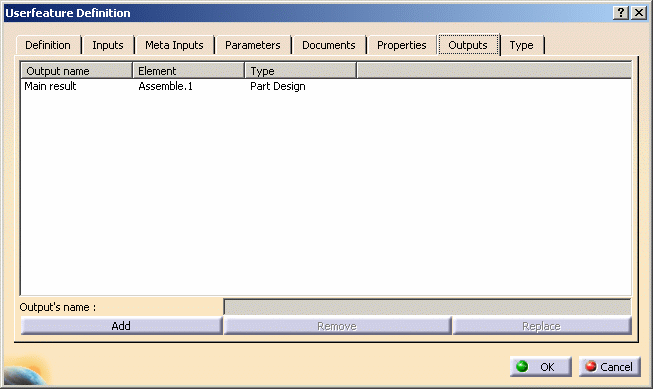
Reference file: PktModifyingMainResult.CATPart
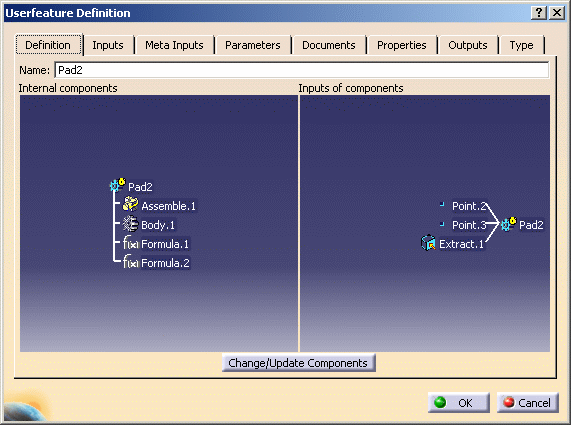
The Definition tab
|
![]()
|
![]()
|
||
![]()
|
![]()
|
![]()
|
|||
 |
![]()
|
![]()
|
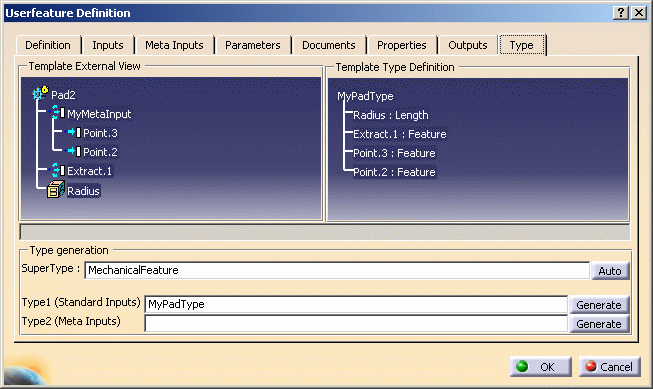
| Super Type | Click Auto. Note that the super type is automatically displayed by the application. The super type can be MechanicalFeature or Skinfeature. |
| Type1 (Standard Inputs) | Enables you to enter the name of the type that you want to assign to the User Feature (MyPadType in the image above) and click Generate. |
| Type2 (Meta Inputs) | Enables you to define a type for the meta input. |
|
|
|
![]()