![]()
The meta input mechanism is a way to ease Knowledge templates instantiation (PowerCopies, User-Defined Features and Document templates.) It is designed to assemble objects together, and to connect them to their environments through their inputs. It relies on a component-based approach. Meta inputs specifications are stored in Knowledge Templates.
Meta inputs:
Improve templates instantiation.
Allow better control of templates instantiation. The architect can associate a type to a meta input thus ensuring the selection of the corresponding input at instantiation.
Improve the usability of templates in the Business Process Knowledge Template workbench.
Improve the instantiation through the Engineering Knowledge Language (EKL). To find out more, see Introducing the User Feature Definition Window and Introducing the Document Template Definition Window.
The characteristics of a meta input are:
|
|
The step-by-step procedure provided below shows how to create a User-Defined Feature containing a meta input. The procedure is identical for PowerCopies and Document Templates. |
Click the Create a User Feature icon (![]() )
to display the User Feature Definition window, or from the Insert
menu, select Knowledge Templates>User Feature.
)
to display the User Feature Definition window, or from the Insert
menu, select Knowledge Templates>User Feature.
In the Name field, type the name of the User Feature, then click the inputs in the specification tree or in the geometry.
Click the Meta Inputs tab. Click Add to create a meta input. Change its name in the Role field.
In the Meta Inputs field, select the input that
you want to associate to the meta input and click the
![]() button.
button.
Repeat the above operation to associate the necessary inputs to the meta input.
Click OK when done.
|
|
The step-by-step procedure provided below shows how to create a User-Defined Feature containing a meta input. The procedure is identical for PowerCopies and Document Templates. |
Click the Instantiate From Document icon (![]() )
and select the file containing the template in the File Selection window, or
if not in the Product Knowledge Template workbench, from the Insert
menu, select Instantiate from Document. The Insert Object dialog
box displays.
)
and select the file containing the template in the File Selection window, or
if not in the Product Knowledge Template workbench, from the Insert
menu, select Instantiate from Document. The Insert Object dialog
box displays.
Select the input in the geometry and click OK when done.
|
|
|
 |
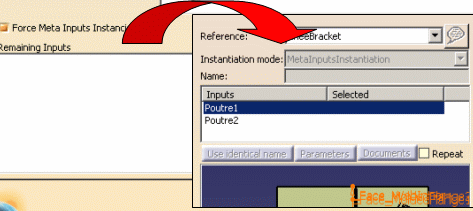
If you do not select the Force meta inputs
instantiation option when creating the meta input, 2 different
modes are available at instantiation:
|
 |
If you select the Force meta inputs instantiation option when creating the meta input, the MetaInputsInstantiation instantiation mode is available. |
|
|
Inputs that remain not associated to a meta input are kept as standard inputs even in meta inputs instantiation mode |
You can associate a type to a meta input to make sure that the user selects an item matching this type at instantiation.
Click the Create a User Feature icon (![]() )
to display the User Feature Definition window, or from the Insert
menu, select Knowledge Templates>User Feature.
)
to display the User Feature Definition window, or from the Insert
menu, select Knowledge Templates>User Feature.
In the Name field, type the name of the User Feature, then click the inputs in the specification tree or in the geometry.
Click the Meta Inputs tab. Click Add to create a meta input. Change its name in the Role field.
In the Meta Inputs field, select the input that
you want to associate to the meta input and click the
![]() button.
button.
Repeat the above operation to associate the necessary inputs to the meta input.
Click the ... button. The Select a type window displays.
Select the type and click OK. The type of the input that you will select at instantiation will have to be identical to this type.
Click OK when done.
|
|
The types that display in the Select a type window belong to the packages you selected in the Language tab. (Tools>Options>Parameters and Measure). |