|
The scenario below describes in detail how to create a
User Feature. A first User Feature has already been created. A new User
Feature is now created. |
 |
Note that datums (features that cannot be
calculated) cannot be inputs of User Features. For more information about
the User Feature limitations, click here. |
 |
-
Open the
PktcreateaUDF.CATPart file. Note that this file already contains a
User Feature located below the KnowledgeTemplates node.
-
From the Start > Knowledgeware menu, access
the Product Knowledge Template workbench.
-
Click the Create a UserFeature icon ( ).
The UserFeature Definition dialog box is displayed. ).
The UserFeature Definition dialog box is displayed.
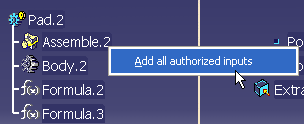
Replace the default User Feature name with Pad2, then click the
Assemble.2 object in the specification tree. The dialog box looks like
the one below:
|
|
 |
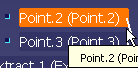
When creating the User Feature,
the Selected components view shows the components that you clicked in
the geometry and that make up the User Feature (see picture
opposite).
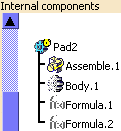
If, after creating the User Feature, you double-click it, the dialog
box that is displayed shows the Internal components of the User
Feature, i.e, the instances of the selected components. |
 |
The components of a
User Feature must be consecutive elements if they are located in an
ordered set like an Ordered Geometrical Set. To know more, see
Frequently Asked Questions:
User Features. |
|
|
If a User Feature
embeds a relation (i.e. rules, checks or formulas) that references
one of the inputs of the User Feature, the selection of a
geometrical Sub-element for this input will not be possible at
instantiation time. |
-
|
|
The system may display a Warning
message if any of the selected inputs are not selectable because
their manual selection is forbidden. |
-
-
|
|
|
|
|
|
-
Select the Outputs tab. By default, the
Assemble.2 object is displayed as the main result.
-
Click OK in the dialog box. The Pad2 User
Feature is added to the specification tree.
-
Save your file.
-
Keep this document open and proceed to
Saving a User Feature in a Catalog.
|
|
|
For more information about the User Feature definition window, see
About the User Feature Definition window.
See the Quick Reference topic for a
comprehensive list of the interactions that can be carried out on User
Features. |
| |
") |