Validating and Updating a Penetration

 atarget.gif (1372 bytes) This task explains how to split a penetration when you have two or more clashes, but only one penetration.
You use the Validate and Update command for each penetration selected from he Penetration Management dialog box. You can only select one penetration at a time to be validated.
ascenari.gif (1376 bytes)


1. With your document open, click the Penetration Management button. The Penetration Management dialog box displays.

Select the object in your document or on the specifications tree. See Querying for Penetrations for a more detailed explanation.

The penetration to be split displays in the Penetration Management dialog box. Select the penetration in the dialog box.

2. Click the Validate and Update button .

A message displays, informing you that the penetration must be split.
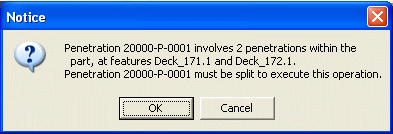
Click OK to validate, update and split the penetration.

The Penetration Management dialog box now displays the new penetration.
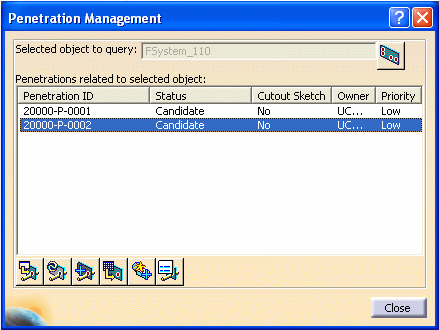
3. You can select either of the penetrations and click the Penetration Properties button. The Penetration Properties dialog box displays, listing the attributes.

The attributes are the same for the two penetrations. Note that the penetrated object is different for each of the penetrations. (See Viewing and Editing Penetration Properties for more information.)

4. Click Close to close the Penetration Management dialog box. 

Save your document to save the data in ENOVIA.

aendtask.gif (1477 bytes)