Creating a Penetration with Workflow

This task shows how to create a penetration with workflow from one existing clash.
To create a penetration solving multiple clashes with a workflow process, you must add one or more clashes to the penetration (that was created in the workflow process). For a detailed explanation on how to add clashes, see Adding Clash to a Penetration.

You also can create a penetration with workflow in ENOVIA.

To create a penetration without workflow, see Creating a Penetration.


1. With your document (from ENOVIA) open, click the Create Penetration button . The Create Penetration dialog box displays.

Select the object to be penetrated (the bulkhead, for instance).
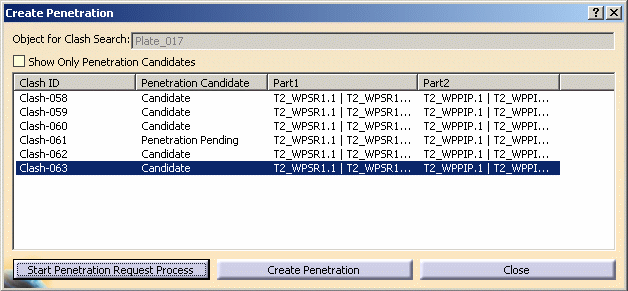
2. The object you select appears in the Object for Clash Search field. The Create Penetration dialog box displays a list of clashes associated with the selected object.

Select one or more clashes from the list and click the Start Penetration Request Process button at the bottom of the dialog box.

A confirmation box displays indicating that the workflow process started.

Click OK to close the confirmation box.

Save your document to save the data in ENOVIA.