ENOVIA zones, covering the space of the clash, must be created before you can create a penetration.
You also can create a penetration in ENOVIA.
This creates a penetration without workflow. To create a penetration with workflow, see Creating a Penetration with Workflow.
Select the object to be penetrated, either from your document or on the specifications tree.
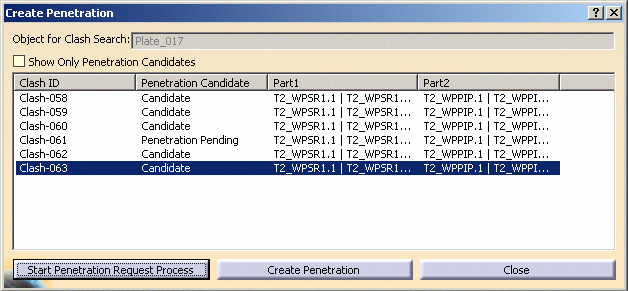
Select one or more clashes from the list and click the Create Penetration button at the bottom of the dialog box.
The Specify Penetration Data dialog box displays.
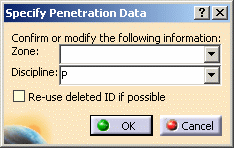
Zone and Discipline information, with data computed from the objects related to the selected clash, appear in the fields.
You can accept the supplied information for Zone and Discipline or enter other information, or select from the drop down list.
Click OK and a message displays indicating you have created the penetration.
Save your document to save the data in ENOVIA.