Editing annotation font properties
-
Double-click the text to switch it to edit mode.
-
Select the whole text (you can also select only part of the text) and then select Edit > Properties.
You can also right-click the selected text, then choose Properties from the contextual menu.
-
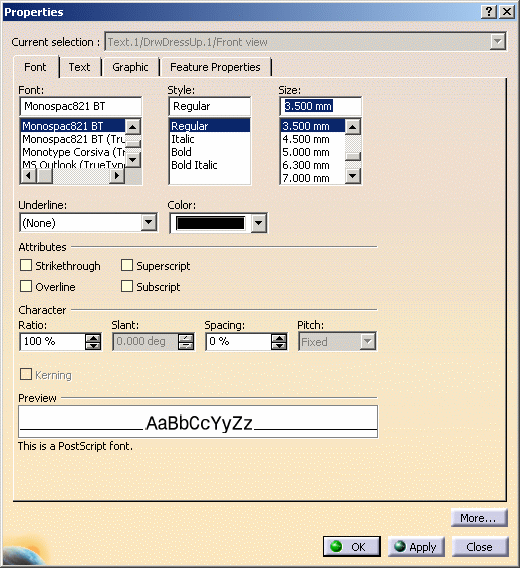
In the Properties dialog box that appears, click the Font tab. The associated dialog box is displayed.
- Font, Style, Size, Underline and Color: choose the font, size, style and color of the text, and underline it.
- Attributes: draw a line through (Strikethrough)
or above (Overline) the selected text, and make it
superscript or subscript.

You can either underline or overline a text, but you cannot do both. 
When you are using a font stroke for annotations, the character's thickness is set to 1 for regular style and 3 for bold style.
You can customize standard files in order to remove this parameter from the Thickness combo box so that it cannot be applied to annotations' characters.
- Character:
- Ratio: modify character width.
- Slant: modify character slant (for italic text, slant=15 deg).
- Spacing: change the spacing between characters.
- Pitch: set a fixed or a variable pitch. As an example, create the free text "Tools" and apply the font ROM1.

Fixed Pitch 
Variable Pitch 
The Slant and Pitch options are available only for stroke fonts. The pitch of some stroke fonts cannot be modified. In that case, the Pitch combo list is disabled.
In case you use characters in some fonts that have no or very little spacing (i.e. i or l), you should not set the spacing to 0 mm, otherwise they would look as if they are superimposed and only one character would seem to be displayed in your annotation.
- More button: display extra options, if any are available.
-
Modify the available options as required.
-
Click OK to validate and exit the dialog box.
- For more information on font properties, refer to the Infrastructure User's Guide.
-
Changing Character Ratio and Spacing
In this task, you will learn how to change the character ratio and spacing of a portion of text, but it is also possible to change these for a whole text.
-
Double-click the text to switch it to edit mode.
-
Select a portion of text and right-click it.
-
Click Properties in the menu that appears. The Properties dialog box appears.
-
Click the Font tab.
-
In the Character area, increase or decrease the value in the Ratio field to change the character ratio.
-
Modify the value in the Spacing field to change the character spacing.
-
Click OK to validate your changes. The text is updated.
Making Text Superscript or Subscript
In this task, you will learn how to make a text superscript, how to make a text subscript, and how to specify their position.
-
Double-click the text to switch it to edit mode.
-
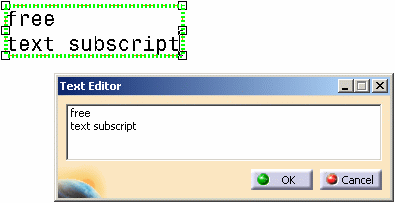
Type a text, "subscript" for example, after the text you created previously.
-
Select the piece of text you just typed and right-click it.
-
Click Properties in the menu that appears. The Properties dialog box appears.
-
Click the Font tab.
-
In the Attributes area, select the Subscript check box.
-
Click OK to validate your changes. The selected text is made subscript.
-
Now type another text, "superscript" for example, after the existing text. For the moment, the new text takes on the properties of the subscript text in front of it.
-
Select the piece of text you just typed and right-click it.
-
Repeat steps 4 and 5.
-
In the Attributes area, select the Superscript check box (instead of Subscript) and click OK. The selected text is made superscript.
-
For the purpose of this exercise, you will now align the subscript and superscript texts and set their offset and size. To do this, select the whole text and right-click it.
-
Click Properties in the menu that appears.
-
In the Properties dialog box, click the Text tab.
-
In the Options area, select the Back Field check box to align the texts.
-
Increase or decrease the values for the superscript and subscript texts in the Offset and Size fields to set the offset and size.
-
Click OK to validate. The subscript and superscript texts are now aligned and set as defined.
![]()


