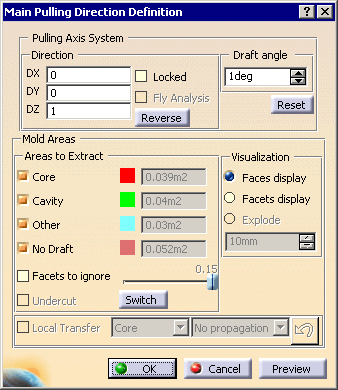
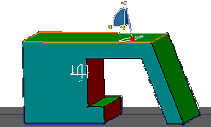
Draft: Pulling Axis System
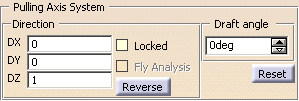
Pulling axis direction that can be defined:
- either by entering the X,Y,Z coordinates,
- or by using the compass. The compass is snapped automatically onto the current axis system. You can change the location of the compass, or rotate it. The direction in the dialog box is updated accordingly, the main direction being the Z axis of the compass.
The pulling axis direction can be locked once you have set the axis system so as to avoid unintentional modifications that can be made when you are moving the compass.
You can use the Reverse button to reverse the pulling direction.
Lock the Pulling axis direction before using:
- the Local Transfer,
- the Fly analysis,
- the Explode option,
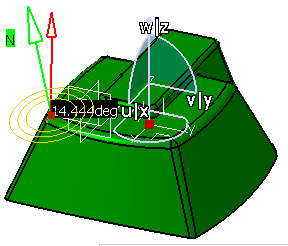
Select this check box to display the normal to the face
and the angle value between the pulling direction and the normal when you
move the mouse pointer over the surface.
Defines the minimum un-molding angle between the surface and the main pulling direction.
Mold Areas
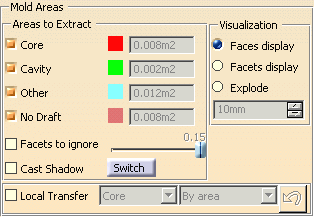
They are the Core side (displayed in red), the Cavity side (displayed in green), Other (displayed in blue) and No Draft (displayed in pink). Other indicates surfaces that are neither core or cavity and that will be dealt with later. No Draft is made of the surfaces that are vertical with respect to the draft angle.
If even only one facet a face is not clearly
either core or cavity, the whole face will be considered to be "other" and
displayed in blue. You can use the
Facet
Display option to solve this problem.
One solution is to "ignore" a given percentage of those alien facets.
To
do so, select the Facets to ignore check box and use the slider
to define this percentage.
Consider this example.
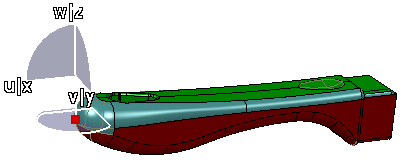
We have selected the Facet display option:
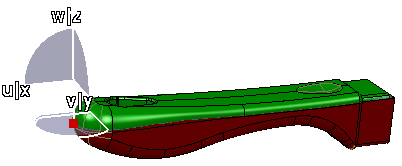
It is clear that a little amount of facets is considered as belonging to
the Core and not to the Cavity.
If those facets were
ignored, the blue portion would belong to the Cavity, which is what we want.
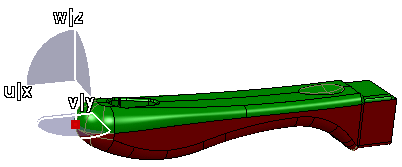
We have unselected the Facet display, selected Facets to
ignore and defined the percentage of facets to ignore with the slider.
This is what we get:
Undercut zones are recognized via the facettisation of the part.
Zones
are defined by the angle formed by the facet normal and the pulling
direction.
Undercut areas that make the un-molding of a zone impossible are
ignored.
This leads to incorrect definition of areas.
For example, the small
green face below, seen as a Cavity area, should be blue, i.e. belonging to
Other areas.
|
|
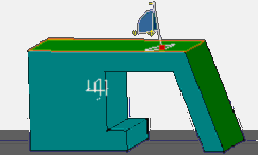 |
| Undercut off | Undercut on |
Select Undercut to take account of hidden faces for a given pulling direction.
The orientation of the facets normals may also lead to "inverted" core and cavity areas for a given pulling direction, i.e. the expected Core area is recognized as a Cavity area, and vice-versa.
Click Switch to invert those areas directly, without inverting the orientation of the normals nor the pulling direction.
Transfers one face of the part to one of the three areas to extract (Core, Cavity, Other).
Local transfer is available in exploded view.
-
Select Local Transfer.
-
Select the area where you want to transfer the face in the list.

-
Select the kind of propagation you want to use from the list.

- No propagation: you pick the faces you want to transfer one by one.
- Point continuity: you pick one face and all the faces of the same initial color that have a point continuity with this face will be selected and transferred.
- By area: useful when a few faces of a given color are
found among the destination faces, but are not connected to each
other:

You select one red face and all the other red faces found among the green ones will be transferred.
The faces selected are transferred to the destination area, this transfer is taken into account immediately.
Should you wish to change the selection to transfer locally, click
. This button is inactive when you are using Explode Visualization mode.
Visualization
By default, Faces display is active, i.e. the faces of the part are displayed.
The definition of the core and the cavity is based on a facetisation of the faces. The deviation of the normal to a facet with the pulling direction defines whether the facet belongs to the core or the cavity. If one facet in a face does not clearly belong to the core or the cavity, the whole face will be considered to be "Other" and displayed in blue. In this case, it is interesting to know how all the facets of the face behave, to decide to split the face, or to transfer it to the core or the cavity side.
Displays the facets on a blue face so that you can find which one(s) is (are) not compatible with the rest of the face and solve the problem.
Faces display:

Facets display:

Displays the graphic visualizations of the Core area and of the Cavity area apart from each other, along the current pulling direction.
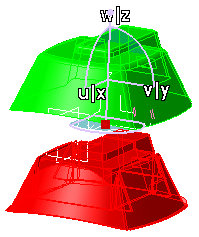
- The Other area is ignored
