CATDefaultCollectionStandard environment
variable which is set to installation_folder\resources\standard
by default.Line thickness is a property which can be applied to elements such as lines, curves, dimension lines, etc. But keep in mind that line thickness cannot be applied to fonts and points.
As far as .CATDrawing documents are concerned, you do not use the CATStdLineThickness.xml file but specific files provided in the Drafting category. Refer to the Version 5 - Interactive Drafting User's Guide - "Administration Tasks, Setting Standard Parameters, Line Thickness Definition".
These default definitions are grouped together in the
CATStdLineThickness.xml file. The values set in the samples provided can
easily be customized to address your needs, provided that you are logged as
administrator.
The defined thicknesses can then be applied to any element which supports
line thickness, either using the Edit > Properties or the
Graphic Properties toolbar.
This scenario aims at explaining how to create and modify line thickness definitions using the interactive editor.
Prior to modifying standards, you need to set
the CATCollectionStandard environment variable to
identify the location where your customized standards will be saved. For detailed information on how to set environment variables, refer to Customizing Your Environment on Windows (or on UNIX depending on your operating system). |
![]()
-
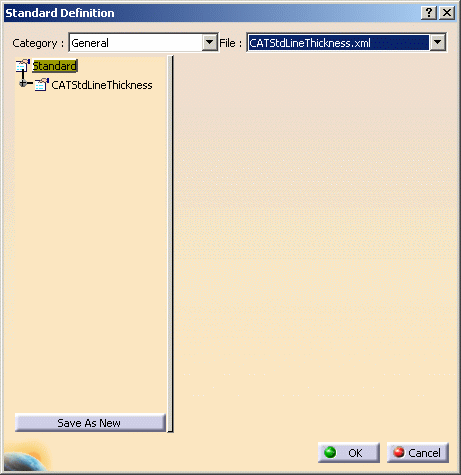
Select Tools > Standards to access the interactive standard editor.
-
Check that the General category is selected then from the file list, select the CATStdLineThickness.xml file.

-
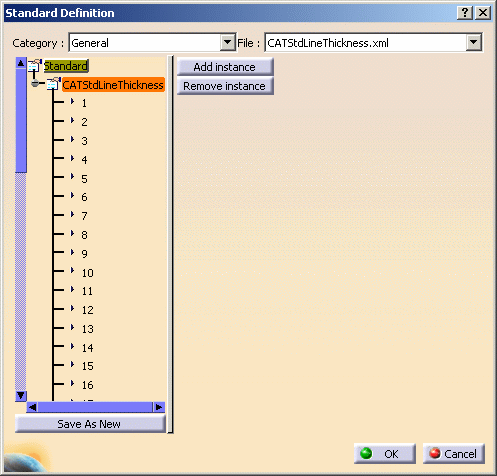
Click the plus sign next to the CATStdLineThickness node: a list of 55 line thickness definition is displayed.
-
line thickness definitions ranging from 1 to 8 are pre-defined with different parameters for each, and available (i.e. the Availability box displays "1")
-
line thickness definitions ranging from 9 to 55 are pre-defined with the same parameters for all, and unavailable (i.e. the Availability box displays "0").

Now let's suppose you want to add a new line thickness. To do so: -
-
Select the CATStdLineThickness node from the tree structure then click Add instance to the right.
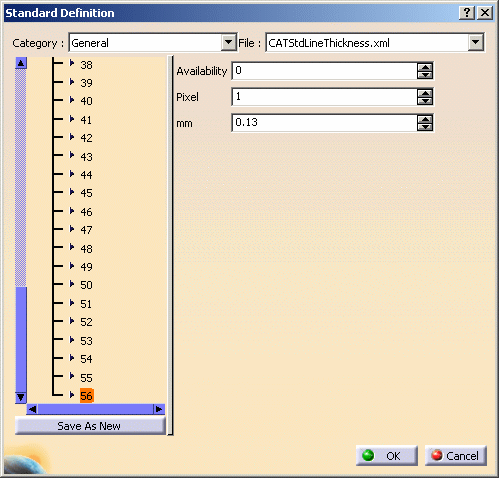
This creates a new instance in the tree structure. The number of the new line thickness is incremented by one and therefore, its number will be "56".
-
Select the created instance, i.e. "56" then define the thickness parameters either by entering the values directly in the boxes or using arrows:

-
Availability: indicates whether the line thickness definition is available in the thickness list for users to choose from, when creating or editing elements.
-
0 means that the definition is unavailable
-
1 means that the definition is available
-
You can only assign "available" line thickness definitions to elements. However, existing element properties in drawings will not be affected: if an existing element is assigned a line thickness which is flagged as "unavailable" in the Standards editor, then this line thickness will be used for this element but it will not be available in the thickness list, so that users cannot apply it to other elements.
-
Pixel: sets the size in pixels. This value reflects the result displayed on screen
-
mm: sets the line thickness in millimeters (mm). This value corresponds to the printed version.

You can modify any value anytime simply by selecting the desired line number then entering the new values in the corresponding boxes. -
-
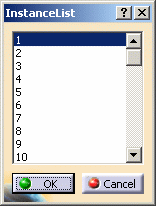
In case you are not satisfied with a line thickness, select the CATStdLineThickness node then click Remove instance. This opens the following dialog box which displays the list of available instances:

Just select the instance to be deleted then click OK to validate. -
When finished, you can:
-
click OK to save the modifications in the CATStdLineThickness.xml file. A pop-up message informs you that the modified standard file has been saved in the directory specified when setting the
CATCollectionStandardvariable -
click Save As New to save the modifications in a new .xml file. Clicking this button opens the Save As dialog box which places you in the directory you specified when setting the
CATCollectionStandardvariable. This new file will then be accessible from the File list.

You cannot change the default name of standard files included in the General category. For these files, Save As New can only be used to generate a new file in another directory but still with the same name. -
![]()