-
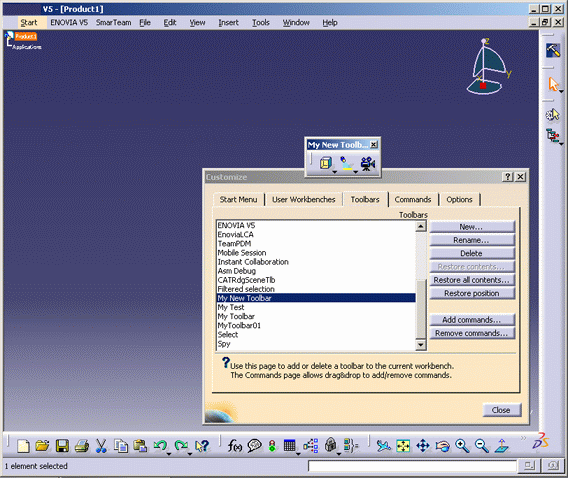
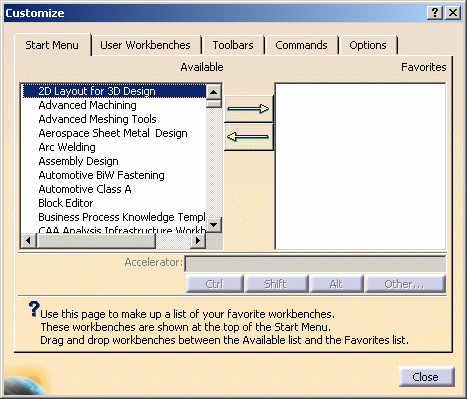
Select Tools > Customize or right-click any icon in any toolbar then select Customize to open the Customize dialog box:
The symbol  might be displayed next to a workbench name in the Available
list to identify a workbench that has been locked by your
administrator. This means that you cannot transfer the locked
workbench to the Favorites list and that the workbench
is not listed in the Start menu. For detailed
information, refer to Administering the
Workbench list.
 -
Under the Start Menu tab, you can select a workbench then click the right
 arrow
(or right-click it then select Add) to display it in the
Favorites list.
Inversely, click the left arrow (or right-click then select Remove) to remove a workbench from the Favorites list. -
Repeat the previous step as many times as necessary. In our example, six workbenches have been transferred to the Favorites list:
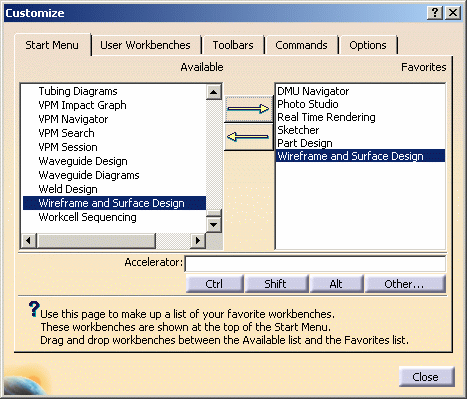
You can then use Ctrl, Shift, Alt and Other... to include them in the shortcut displayed in the Accelerator box.
Other... lets you see the list of available keys. Select a key then click Add, or double-click a key.
Whichever method you use, the corresponding choice is displayed in the Accelerator box, for example like this: Ctrl+.
The shortcut you define appears besides the workbench name in the Start menu. -
Click the User Workbenches tab.
Note that New... is available only if there is an active workbench: if no document is open, the button is grayed out. 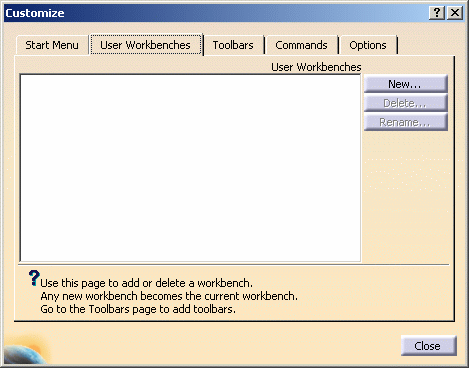
-
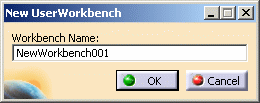
Click New... to display the New User Workbench dialog box:
-
Enter the name for your workbench, then click OK.
In our example, let's assume the name of the user workbench is "My Workbench". Clicking OK adds the workbench name to the list... 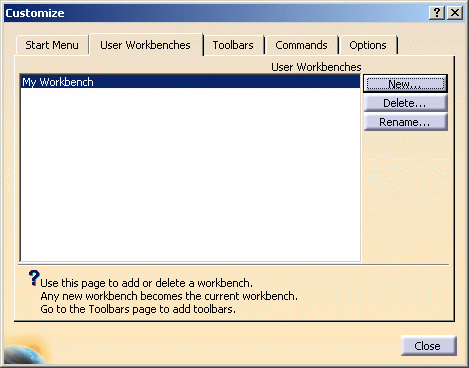
... and deactivates the current workbench, and activates "My Workbench", represented by the icon top right:  .
. -
Access the Toolbars tab, then click New... to start adding toolbars to "My Workbench".
The New Toolbar dialog box and an empty toolbar are displayed: 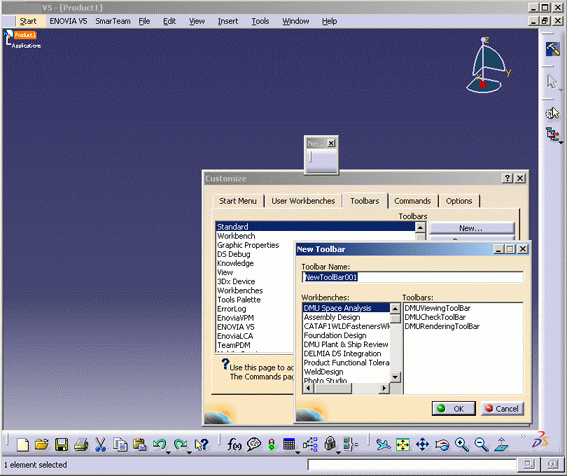
In the New Toolbar dialog box: - the Workbenches list contains a list of all workbenches related to the current working context: in our example, a CATPart document was open when we created "My Workbench", so the list contains all workbenches that could possibly be activated in a CATPart document
- the Toolbars list contains the toolbars belonging to the selected workbench.
-
Select a workbench from the Workbenches list.
The toolbars belonging to the selected workbench are displayed in the Toolbars list. -
Select a toolbar.
-
Name the new toolbar to be included in your workbench.
-
Click OK, and close the Customize dialog box.
More about favorite workbenches
- When removing a dynamic (i.e. non-static and shareable) license during a session, the corresponding favorite workbench disappears from the list of favorites. From now on, when the removed license is acquired once again, the workbench automatically reappears in the list of favorites. You do not need to add it manually anymore
- If you installed a configuration containing more than 12 workbenches (such as the "AL2" configuration), only the first 12 workbenches are displayed in the Favorites list. The other workbenches do not appear in the list
- Your customization is stored in the settings only when exiting the
session.
If you intend to acquire or remove licenses using Tools > Options > General > Shareable Products, you need first to exit then restart your Version 5 session before accessing this tab in order to recover your customization.
Acquiring or releasing shareable products implies that all the toolbars and menus are regenerated. The user interface is recomputed using the last settings saved and therefore, if your customization has not been previously saved, it will be lost.
![]()
