If the document to be copied is linked to others, those documents are also copied to the directory (or diskette) you choose, provided they can be found.
-
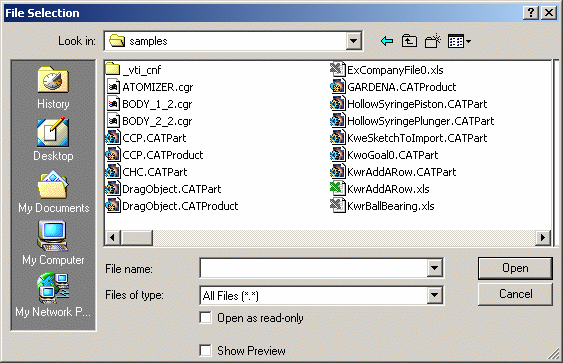
Select File > Send To Directory. If no file has been previously opened, the File Selection dialog box appears:
-
Select the Version 5 document you want to copy as shown above.
-
Click Open. The Send To Directory dialog box opens:
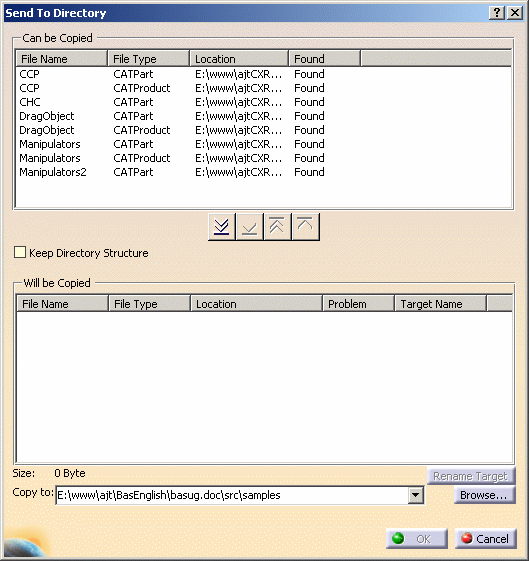
In the upper part of the dialog box you can see a list of all the different documents linked to the document you selected for the copy operation.
Note that all documents are displayed, whether they are directly or recursively linked to the selected one.The four columns provide information about the file name, the file type, the location and whether or not the file was found.
-
Click the Copy all files
 button between the two lists. The dialog box then looks something like
this:
button between the two lists. The dialog box then looks something like
this:
The files have now been sorted. The list in the lower part of the box shows a list of those files that will be copied. In the upper list remain those files that could not be found. This can be remedied by selecting either Tools > Options > General > Document or Edit > Links (see Localizing Linked Documents or Editing Document Links). If you prefer, you can select the files in the upper list individually and use the Copy selected files  button to transfer them to the lower list.
If you want to select the files by type, place the cursor inside the list and right-click to display the list of file types and then select the appropriate type. (Selecting by type in this way operates of course in the lower list as well.) -
If you want to keep the same directory structure in the target directory, select Keep Directory Structure between the two lists. Once selected, this check box remains selected when you next select File > Send To Directory.

Bear in mind that this option is not available or has no effect if the files to be copied have no directory structure in common. It might be useful, especially if copying files to a diskette, to know the size of the documents to be copied. You find this just above the Copy to box. OK might, as in the case shown above, be grayed out. This means that problems shown in the Problem column have not been resolved.
As well as the information provided in the upper list, the lower list also contains a column showing potential problems such as duplicate file names. In case of duplicate file names, you have different ways of resolving this: - select one of the identically named files and click the
Reset selected files
 button to move it to the upper list i.e. not include it in the
files to be copied
button to move it to the upper list i.e. not include it in the
files to be copied - select the Keep Directory Structure check box thus avoiding having files with the same name in the same directory
- rename one of the files using Rename Target.
- select one of the identically named files and click the
Reset selected files
-
If you want to give one of the files a different name in the target directory, select the file and click Rename Target in the lower right-hand corner of the dialog box.
The following dialog box appears specifying the name of the file selected:
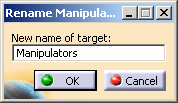
Enter the new name and click OK. To cancel the rename, select the new name just entered in the Rename dialog box, delete it and click OK. The old name is restored. You can of course move all files to the upper list at any time by clicking the Reset all files  button.
 -
Enter the path of the target directory in the Copy to box, or browse your file tree using Browse... if necessary and click OK.
This box is in fact a list and contains the nine destinations last used. The target directory must be different from the original directory. -
Click OK.
If you copy to an as yet non-existent directory, the following message appears: 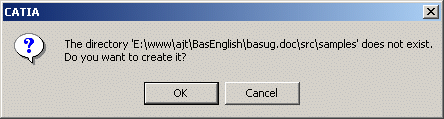
If the target directory contains any files with the same name as any copied, the Confirm File Replacement dialog box is displayed. Click the appropriate button: 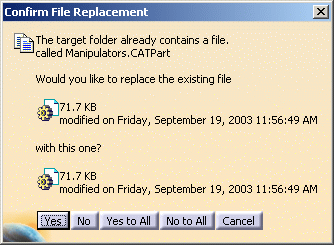
A progress box appears as each file is copied: 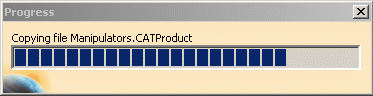
When the copy has been performed the Files Copied dialog box appears telling you the number, size and type of the files copied. 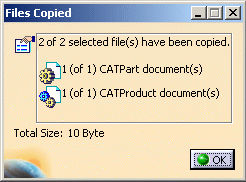
![]()