Your license must provide access to the product structure functions to open this document.
-
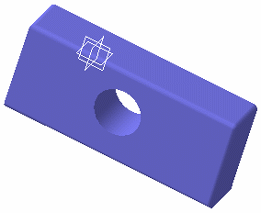
Select View > Named Views and double-click the desired view.
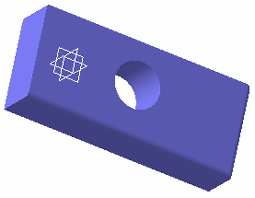
You are now ready to customize the view. -
Adjust the different view parameters (zoom, rotation, etc.) until you are happy with the result.
-
Click Add to add the view to the list.
The default name of the view is "Camera 1", and the name is also displayed in an editable box below the list. 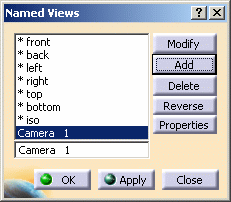
-
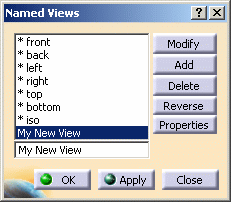
Rename the view in the editable box as required and press Enter, or click Apply.
-
If you want to set the camera properties (the properties of the view), click Properties to access the Camera Properties dialog box.
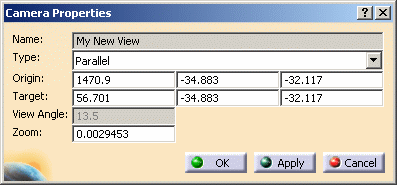
The settings are as follows: 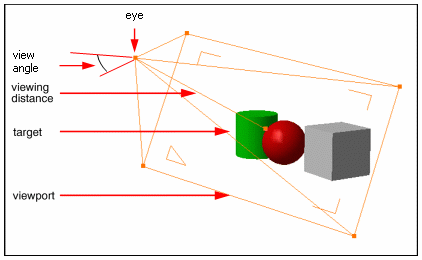
- Name: name of your user-defined view (cannot be modified)
- Type: lets you set a Parallel or Perspective view projection
- Origin: coordinates of your eye position
- Target: coordinates of the center of rotation of the camera (the point located at the center of the viewport). You can set the center of rotation by clicking the middle mouse button on the desired point: the coordinated are memorized with the camera
- View angle: sets the angle of the pyramid-like shape with which you look at the geometry (available in perspective views only). A large angle has the effect of zooming out to make the geometry look small; a small angle has the reverse effect
- Zoom: zoom factor (available in parallel views only).
-
If you want to modify any customized view you already saved, select it, modify the view parameters again, then click Modify to save your changes.
When working in P3 mode, you can use an alternate method to define the view angle. Refer to Editing the View Angle for detailed information.
![]()
You can also delete views by selecting the view from the list and clicking Delete.
Exporting User-Defined Views to VRML Format
Bear also in mind that when reopening your VRML document in Version 5, you will not be able to use your customized views, only the standard views will be available.
-
Select File > Save As then choose the wrl format in the "Save as type" list.
Your file has been exported to VRML. Below is an example of the syntax used to export data to VRML: Viewpoint
{
position 0.980386 0.548146 0.603133
orientation 0.300869 0.556138 0.774718 2.061790
fieldOfView 0.471225
description "Main Viewpoint"
}Viewpoint
{
position 0.690322 0.784519 0.790794
orientation 0.187054 0.451587 0.872399 2.448075
fieldOfView 0.471225
description "Iso View"
} -
Open your document in a VRML viewer: the named views defined in Version 5 are accessible.
![]()