-
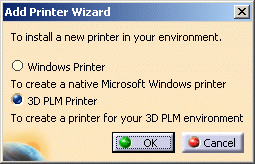
Select File > Printer setup to open the Printers dialog box then double-click Add Printer on top of the list.
-
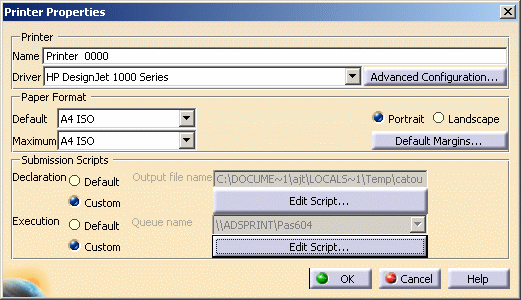
Click Driver (on UNIX) or the black arrow (on Windows) and choose the appropriate driver for the printer.
Ask your system administrator which printers require which drivers. The list of available drivers is: - PostScript
- HP-GL/2 RTL
- HP-GL
- HP DesignJet 1000 Series
- CGM Software
This driver is intended for viewing applications but note that some restrictions apply such as: pixel images are not supported, the image size is fixed, polylines are converted into polybeziers (provided that their curves can be modified) - CGM
- OCE
- Raster
- V5 Print Plugin Driver
- Windows Enhanced Metafile
- SVG.
This list varies with your operating system. For instance, some of the above-mentioned drivers are not available on UNIX. -
In the Paper Format box, set the desired paper format options: default and maximum paper size, margins and orientation (portrait or landscape).
-
In the Submission Scripts box, set the desired options activated when the print job is submitted.

This box lets you specify: - the default output file name: each time you print a document, an output file is created at the location you specify in the text field
- the default queue name: this field lets you choose which print queue to send the print job to.
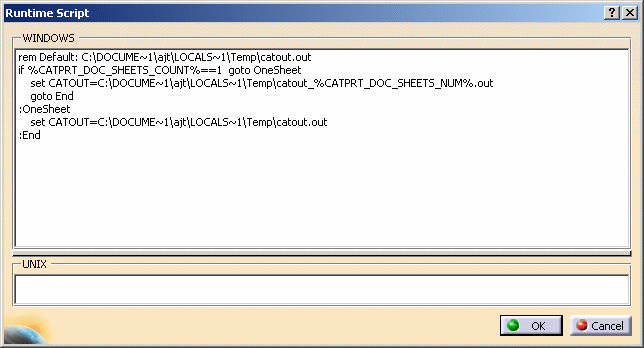
The Custom options let you specify the location of your own submission scripts. Clicking these buttons activates the Edit Script... buttons to let you modify the script in the Runtime Script window:

Advanced Configuration... lets you define advanced configuration settings for the driver. Note that once a printer has been added to the list of printers, you can also access advanced configuration settings by right-clicking the printer in the list then selecting Configure.
Refer to Configuring an Existing Printer for detailed information. -
Click OK to return to the Printer Setup dialog box.
A printer configuration file named
PLOT0000.xmlcontaining all the settings you set in the Printer Properties dialog box is created in$HOME/CATSettings/Printers/which is the default location. The numbers of additional printers created are incremented by one, as follows: PLOT0001.xml, PLOT0002.xml, etc.
However, note that when printing to 3DPLM printers, you can now modify the default location of the configuration file via the Printers tab.
The format of Version 4 plot configuration files is not compatible with the Version 5 format.
![]()

