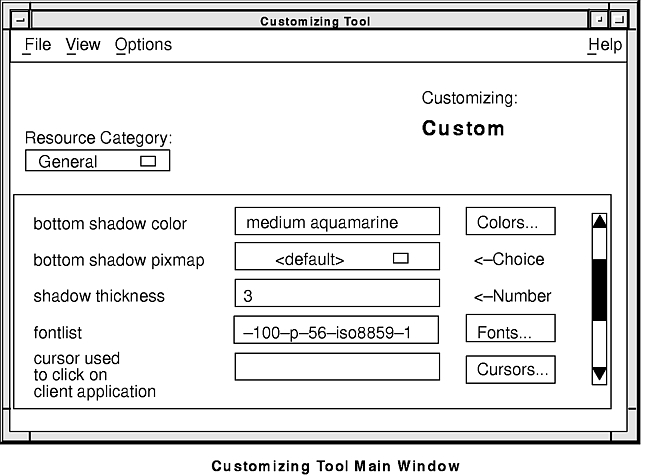
This customizing tool has a graphical user interface that describes the resources available for modification of a particular application and their possible values. Tools are provided to assist in setting these values. When you complete modifications, you can save the changes, restore the defaults, start a new customizing session, or exit the customizing tool.
See the figure titled "Customizing Tool Main Window" for an illustration.
For more information on the customizing tool main window, see the following:
The class of the application that you are customizing (for example, XCalc) is displayed in the area on the right beneath the "Customizing" label. The class of the application is hard-coded into the application itself and is generally different from the command that starts the application. By convention, the class usually begins with a capital letter.
Pressing and holding the left mouse button on the Resource Category button displays a list of resource categories. You can select a category by dragging the mouse over the list and releasing the mouse button on your choice. The panel inside the scrolled window area changes to present another set of resources to customize.
Inside the scrolled window are the resources that can be customized. Each line contains a description of the resource, a field to enter a value for the resource, and, in some cases, a button that starts a tool called a browser to assist in choosing a valid value.
On the left side of the scrolled window area are descriptive explanations of each resource you can customize. To see the actual resource strings, select the Resources option from the View pulldown menu.
To the right of the resource descriptions are fields for entering values for particular resources. To type in this field, press the left mouse button on this field so the keyboard focus is directed there; then enter the desired text.
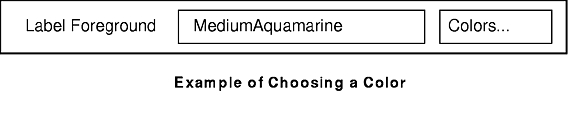
You can directly type a value into the text field or, if there is a button to the right, you can press it to access a browser that assists you in choosing a valid value. The button is highlighted when the browser is called and not highlighted when the browser is exited. See the figure for an example.
When changing a resource involving a cursor you must use the cursor browser to choose a value for a cursor because you cannot type directly into the Chosen Value field for cursors.
When the <-Number label appears to the right of the text field, only numbers may be entered as valid values.
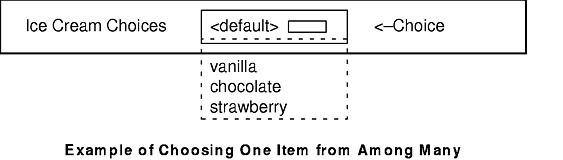
To select a value when the <-Choice label is present, press the button to the left and select a value from the displayed list. The first item in this menu is always <default> , which allows the default for that resource to be used and specifies that no value is written to your resource file when you save. See the figure for an illustration.
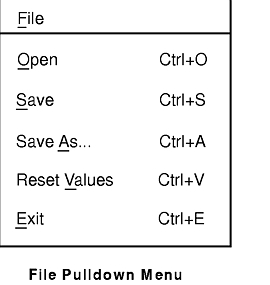
The File item on the menu bar has four options, as shown in the figure.
| Open | Starts the customizing session for a new application. You are presented with the Starting the Customizing Tool dialog. You can choose an application and press the OK button. If you decide not to start a new session, you can press the Cancel button. |
| Save | Saves your changes to the current resource database. This is usually the same place from which the resources were initially loaded from showing the current values. The current resource database can be changed by using the Save As . . . option, but most users do not need to change it.
The default resource database initially used for loading and saving resources is the first of the following:
The X server resource database is usually created by the xrdb command, and it is stored in the RESOURCE_MANAGER property of the root window on screen zero. When modifying an existing resource database, only the resource specifications that exactly match those defined in the app-custom file for the application are replaced or deleted. Comments and other settings are left intact. |
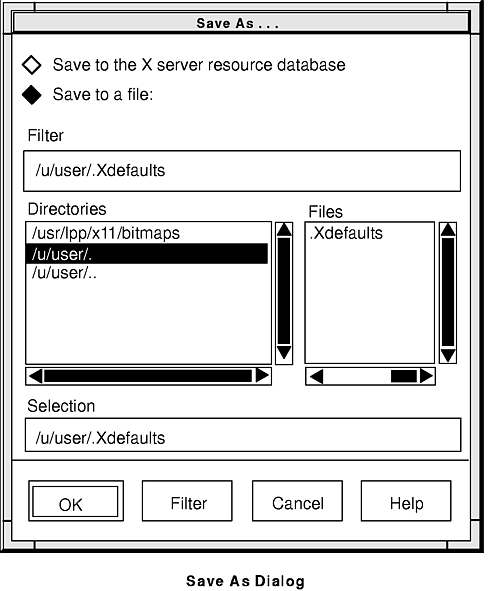
| Save As... | Allows you to save your changes to a location that you specify.
See the figure titled "Save As Dialog".
Once the Save As . . . option has been used, the Save option will
continue to save to the new location. For most users, there is no need to
specify a different resource database and using the Save option is
sufficient.
You can specify that your settings be saved either to the resource database stored on the X server or to a file. The X server resource database is usually created by the xrdb command, and it is stored in the RESOURCE_MANAGER property of the root window on screen zero. |
| Reset Values | Erases all values you have chosen and reverts to values that were read in from the resource database at the beginning of the customizing session. You can cancel this operation. If you already saved your previous values, you must save again after resetting to erase those values and to accept the reset operation values. |
| Exit | Exits the customizing tool editor. If you have made modifications but have not saved them, you are prompted to save and allowed to cancel the exit or exit. |
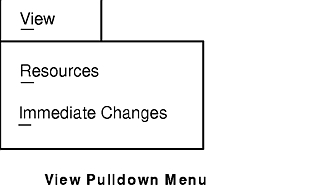
The View item on the menu bar has two options: Resources and Immediate Changes. See the figure for an illustration. If you select the Resources option, the attribute labels change to display the actual resource names. To return to the descriptive strings, select the Resources option again.
The Immediate Changes toggle button controls the immediate updating of application resources. Previously, running applications had to be restarted for resource value changes to be applied. Using the customizing tool, many resources can be updated immediately when a value is changed. If you type a value directly in the text field of the resource, you must press the Enter key to update the client application.
The Immediate Changes button is desensitized (grayed out) until the customizing tool can communicate with the application. When communication is established you can use the Immediate Changes button as a toggle button to turn the immediate updating on or off. The default state for this button is on. If all instances of the application are exited anytime after startup, the button is desensitized again.
The Immediate Changes option is intended as a tool to view possible changes. Since it is possible to corrupt the interface of an application (for example, setting an unreadable font), it is best to use this option only when the application is in a noncritical state. There are some limitations, such as the following, to the immediate updating of applications:
The Immediate Changes button becomes insensitive if the customizing tool cannot update the application. If you cannot update an application immediately, you can always save the changes to your resource file and restart your application to see the changes take effect.
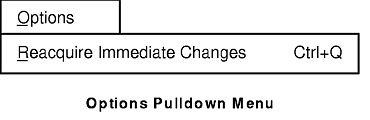
The Options item on the menu bar has the following option. See the figure for an illustration.
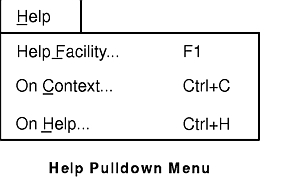
The Help item on the menu bar has the following three options. See the figure for an illustration.
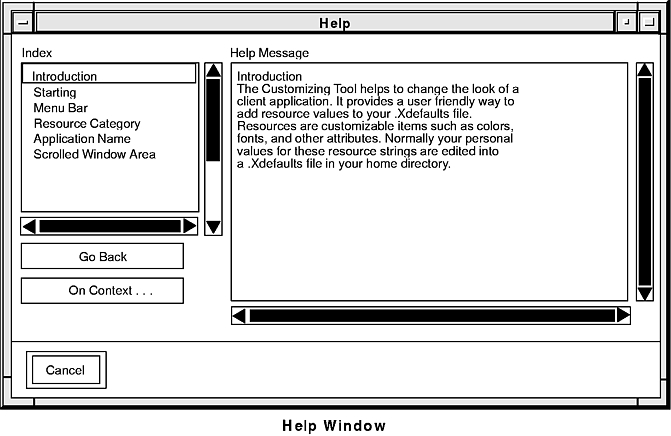
| Help Facility | Brings up the help facility at the introduction level. The help facility contains a Help Message window for viewing the help messages and an index to navigate through the facility. See the "Help Window" figure for an illustration.
The index is hierarchical. Selecting an item in the index causes the corresponding help message to be displayed in the Help window. If the index item has additional help messages, selecting that item causes the index to descend to the next level. To return to the preceding level, press the Go Back button. The On Context button provides access to context-sensitive help. See the On Context description that follows. The help facility can remain active throughout your customizing session. To exit the help facility, press the Cancel button. |
| On Context | Changes the mouse cursor to the question mark cursor, prompting you to click on any object of interest. The index and help messages for that object are displayed in the help facility. |
| On Help | Brings up the help facility and displays the help message that describes how to use the facility. |
Using the AIXwindows Customizing Tool Overview
Understanding the app-custom Files
How to Start the Customizing Tool