This chapter provides an overview of the AIX installation process and various installation scenarios you can use. Because the managed system may be the first AIX system in your environment (or the first AIX 5.1 system in an AIX 4.3 environment), this information and accompanying recommendations will help guide you on decisions about installation, maintenance, and system backup.
Due to the physical configuration of a managed system, use of the Network Installation Management (NIM) environment to install AIX is recommended. The following table compares how different forms of media proceed through the AIX installation process:
| Steps | CD-ROM Product Media | NIM | mksysb on CD-R or DVD-RAM | mksysb on tape |
|---|---|---|---|---|
| Booting | Boot image is stored and retrieved from CD. | Boot image is stored on NIM server. Boot image is retrieved from network by firmware. | Boot image is stored and retrieved from CD-R or DVD. | Boot image is stored and retrieved from the first image on tape. |
| Making BOS Installation Choices | Manually step through the BOS menu selections for disks, kernel, language, and so on. | Perform nonprompted installation using a bosinst.data file to answer the BOS menu questions. | Manually proceed through the BOS menu selections for disks. | Manually proceed through the BOS menu selections for disks and other choices. |
| Executing Commands During Installation | CD-file system is mounted and commands are executed. | SPOT file system is NFS mounted and commands are run from the SPOT. | CD-file system is mounted and commands are executed. | Command files are retrieved from second image on tape to RAM-file system in memory. |
| Installing Product Images | Installation images stored on CD in a file system. | Installation images are stored in LPP_Source, which is NFS mounted during installation. | Backup image is stored on CD-R or DVD-RAM in a file system. | Backup image is stored and retrieved from fourth image on tape. |
| Rebooting System and Logging into System | Use Configuration Assistant (or Installation Assistant) to accept license agreements, set paging space, and so on. | No Configuration Assistant (or Installation Assistant). Boot to login prompt. | No Configuration Assistant (or Installation Assistant). Boot to login prompt. | No Configuration Assistant (or Installation Assistant). Boot to login prompt. |
This section provides an introduction to the NIM environment and the operations you can perform to manage the installation of the Base Operating System (BOS) and optional software on one or more machines. NIM gives you the ability to install and maintain not only the AIX operating system, but also any additional software and fixes that may be applied over time. NIM also allows you to customize the configuration of machines both during and after installation. NIM eliminates the need for access to physical media, such as tapes and CD-ROMs, because the media is a NIM resource on a server. System backups can be created with NIM, and stored on any server in the NIM environment, including the NIM master. Use NIM to restore a system backup to the same partition or to another partition. Before you begin configuring the NIM environment, you should already have the following:
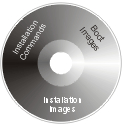
For any installation procedure, you need a software source to install from, such as the AIX product CD-ROM. The AIX product CD-ROM contains boot images used to boot the system from the CD-ROM, installation images, and the installation commands used to install the installation images, as shown in the following illustration:
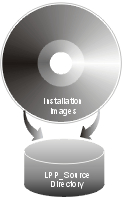
In the NIM environment, the software source is separated into two NIM resources, the LPP_Source and the SPOT. The LPP_Source is a directory on your NIM server. When the LPP_Source is created, installation images are copied from the product CD-ROM to the LPP_Source directory, as shown in the following illustration:
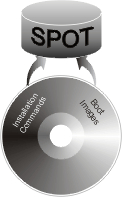
The product CD-ROM also contains boot images that enable the system to boot from the CD-ROM and installation commands that are used to install the installation images. This equivalent NIM resource is called the SPOT (Shared Product Object Tree). The SPOT is a directory that contains the installation commands that are used to install the installation images from the LPP_Source onto a system. The SPOT is also used to build the necessary boot images to boot a client system. Separate boot images exist for each type of adapter (Ethernet, token ring, and so on).
Scripts are available that configure the NIM environment for you and create the resources necessary to perform a mksysb installation. The nim_master_setup script creates an LPP_Source and SPOT resource for you and defines the resources in the NIM environment. The nim_master_setup script will also copy the update images from your update CD to the LPP_Source and then install the update images into the SPOT resource.
In addition to the LPP_Source and SPOT resources, several NIM resources can help customize the BOS installation process and basic network configuration. The following table shows all the NIM resources that are created with the nim_master_setup script:
| NIM Resource | Name Given | Description |
|---|---|---|
| spot* | 520spot_res | Commands used during installation. The network boot images are built from the SPOT. |
| lpp_source | 520lpp_res | Directory containing installation images. |
| mksysb | generic_sysb | System backup image |
| bosinst_data | bosinst_ow | Answers questions asked during the BOS installation, which allows for a non-prompted new and complete overwrite installation. |
| resolv_conf | resolv_res | Provides the domain name and name server information. |
| res_group | basic_res_grp | Used by the nim_clients_setup script to allocate the bosinst_data, mksysb, lpp_source, spot, and resolv_conf to install the client partitions. |
* Required resource for installation
Each partition you install will be defined in the NIM environment as a standalone system resource, also referred to as a NIM client. The nim_clients_setup script allows you to define the partitions as NIM clients and initiates a BOS installation on the NIM clients.
This section contains several scenarios for installing AIX.
In this scenario, you are adding a managed system to an existing environment of systems running AIX 5.1. The managed system is the first system in your environment that requires AIX 5.2. If you have a system available to use as a NIM master, or you already have a NIM master, perform the following steps:
In this scenario, the managed system is the first AIX system in your environment, and you do not have another system with a graphics adapter available. In this case, you must use the HMC as both your software and hardware console.
If you do not have a great deal of experience using AIX, use the procedure described in Configure an Initial Partition as a NIM Master to Use NIM to Install the Remaining Partitions. This procedure will create a NIM master on one of the partitions and use its system image to install the other partitions.
NIM enables you to install and customize your logically partitioned environment. Using the NIM environment enables you to perform future installation and maintenance tasks more efficiently.
You can clone an existing disk image to another disk or disks without using NIM. You may want to do this if your network is not fully set up, or if you are not sure about your network configuration. However, you may choose to use NIM at a later time.
You can use the alt_disk_install command to clone a system image to another disk, but you must use the -O option to remove references in the object data manager (ODM) and device (/dev) entries to the existing system. The -O flag tells the alt_disk_install command to call the devreset command, which resets the device database. The cloned disk can now be booted as if it were a new system.
An example of this scenario is as follows:
# /usr/sbin/alt_disk_install -O -B -C hdisk1The cloned disk (hdisk1) will be named altinst_rootvg by default.
# /usr/sbin/alt_disk_install -v alt1 hdisk1
# /usr/sbin/alt_disk_install -O -B -C hdisk2
# /usr/sbin/alt_disk_install -v alt2 hdisk2
For a full description of alternate disk installation, see the alt_disk_install man page and the AIX 5L Version 5.2 Installation Guide and Reference.
For information about planning, installing, and configuring AIX on RS/6000 SP systems, refer to the following Web site:
You can use several other scenarios to install your partitions by using some AIX advanced functions. These procedures are documented in the /usr/lpp/bos/README.PARTITION_INSTALL file.
Some installation scenarios covered are the following: