Drive Rail Hacking
This page uses quite a few pictures. The ones displayed here have been reduced in size so as to increase the speed of downloading. To give more detail, each photo is clickable. The enlarged photos are 640x480 in size.
If you own a PS/2 Model 40, 57, or 77, then you are probably familiar with the practice of hacking the common and cheap AT drive rails you can get from an AT or your local clone mill computer shop.
However, if you have a lot of drives to put into a lot of these PS/2s, you will likely very quickly deplete your source of these rails. And by then, you are probably going to be pretty tired of cutting all those rails down to fit!
So here's an alternative route, should you run out of drive rails to hack! You can use those really common (and really useless, anymore) 256Kb 30 pin SIMMs to quickly and easily make new drive rails. I mention installing a CD-ROM throughout this page, but you could use these steps to install any device that fits in a 5.25" drive bay.
I can guess your reaction to this now. Something along the lines of "What???! Is he crazy???!"
The simple, answer, is no, I'm not crazy. So let's get started. (Please note that all photos on this page are "clickable" and will produce a larger picture when clicked.)
Requirements:
Some self confidence and a careful hand are also highly recommended.
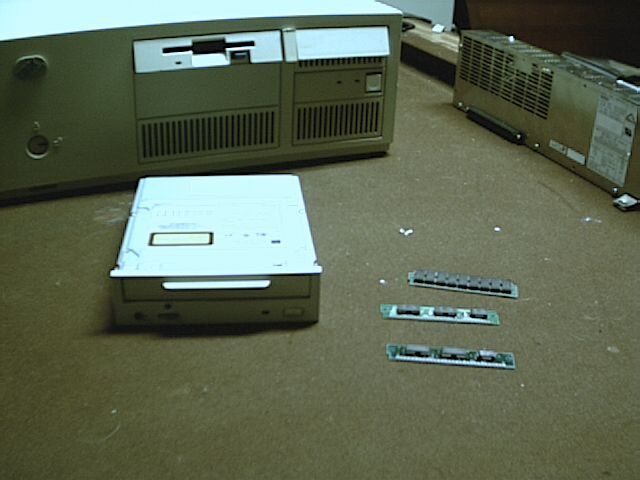
1. Start by getting your PS/2 out in a well lit location free of places where parts can wander off and not be seen again. Get the drive you plan to install, the 256K SIMMs you plan to use (you'll need two of them for this) as well as the screws you plan to use. Finally, make sure you have a screwdriver of the appropriate type.
2. Remove the cover from your PS/2. Set it aside in a safe location where it won't fall and possibly break.
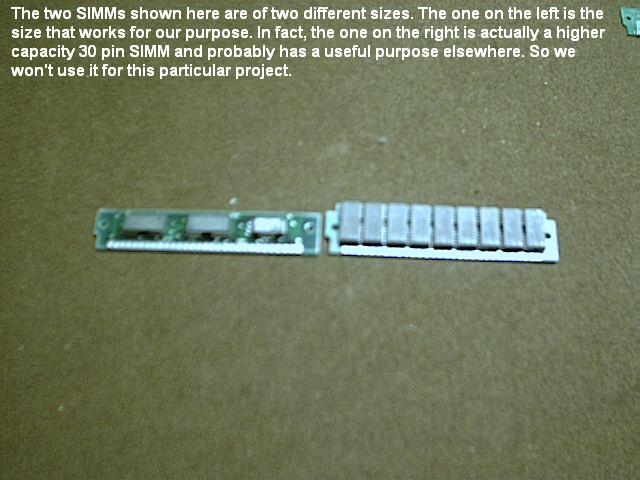
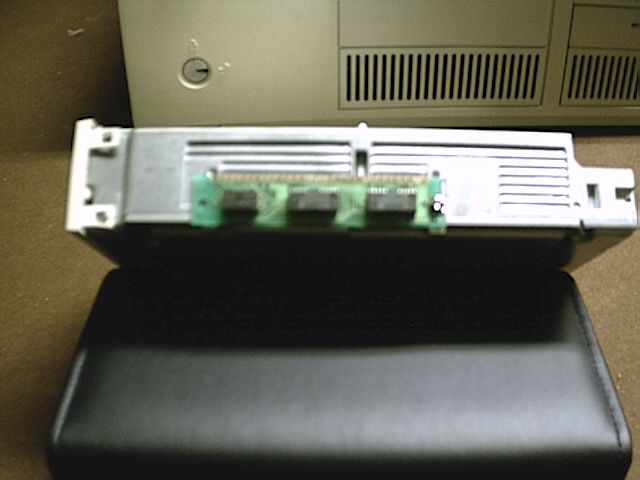
3. Take a look at your SIMMs. They must look like the circled example in this picture:
4. As per the picture, set your CD-ROM drive up so you can clearly see the screw holes in the side of it.
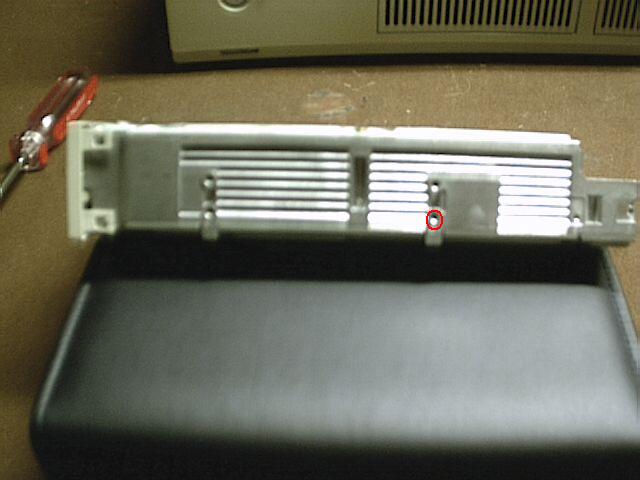
What we're most interested in now is the hole that I have marked with a circle in the above picture. Why? Because the SIMM has a hole punched in it and what we're going to do next is to line that hole up with the screw hole in the CD-ROM drive.
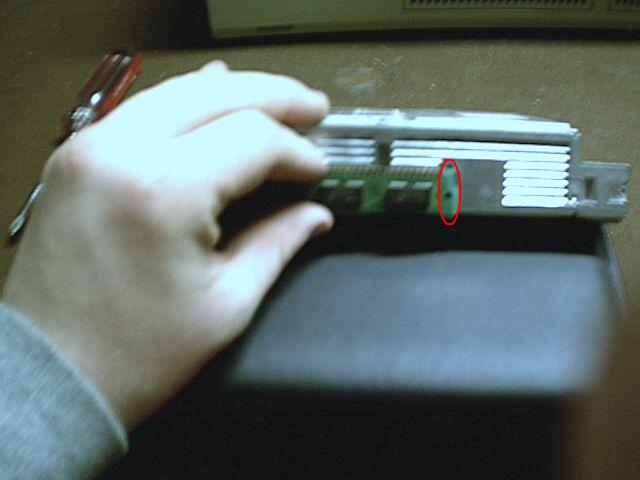
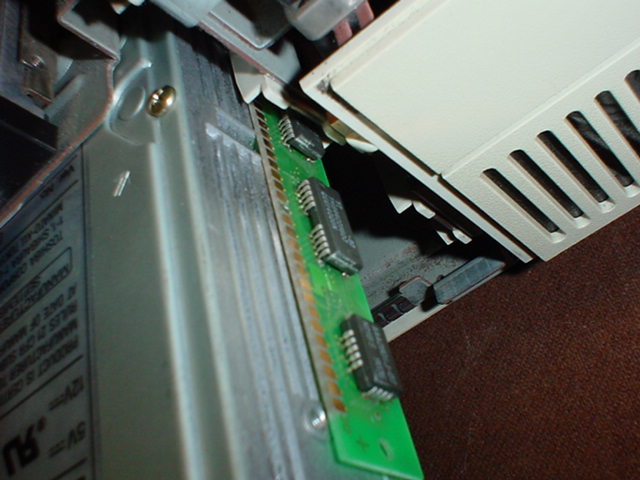
5. Now I've actually fastened the SIMM onto the CD-ROM drive side. I didn't take a picture of the actual process for the other side, but it should be self-explanatory as to what to do on the other side. Note: As you can see in the picture above, the SIMM is placed so that the its connecting pins face toward the top of the drive. This is done so that the screw hole and the hole cut in the SIMM line up. If you don't do it this way, then you won't be able to fasten the SIMM to the drive.
6. With the SIMM in place, place the screw appropriately, and proceed to fasten it.
When you actually fasten the SIMM to the CD-ROM drive, tighten the screw to the point where it is possible to move the SIMM a little bit, but also so that the SIMM takes some force to move. Don't tighten the screw down too hard--you could break the SIMM or the screw, or worse yet--actually strip the threads out of the hole in the CD-ROM drive.
Make sure that both sides of the drive now have the SIMM in place and fastened.
You're almost home! All to do now is to mount the drive inside the computer.
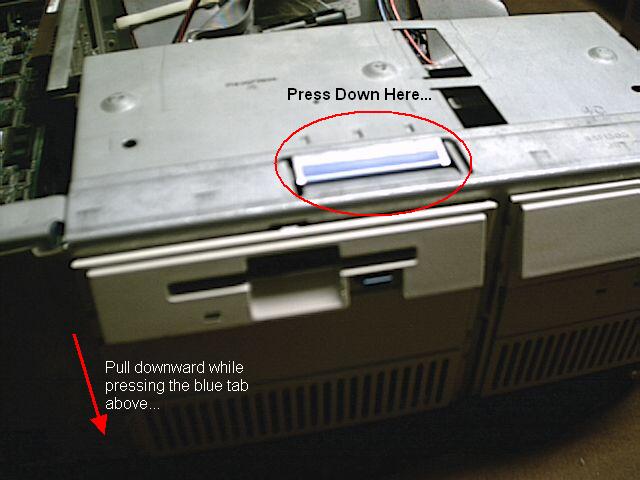
7. Locate the thin metal "handle" at the top of the "bezel cage" and depress it while pulling the "bezel cage" away from the front of the computer.
BE CAREFUL! Take it slow and easy, and note how the "bezel cage" comes out so you can put it back when done.
Before you go on to step 8, make sure you have set the SCSI ID (or IDE master/slave setting for the Model 40sx) appropriately, as it may not be easy to reach and change when the drive is installed.
8. With the "bezel cage" removed, proceed to mount the drive. Again, be sure to go slow and be careful.
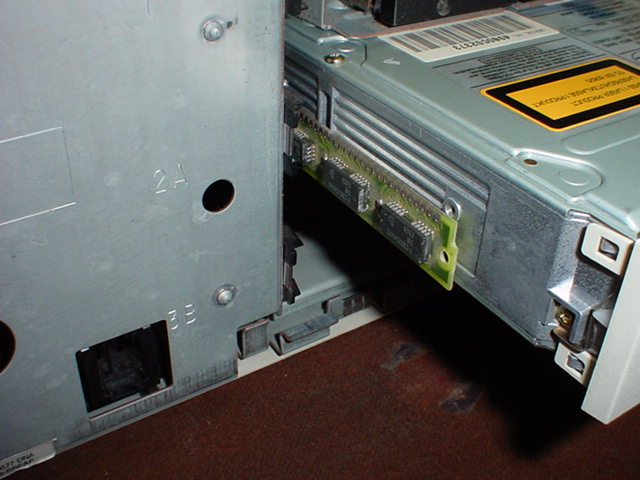
9. Put the "bezel cage" back into place and align your CD-ROM carefully if needed. If the bezel cage won't go on, you may need to gently move your CD-ROM drive up and down a little before it will go in. The SIMMs move just enough to allow you to make this final adjustment.

Cable up your drive as needed, and put the system cover on once you are happy with how everything looks.
Your comments are welcome! Please send them to me!