Grizzly G9972Z Refit
G9972Z 11" x 26" Light-Duty Lathe
w/Gearbox Owner's ManualG9972Z Parts List
The Yangzhou Super Machine Tool Co makes the "CQ-6128". YSM has NO user manuals on their site. The original manual from Grizzly showed "CQ-6128" on the cover picture.
Spindle taper is MT4. The laughable ball oilers are 6mm press-in.
If you can't believe I still have all my appendages or know how to use tools more advanced than a sharpened stick, contact ME
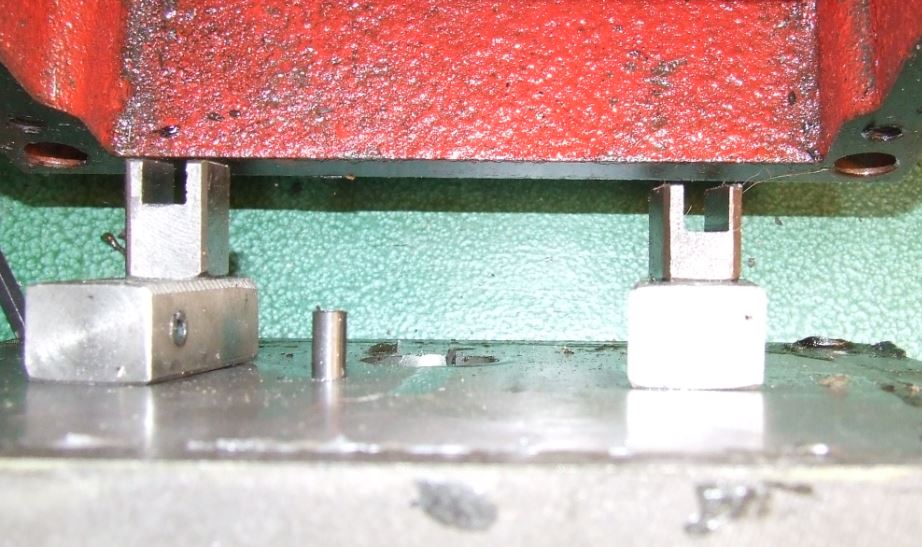
Mounting Location for Feed Rate Gearbox
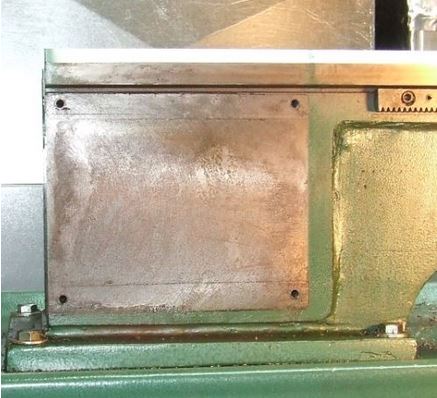
This is the start. The four holes take an M6-1x50 cap screw.
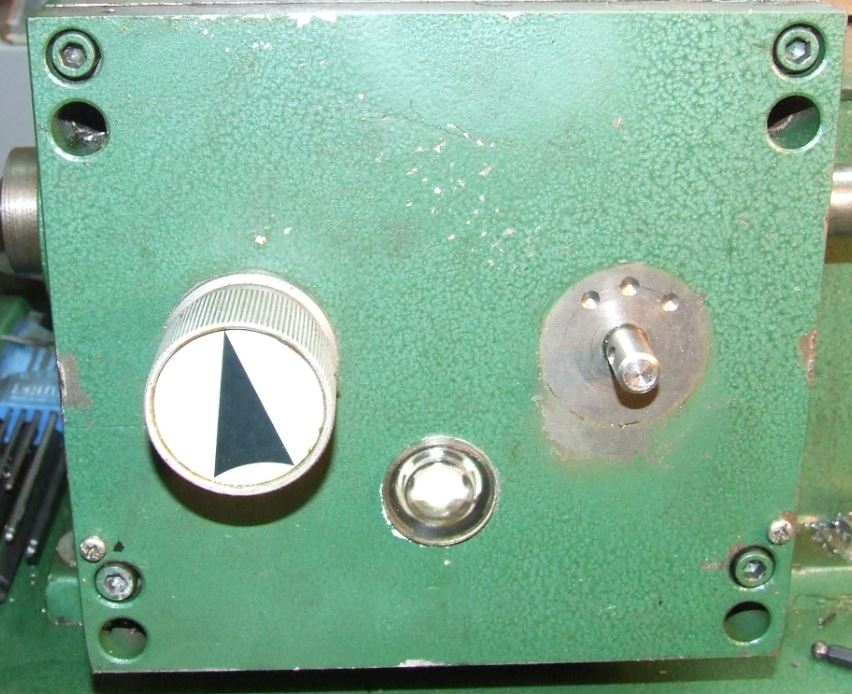
Feed Rate Gearbox Mounted
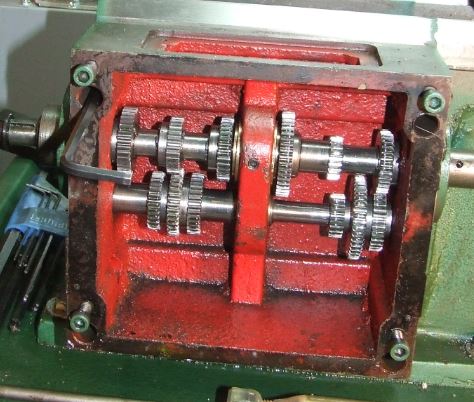
Please note the Allen wrench in the upper left corner. The four M6-1x50 cap screws are in deep counterbores. The green painted M6-1x20 cap screws are for attaching the FRONT GEARBOX COVER (P9972Z0335).
You will need a 5mm Allen wrench to mount the Gearbox.
Feed Rate Gearbox Top
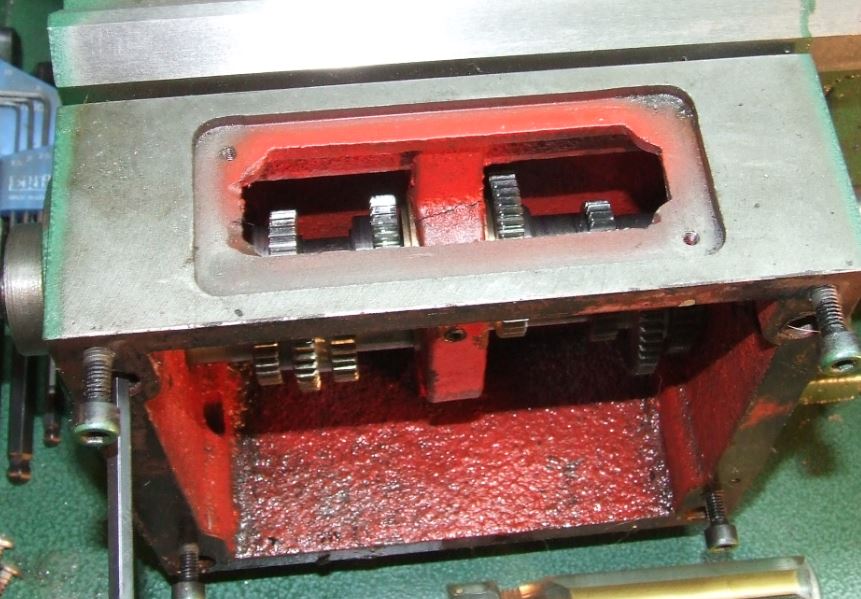
Was the gearbox was adapted from one with a different gear selection method?
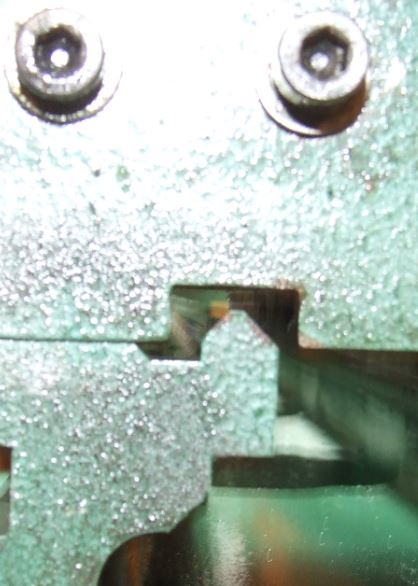
Feed Rate Gear Position
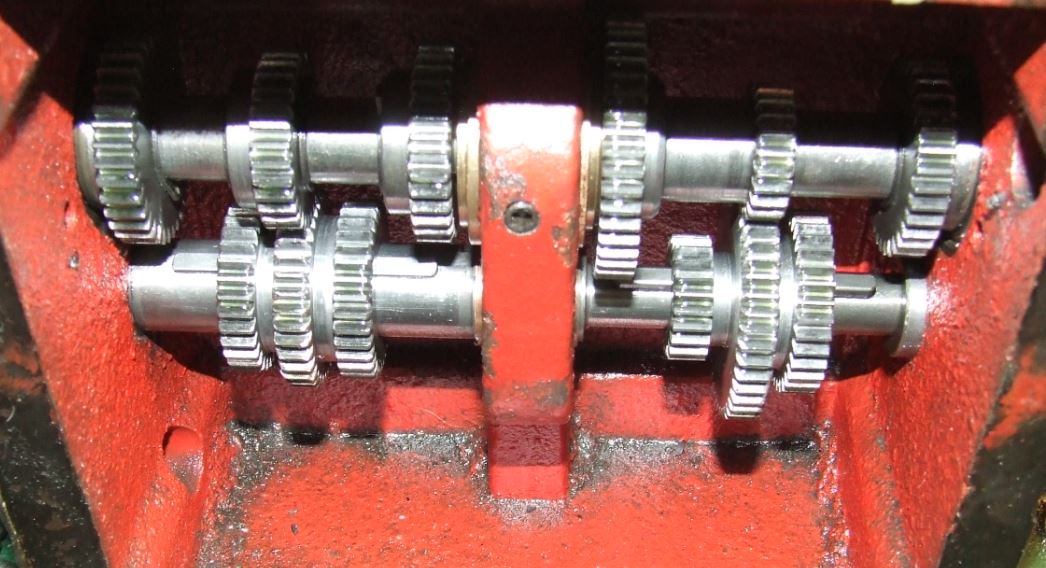
Before re-attaching the Front Gearbox Cover, slide the gears on the lower shaft from side to side so they align with the center gear on the top shaft. The gears on the top shaft are fixed. The bottom gears independently slide from side to side.
SHIFTING FORK Positions
This is the easiest way to align the shifting forks. It isn't super precise. With the lower gears centered, place both Shift Hubs in the center position.
Front Gearbox Shift Hub Positions
Turn each shifting hub so the pointer is up. The right hub is off so you can see the depressions for the detent ball.
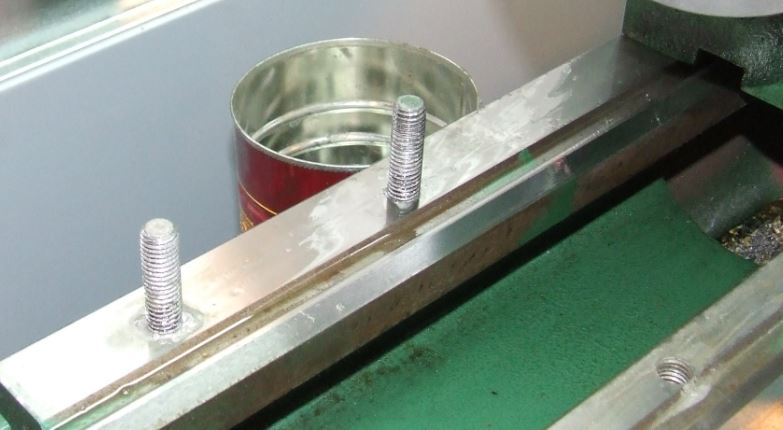
NOTE: The gearbox mounting screws (M6-1x50) are inside the deep counterbores. The four visible caps crews (M6-1x20) hold the Front Gearbox Cover on. Placing a 20mm long screw into a counterbore (with the gearbox mounted) provides you with an interesting challenge.
Change Gear "B" Remounting

Installing the Change Gear Bracket is simple, but it uses an M8-1.25 X 40 cap screw. With the bracket installed, ensure the key (4x4x14) is started correctly. Note the rounded end of the key mates with the keyway. You may have to fiddle with the key so it slides in.
You need a 6mm Allen wrench to attach the change gear bracket.
Change Gear Spacer
Fits on keyed shaft. Add the change gear "B", follow with the 6mm flat washer and the M6-1x6 cap screw.
You need a 5mm Allen wrench to fasten the Cap Screw holding Change Gear "B"
Headstock Studs
To make your life easier, start the two M10-1.5x35 Threaded Studs on the motor side. Unfortunately, you now must lift the headstock up high enough to clear the studs...
These studs have a 13mm nut.
Headstock Stud Access on Motor Side

Headstock Alignment
The V angle on BOTH sides is NOWHERE near the headstock... Alignment depends on wiggling the bottom of the headstock on the flat portion of the ways. The V machined in the bottom on the gearbox side is bigger than the V on the lathe bed. "Nothing but Air" is not just for basketball anymore...
No wonder it didn't seem square. Nothing to align it with...