MAP 0140 Setting the Screen (9516)
 Setting the Screen
+---+
|001|
+---+
- After you replace the main board or the display is attached
to a different system unit, a slight vertical interference
can be seen on the screen every four pixels. To remove this
interference, do the following:
1. Make sure that the system unit is turned on.
2. Turn on the display and let it warm up for a while.
3. Push the setup switch at the rear of the display.
4. Do the following to get the setup menu:
Be sure to these steps within a few seconds.

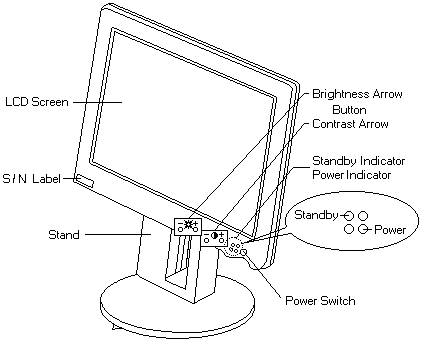
a. Press both brightness arrow buttons at the same time.
b. Press both contrast arrow buttons at the same time.
c. Press the brightness arrow (-) button.
The DEBUG MENU ENABLED message appear on the screen.
5. Repeatedly press the brightness arrow (-) button until
the AMP G screen appears.
6. Using the contrast arrow (-) or (+) button, adjust the
value (±3) until the best quality of screen is obtained.
7. Press the brightness arrow (-) button to go to the
SUB MENU screen.
8. Select SAVE and press the contrast arrow (-) button to
save the change.
9. Push the setup switch again to exit the setup menu.
NOTE: See the "Installation and Operation Guide"
for more information about the setup menu.
Back to 
Please see the LEGAL - Trademark notice.
Feel free - send a  for any BUG on this page found - Thank you.

 Setting the Screen
 for any BUG on this page found - Thank you.