Removing and Replacing the Door Bezel and Upper Bezel
This procedure describes how to remove and replace the plastic bezels mounted to
the front door and to the chassis above the front door.
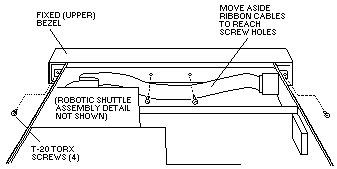
Below figure 42 shows an exploded view of the components for removing and replacing the front door and fixed bezels.

Eight flat-head screws hold the front door bezel to the door sheet metal panel.
The screws are inserted through the sheet metal panel and thread into inserts that are molded into the door bezel.
Two screws are inserted through mounting ears at the left and right sides of the library chassis.
The remaining screws are inserted through the front-center of the library chassis; these screws are
partially concealed by a ribbon cable that runs along the front of the library chassis.
Carefully move the ribbon cable down to gain access to the screws.
 -Attention- When replacing the upper bezel, make sure that the bezel does not bind
the control keys and keep them from making contact or holding them closed.

Please see the LEGAL - Trademark notice.
Feel free - send a  for any BUG on this page found - Thank you.